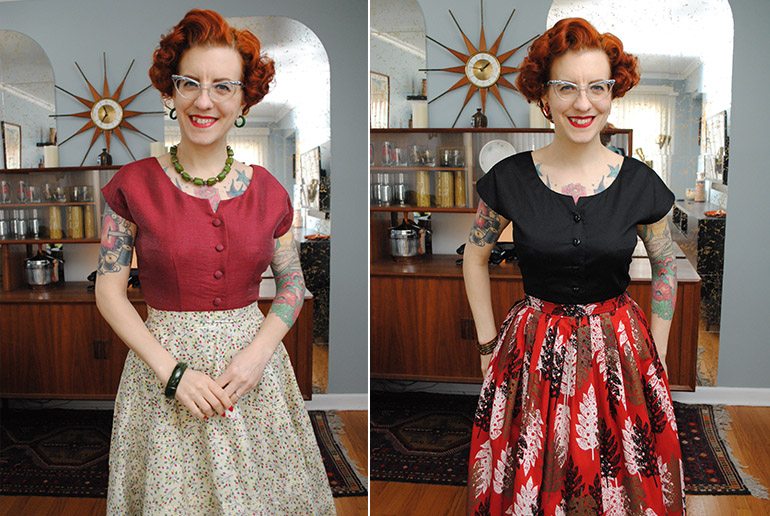
The latest two items I sewed over at the Mood Sewing Network are these blouses. Two blouses, entirely different fabrics, same pattern. Love/hate results. Okay not quite so strong as love/hate… maybe love/feel-vaguely-underwhelmed-about would be closer. 😉
Both of theses blouses are versions of Butterick 6223, one of my tried-and-true 1950s blouse patterns. I’ve made it a few times at least, but a different view. My black cats, candy canes, and birdcage tops are all from this pattern. There may even have been others.
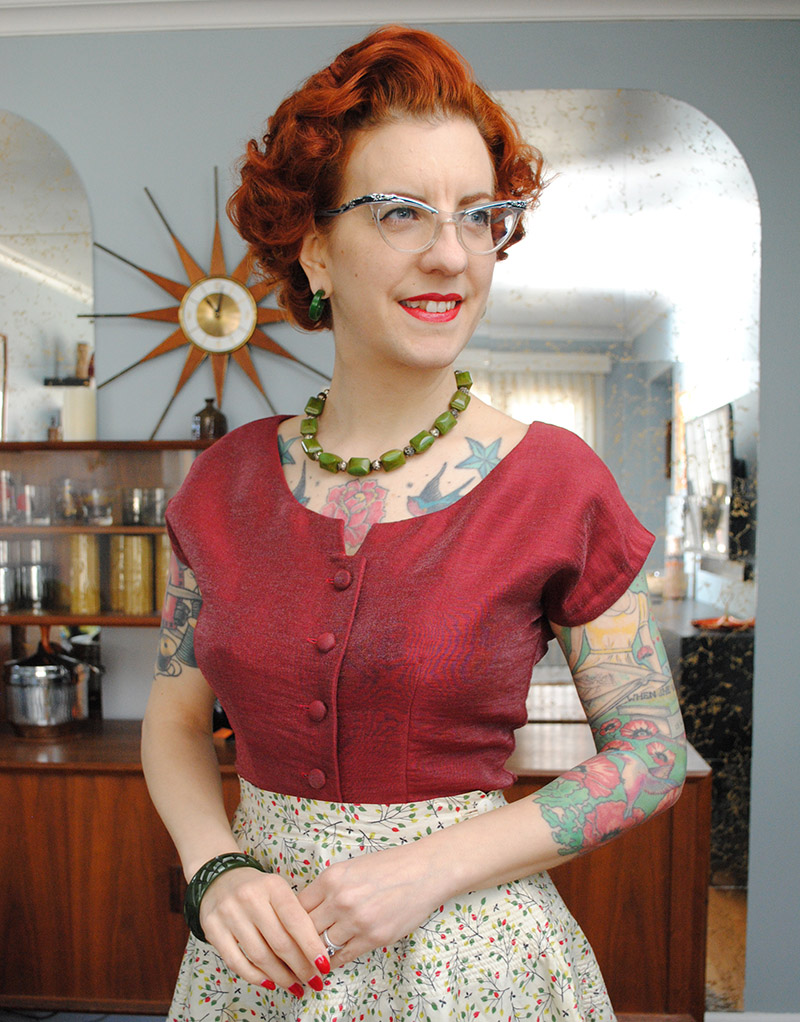
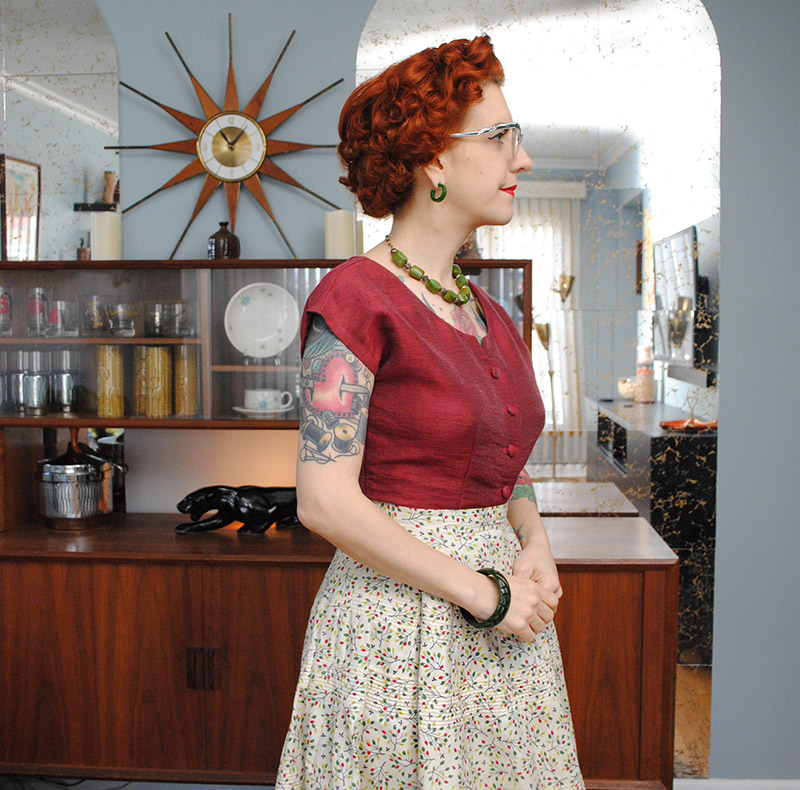
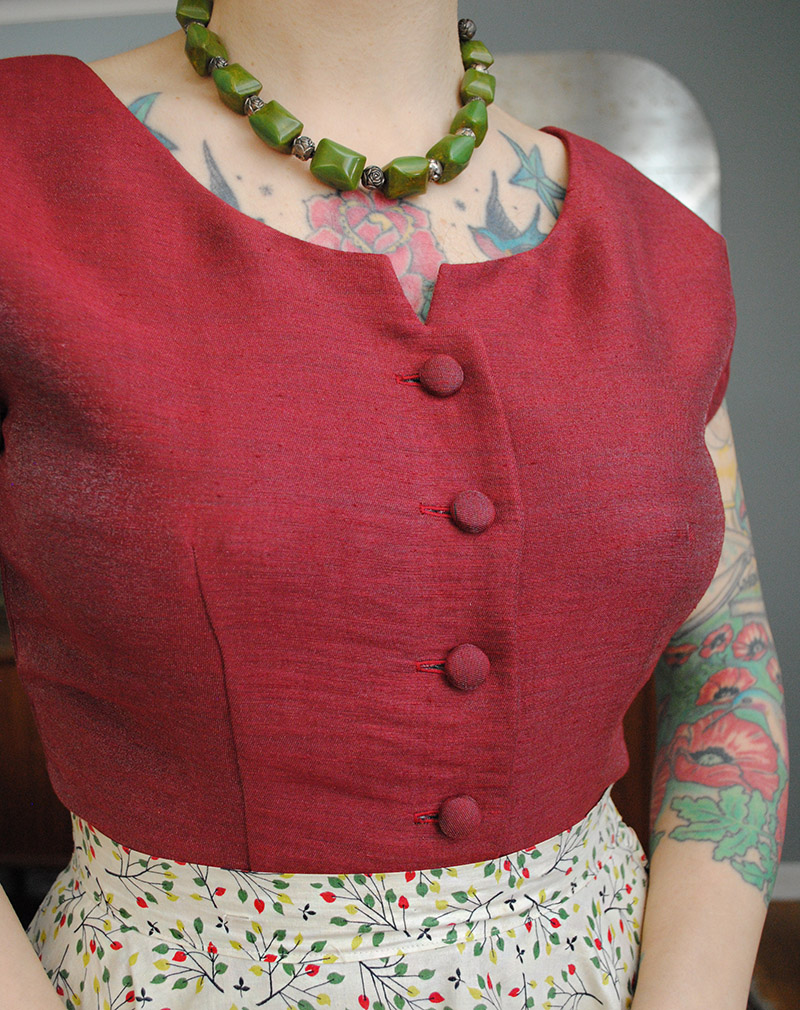
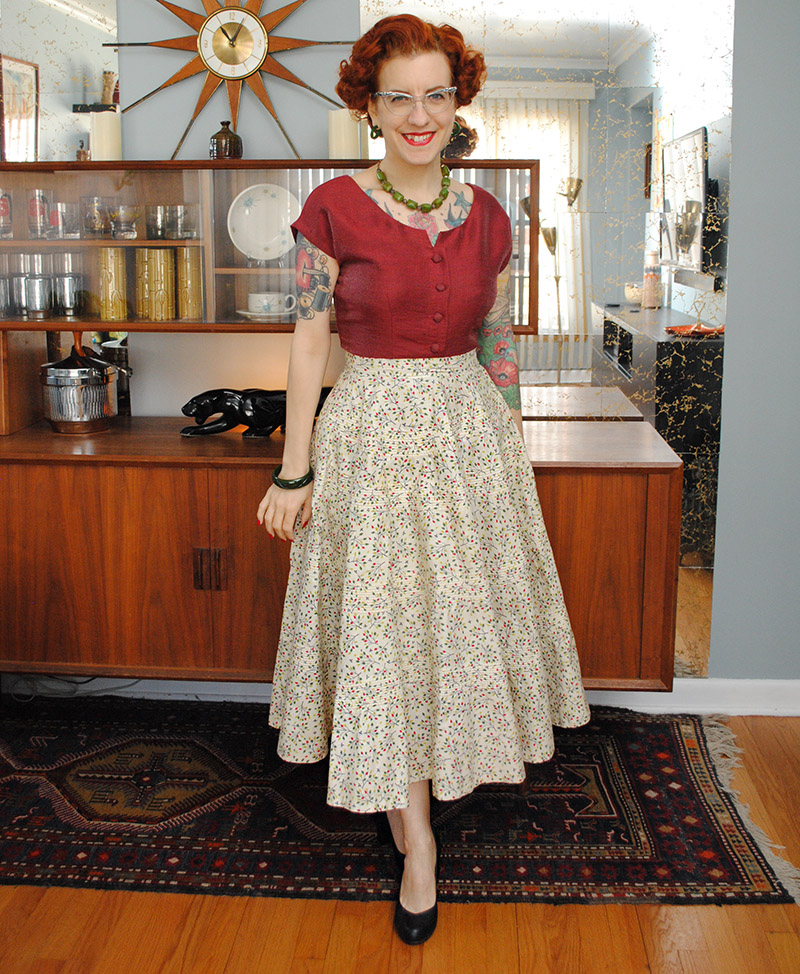
I started with the red version first, which is a double-faced (other side is black) cotton and lurex blend from Mood. I wish you could really see how the sheen of this fabric looks in person! It’s glorious. I am not sure what drew me to this fabric, as it is decidedly not my preferred shade of red. Or even close. Must have been the lurex. So that’s my biggest beef with this top. It goes with very little, and I don’t feel compelled to sew things to go with it because it’s not a shade I love, anyway. Catch 22 there. But, it does nicely work with a couple of skirts I have, including this one. And it gives me a special occasion top, if I’m so inclined.
The other thing I didn’t like about this version initially, I’ve since fixed! You see, I made a mistake: I thought I could avoid a muslin because I’d sewn a different view of this pattern before.
It never occurred to me that the short sleeve version of the cut-on sleeve would end up being a horrible length! It just looked sooo frumpy. I adore cut-on sleeves, but I want them 3/4 length like the other versions I’ve made of this pattern, or a short kind of cap sleeve length. This ended up kind of like a weird mid-upper-arm t-shirt length. Yuck. At that length the sleeve pulls down but the top of the shoulder line points up, and the whole thing was just bad.
I folded up one of the sleeves to a shorter length, and liked that a lot better. But I was really put off by the idea of unpicking the bias tape (which didn’t even look that great in the first place as eeeevery little stitch shows in this fabric). So in the meantime, I decided I’d apply some changes to the sleeve for the second version, while I stewed about the red one.
For the second one, I knew I had to slice off a bunch of the sleeve length, and figured while I was in the process, I might as well try an alternate way to construct the sleeves. It’s a method I used to do all the time when I was more into 1940s patterns! So that was quite some time back. Essentially, instead of an underarm seam that is curved and in one with the side seam, you sew from a mark at the bottom of the armhole down for the side seam, and then fold the seam allowance of the sleeve cap in twice, forming the sleeve hem on the same line as the side seam. No need for bias tape. I’m pretty sure this is a 40s technique though it’s possible I modified the method… it’s been long enough I don’t even remember.
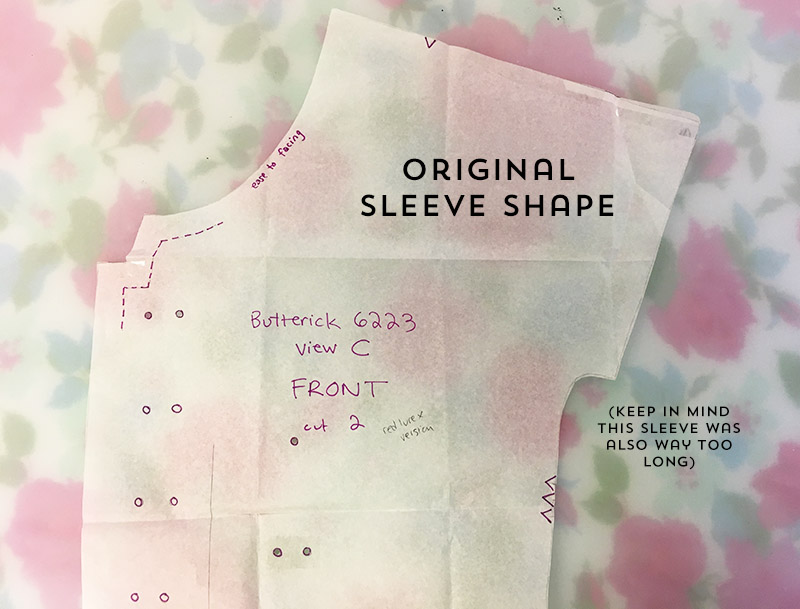
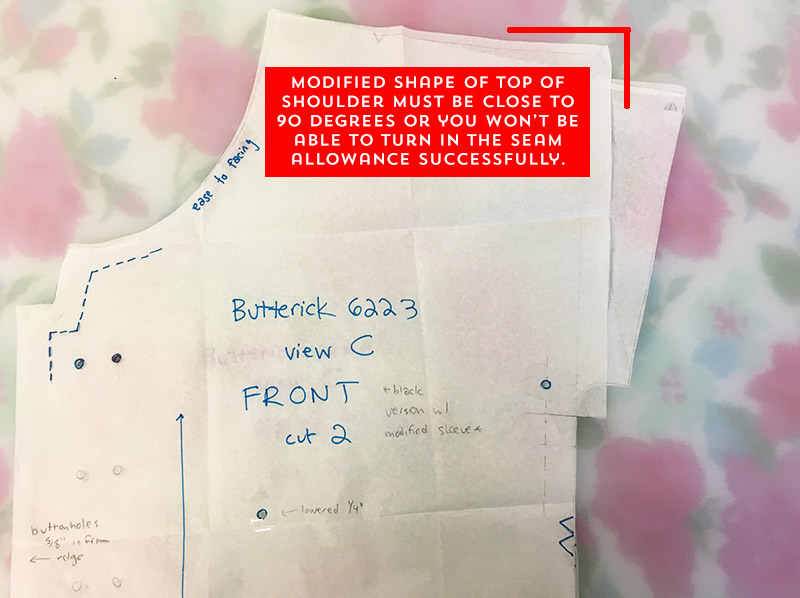
Here’s the original sleeve shape, where you just curve that side seam out to the cut-on sleeve:
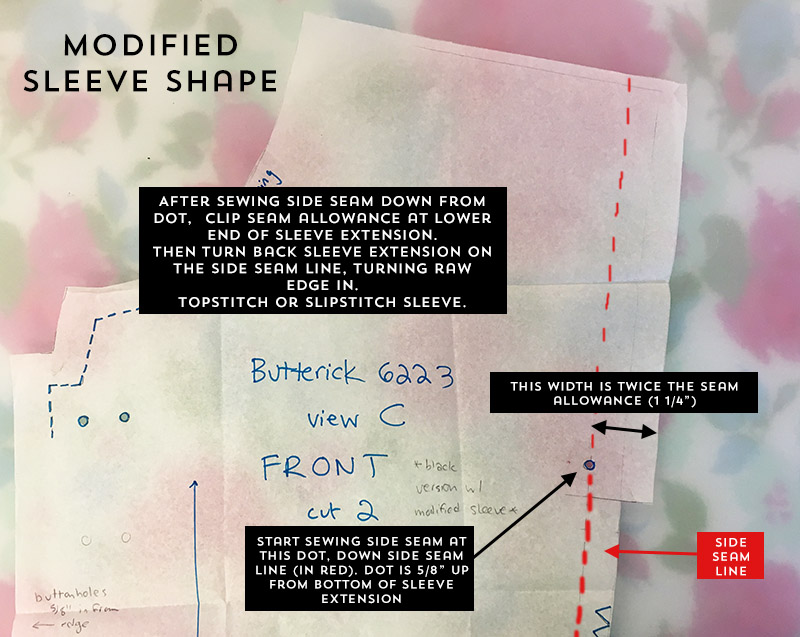
Modified sleeve shape:
I’ll stop to say I didn’t need to do this for the second version of the blouse, I only needed to take length of the sleeve. I could easily have stuck with the original construction, but I just wanted to play around. I’d forgotten this is a nice little method!
If you want to try this yourself and you’re otherwise happy with the shape of your sleeve, you’ll need to make a couple of changes.
First, the top of the shoulder does need to be a 90 degree (or almost 90 degree… you can fudge a smidge but not much if your fabric is a firm weave) to the sleeve. That might mean adding a bit of height, so be forewarned that’ll change the sleeve fit and you might want to test on a muslin to see if you like it. The reason it has to be close to 90 degrees is that it gets turned back twice, and if you have any kind of funky angle from the back and front shoulder coming together, you won’t be able to do that.
Then the next thing is start at the bottom of the armhole, and make a dot 5/8″ in from the raw edge (or whatever your seam allowance is). You’ll sew from this point down the side seam. Starting about 5/8″ below the dot, have the sleeve line go straight out twice the depth of your seam allowance: so 1 1/2″ in my case. (I appear to have made my sleeve a little deeper than the original… can’t remember why, may have been a accident.)
After you sew the side seam from the dot down, clip the seam allowance at the bottom of the sleeve extension and finish your side seam however you’d like, and then simply fold the seam allowance in twice (in my case 5/8″ then 5/8″ again to enclose the raw edge). Finish it by a slip stitch or topstitch by machine. For my second blouse I topstitched and just squared off the stitch line at the bottom.
I’m not saying it’s a better method or cleaner or basically anything but different! If you were using a bitchy fabric, it might be just the method to try to avoid bias tape, if that’s something you’d like to do! And the reason I know that takes me to the next part of this story…
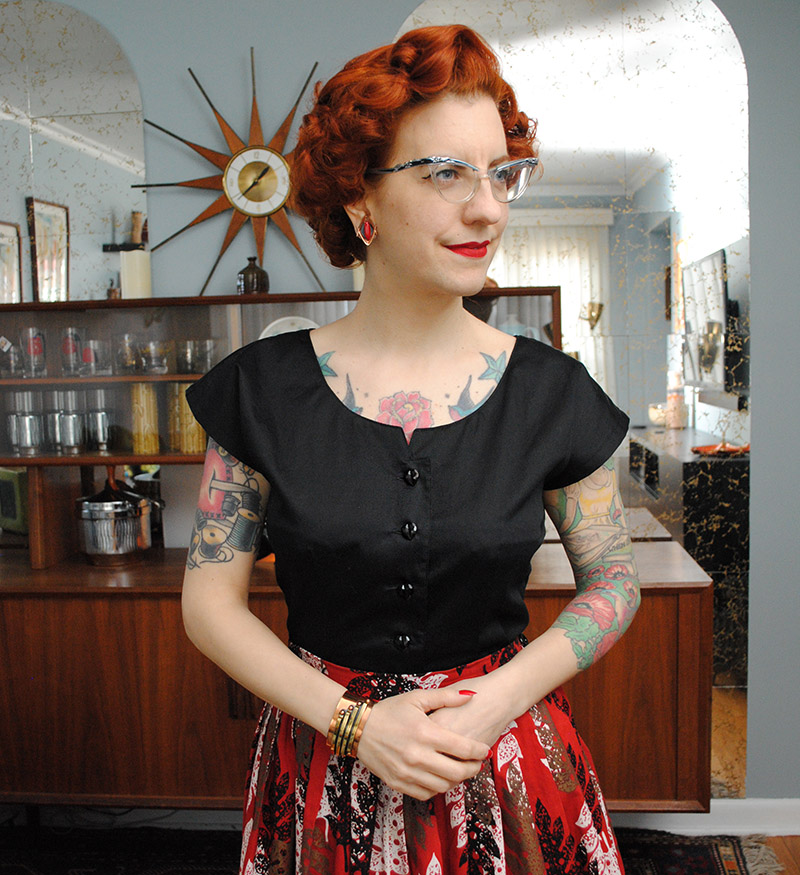
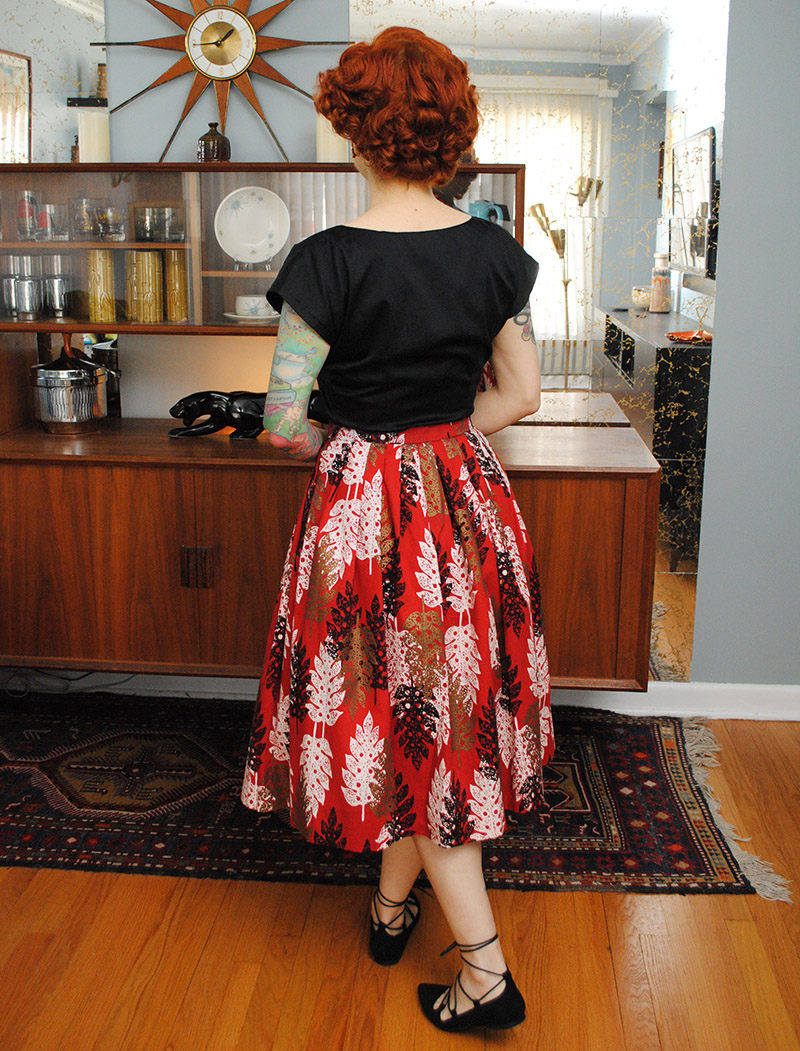
The second top using that sleeve method was made in a thin black Egyptian cotton that felt glorious and was a breath of fresh air compared to the shifty red lurex/cotton blend!
Once I finished that one and was happy with it, I tried the red lurex one on again. Remember at this point, I had one sleeve at the original stupid in-between length, another pinned up to a shorter length that I liked a lot better. I wasn’t sure what I wanted to do. I’d sworn I would not open up the sleeve, but I did.
In fact, I decided I had enough room to slice off a bunch of the sleeve and still retro-actively change the construction to the method I’d just done on the black one! And that meant it alleviated the main reason I groaned about re-doing the sleeve in the first place, because it was soooo difficult to do bias tape in the lurex fabric, and with slicing it all off, I didn’t even need to unpick the original bias tape. Huzzah for resourcefulness!
Thankfully the result was a sleeve I was much happier with! Instead of topstitching it like on the black one, I slip stitched the sleeve hem.
And thus my only complaint about the red one now is really the color. (Although in solids I can more easily see I need to lower the top of the waist darts a bit. No biggie.)
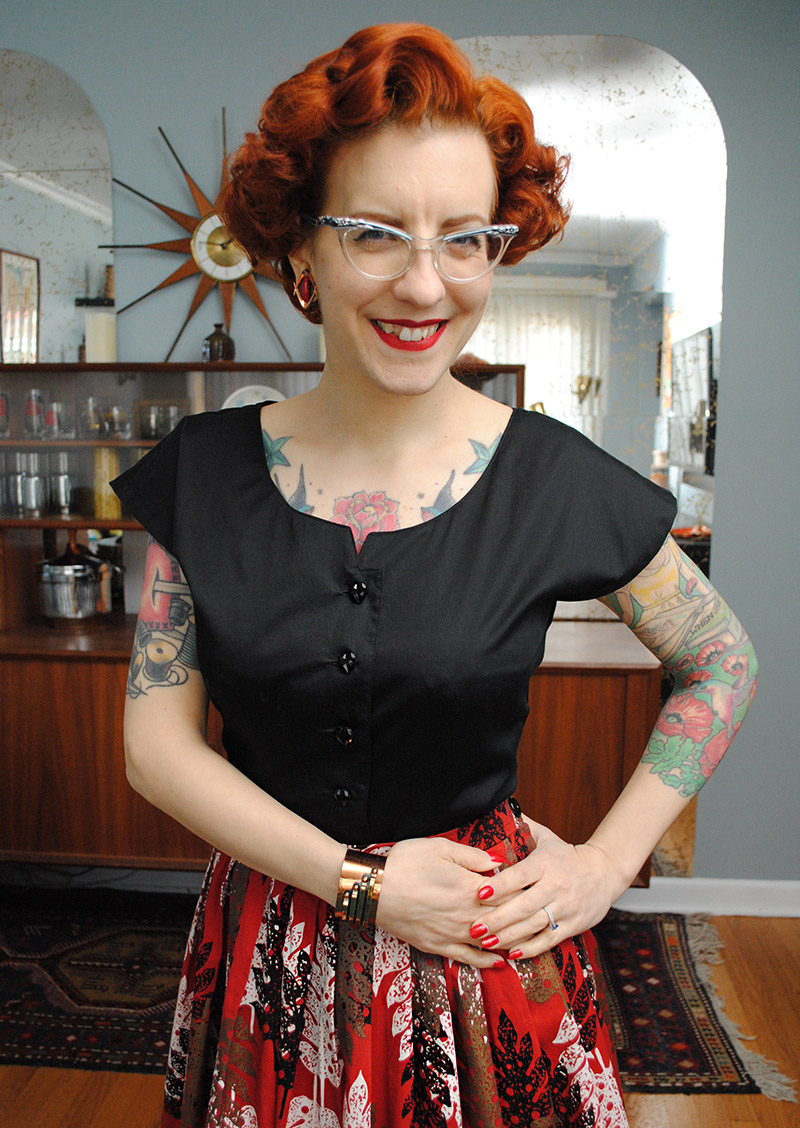
I’m pleased I at least have a couple of things in my closet it goes with, like this beautiful vintage skirt that I rarely wear as while it’s polished cotton, the heft, quilted details, and length make it feel like it’s not an everyday skirt.
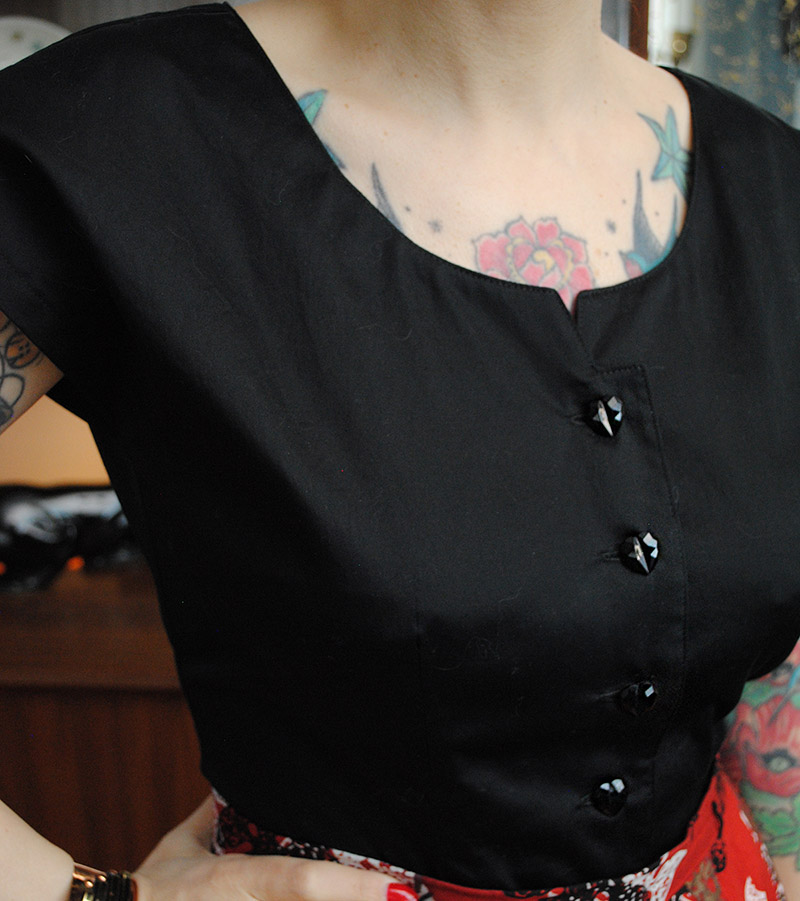
And I do love those covered buttons giving it a special feel. I’d only done those for my short swing jacket before, but they’re lovely on a slightly more dressy blouse.
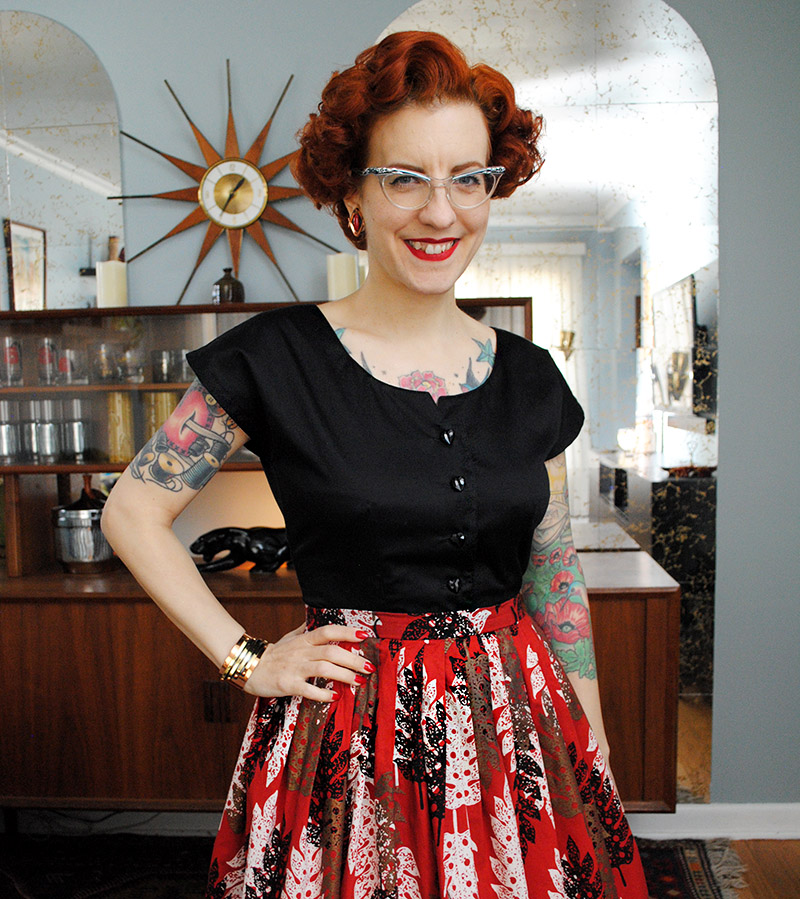
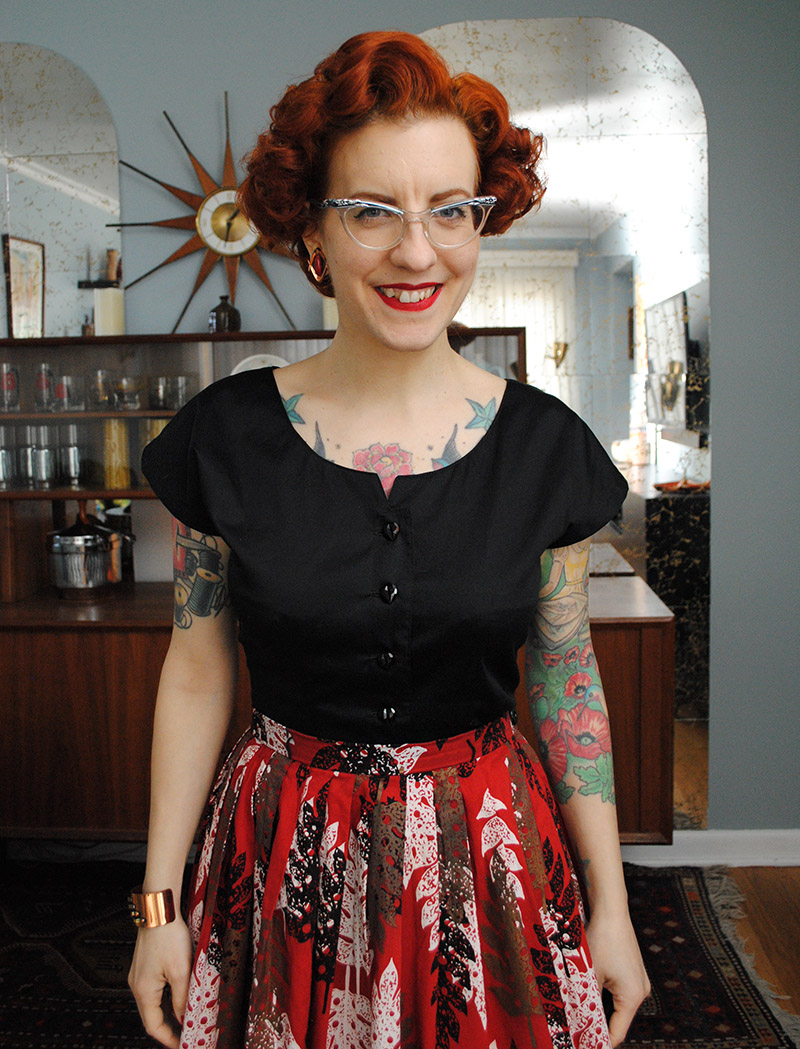
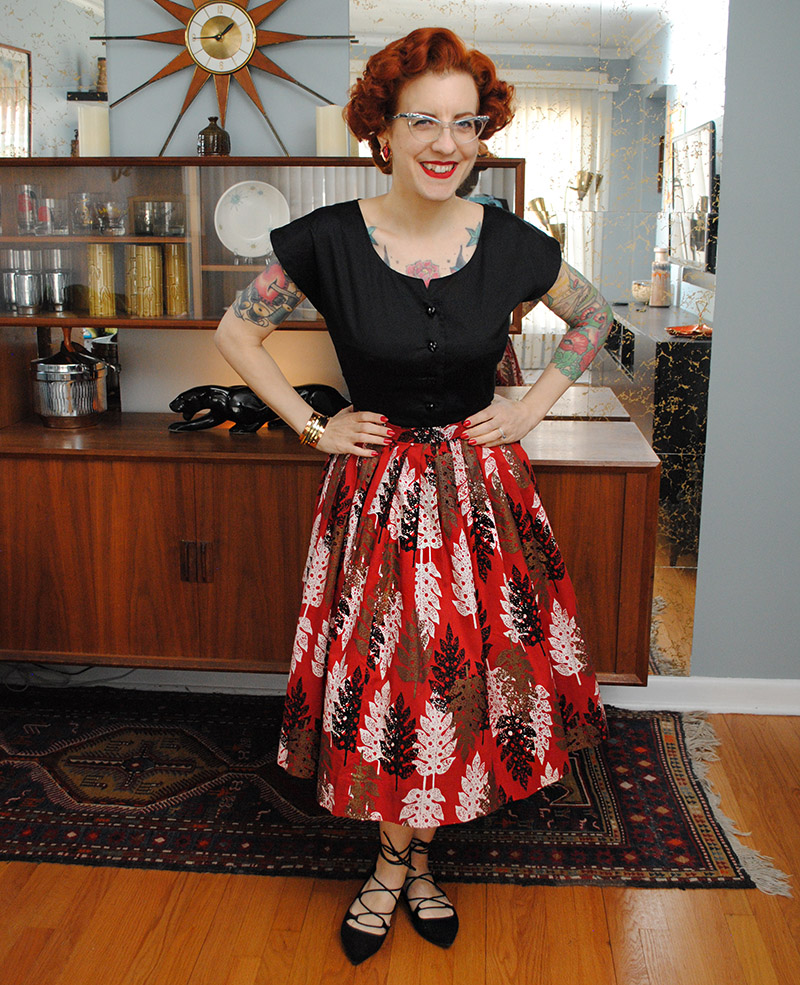
But that black one—I love it!
Do you know how many plain black blouses I had in my wardrobe up until this one? None. NONE. Do you know how often I go into my closet in warmer months looking for a plain black blouse? At least twice a week! I’m so happy to finally have one!
It was basically impossible to capture them, but I used vintage glass heart-shaped buttons.
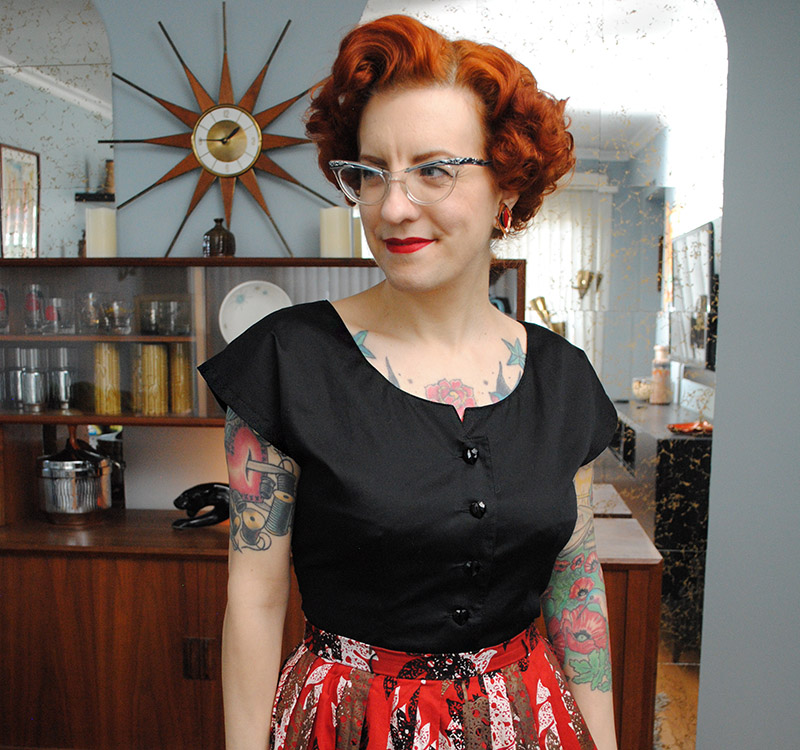
Everything else about the blouses shape-wise, I love. It’s a nice fit—not too tight as to be clingy and uncomfortable when it’s warm, not too loose and blousy as to look sloppy.
It worked so nicely with this vintage skirt that I know it’ll slip right into my warm weather wardrobe. I have lots of colorful shoes, but I love to default to black shoes and accessories a lot, too.
The rounded neck will be lovely for warmer months, although there’s this weird feeling I have particularly with the black version where it feels on my body like it’s roomy in the upper chest, but doesn’t look like it in photos or when I move around. No gaping or anything like that. Maybe it’s because it’s a thinner fabric. I don’t think it was the sleeve difference (remember I had to add a tad of height for the construction method), as I pinned out the extra I had added, and it didn’t change the fit. So part of me actually thinks it might be that right now I’m used to bulkier winter clothing and layers! If I trot this out in a couple of months I may not even notice it! But if I do, I’ll ponder this topic again.
In this exercise of two blouses, same pattern…
Lesson one: sometimes it’s best to stick with fabrics or shades you prefer! But I guess you never really know until you try. 😉
Lesson two: sew the damn staple blouse you need already. Enough said.
The blouse fabrics in this post were provided by Mood Fabrics in exchange for my participation in the Mood Sewing Network.



It’s funny how you can make the same thing twice and have two totally different feelings about it! I love them both, but I can definitely see why you felt so irritated with the red one. I have a few things like that in my closet — they aren’t my normal colors, so I can’t do a whole lot with them. That just means… I have to buy things to go with them. Good excuse for shopping!
And side note, can I just come live in your house? I’m dying over the vintage details I can see behind you!
xo
Kristina
eyreeffect.com
It really is true! And even when a pattern is a total winner already (not meaning this example), differences in fabric and other things don’t necessarily mean the next one will be a winner. It’s kind of fascinating. And thank you about our house! That’s one wall in our living room, one of the few walls I can get a tripod moderately far enough away from to take photos… life in a 50s house with small rooms, ha ha!
Both of these outfits are so inspirational! Well done, and I love to read your ananalysis if the different elements.
I have a sudden urge to go to the fabric store….
Ha ha, thank you! 😀
Oooooh! I love them both. Such a great pattern and looove the basic black one. I need to remember to make some more basics, as everything I make tends to be fun patterns. Why can I never find anything to wear?! It’s like a clown took over my closet. (well, a fun vintagey clown with a penchant for red and flowers and swirls, jeez) Your blog is so great—I love all the detailed sewing info I get that I totally NERD out on. Thank you, thank you, thank you for making my Friday!
p.s. Both button choices are primo!
Thank you! I am with you in the needing to make more basics department. I set myself a goal earlier this year to sew a lot more solid tops for myself as I’m in desperate need of them!
They are both gorgeous and look fabulous. Thanks for sharing how you altered the sleeve; I shall make a mental note for future use.
Thanks! It’s a fun alternate way to try that type of sleeve.
I just love your posts! learn something from every one of them!
Thanks so much! 🙂
OMG… I love this top but especially want the black cat shirt!!
Thanks! That’s definitely a Halloween favorite.
I think both blouses are lovely and both look very nice on you. I think the red blouse will be a nice holiday blouse when Christmas rolls around again.
Lovely blouses. I love the read one, but I understand how you feel about the shade, since I am very picky about colours myself. I imagine you in a black satin/silk skirt and a darker lippy. Have a lovely day. 🙂