Today is my first post in the miniseries I’m doing, that I told you about Friday. Let the wrap/surplice top week begin!
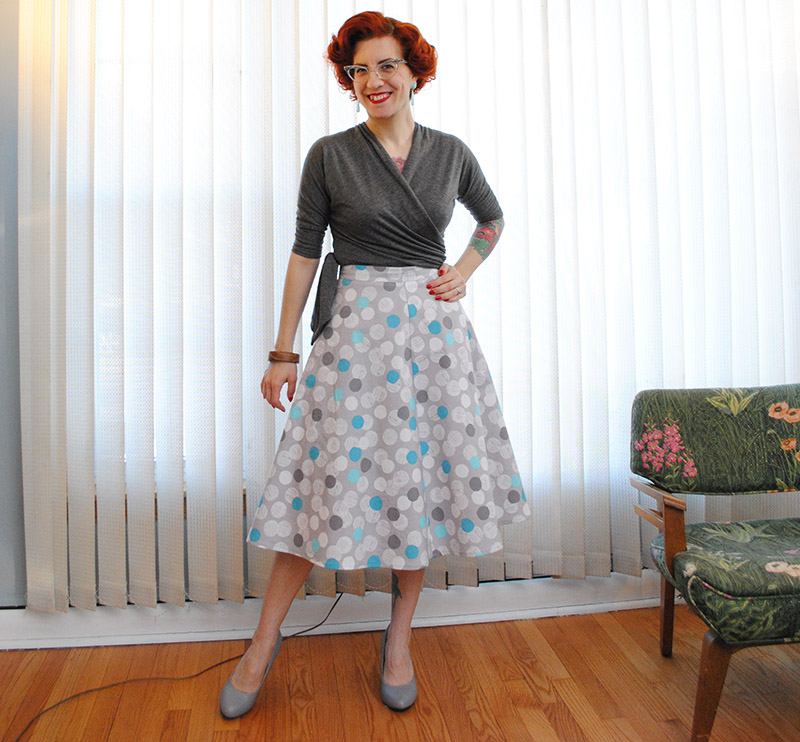
outfit details
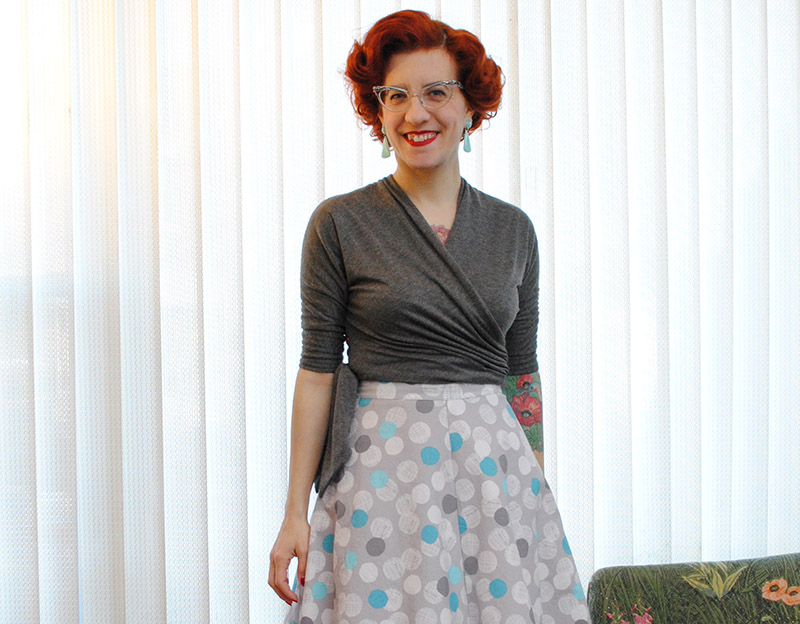
wrap top – made by me
skirt – made by me (vintage Simplicity 4812)
shoes – Chase & Chloe, via Modcloth
wood & resin bangle – Vintage Garage flea market, Chicago
resin earrings – made by me
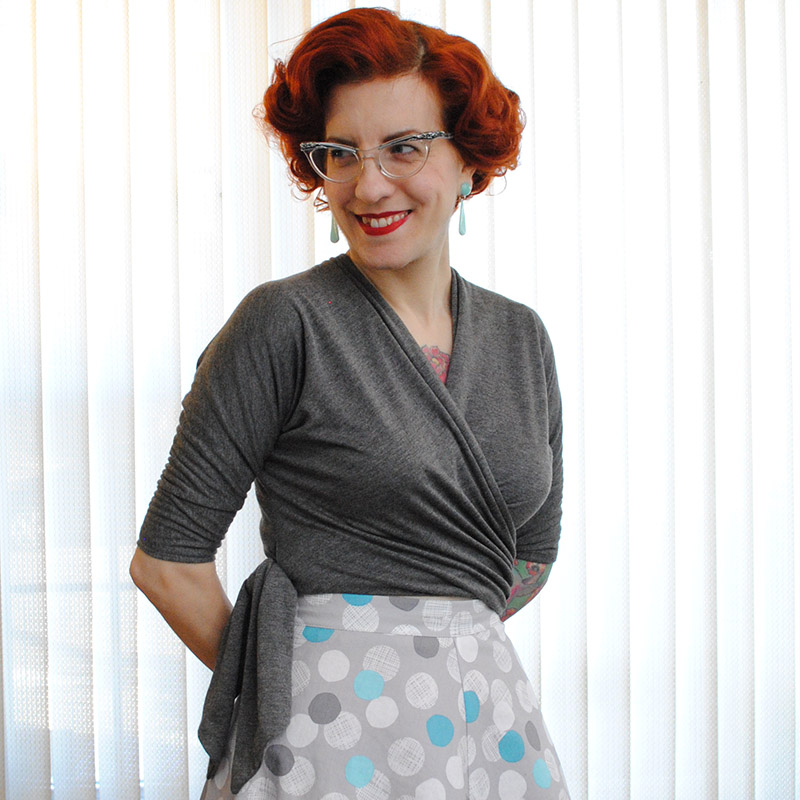
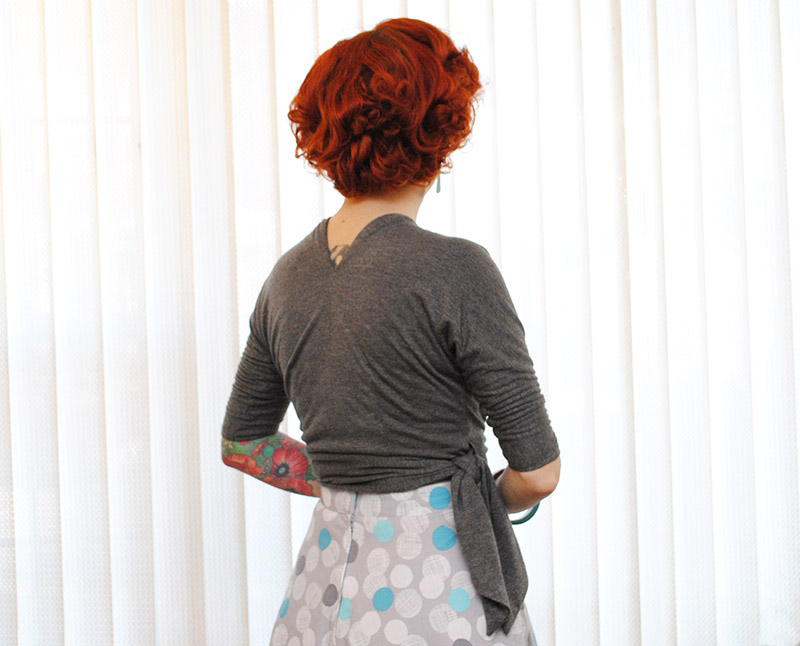
This is Butterick B6285, from the “Patterns by Gertie” line for Butterick, by Gretchen Hirsch, and is a self-lined wrap top pattern for stretch knits. You’re looking at my very first version, which except for the tie length (explained below) was sewn up with no other alterations. For my future versions, I added about 1/2″ of ease to the sleeve, because it was so constricting on me below the elbow that I have to wear the sleeves pushed up a bit.
I used a thin (but not sheer) rayon spandex jersey from JoAnn Fabrics. Michelle commented recently how their knits game is pretty good lately and she’s right. It was a great choice, I really like the fabric and the result. This pattern would make a lovely even warmer top if the fabric were thicker, although bulk would start to be an issue since it’s lined. But but! There’s nothing to say you have to line it, you could simply omit the lining and just finish the inside seams (or trim them, since hey, it’s a knit). Imagine it in a sweater knit! And short-sleeved and unlined would be a nice cover-up in summer. But back to the original self-lined way, it would be nice for those really sheer jerseys that they market for “layering tees” but always come in nice colors. So it would just be “layered” with itself.
I really love the overall shape and the cut-on sleeves, and other than the tie there’s only one pattern piece: the front and back is all together, and you fold it over to form a seam under the sleeves. Makes for a cumbersome pattern piece to manipulate but clever to sew up.
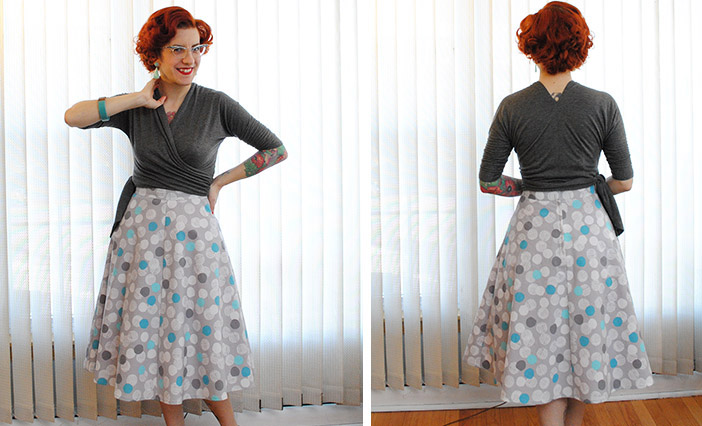
You might not necessarily think to notice until I point it out, but this pattern is quite short: it’s meant to hit at your waist. (You can tell due to the “waist line” marking on the pattern piece basically being within the seam allowance.)
Now I am short-waisted, often shortening bodices anywhere from 1 – 1.5″, and the length of the bodice hits my natural waist. I suspect if you have a long upper torso, it might come up even shorter.
The waist length isn’t so hot when you’re trying to wear it with a skirt or pants and not have the waistband show, unless you like fussing with your clothing a lot. In these photos, I’m wearing a skirt that hits at my waist (technically my first Vintage Pledge item of the year, from 1950s Simplicity 4812). I think perhaps if my skirt had a super tight waistband (as in possibly negative ease) or sat slightly higher up, it might all stay put a bit better, but basically with this particular skirt, you could see part of my waistband showing in every photo.
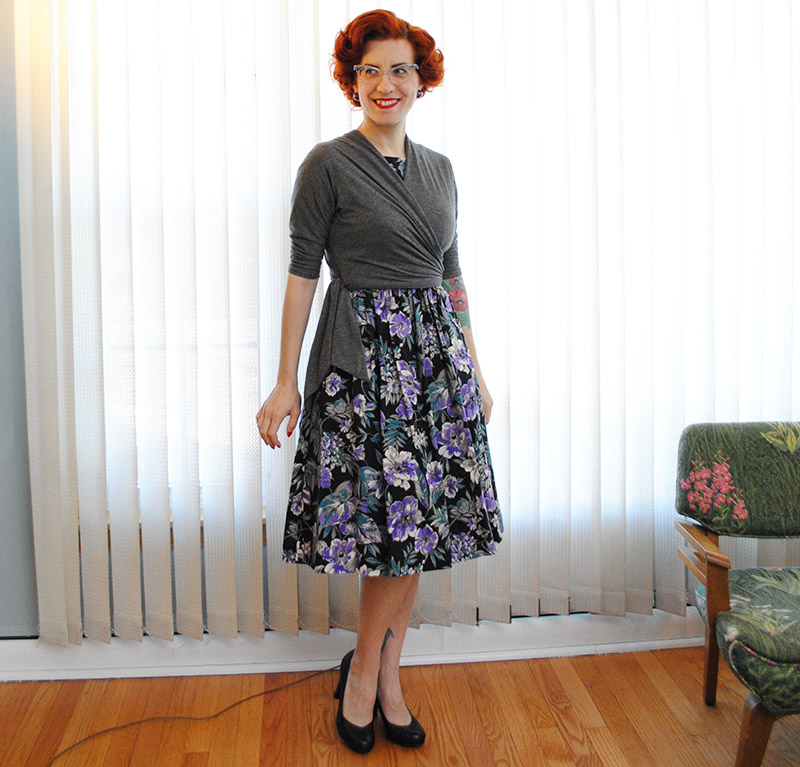
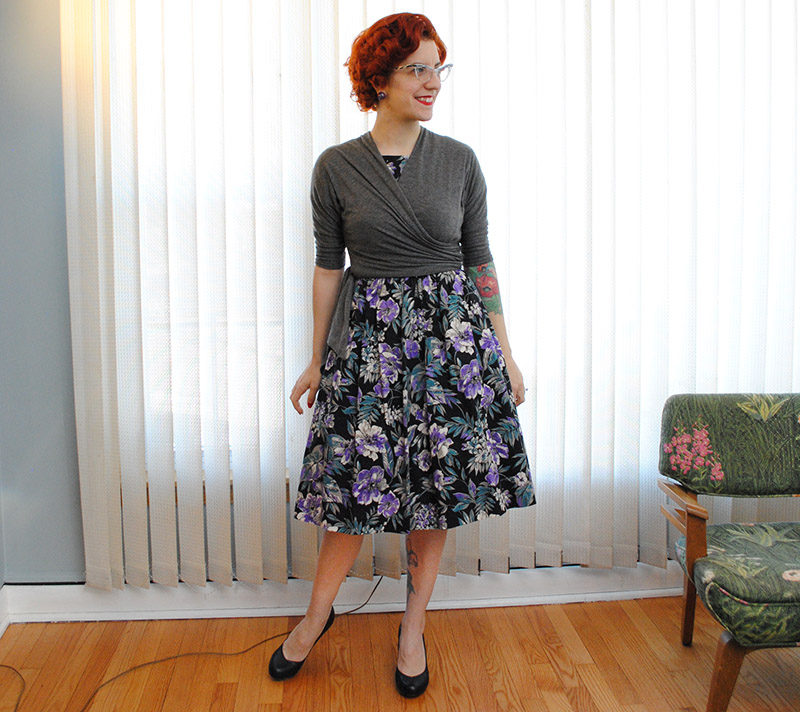
However, where it’s a downside with a skirt, it really shines with a dress: the short length is absolutely ideal to wear over dresses. It can totally transform a dress into a skirt and top combo, which I think is a clever way of expanding your wardrobe with just a quick knit top. I love the result!
outfit details
wrap top – made by me
dress – made by me (Emery pattern)
shoes – Remix
I wore it over my very first Emery dress which has this odd putty color in the vintage fabric print, and works nicely with the gray. I actually don’t wear this dress often because the colors don’t really suit me as a redhead now, but with a top over it, I actually quite like it!
You may notice that the ties on mine are a lot shorter than in the pattern, and that’s because I cut a lot of length off them. At the step when you baste the ties onto the bodice shell, I tried it on, and couldn’t figure out how I wanted to wrap the ties. Leaving them long means you can kind of wrap them a little lower than the hem of the top, effectively lengthening the silhouette a bit, but move around too much and it won’t stay like that. I just felt the ties were too long, for me personally, after fiddling with them for awhile.
I actually really like the idea of them tied at the side back and much shorter, like Vera Ellen’s red and black polka dot wrap top in White Christmas (I believe she’s wearing a little matching dickie underneath):
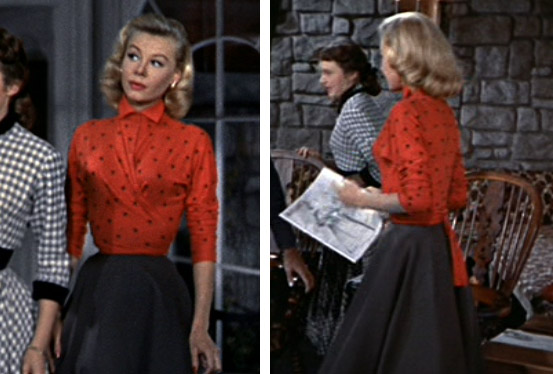 video stills from White Christmas, 1954
So I tied my top at the back right, and stuck a pin into each tie at the finished length I wanted them to be. Then I unpicked my basting stitches, and cut the ties down. This now meant they were different lengths, so I figured out what I cut off each end and made new tie pattern pieces to match (I think the final lengths were about 26 1/2″ and 17 1/2″).
I made sure to note that the tie attached to the right side of the bodice is the longer one, since it wraps from your right side around your front to your back all the way back to the right side, and the tie attached to the left side is the shorter one, since it wraps from your left side through the hole in the right, only to the back right. And voila, ties long enough to hang in a knot, but not accidentally get dunked in the toilet *ahem*. 😉
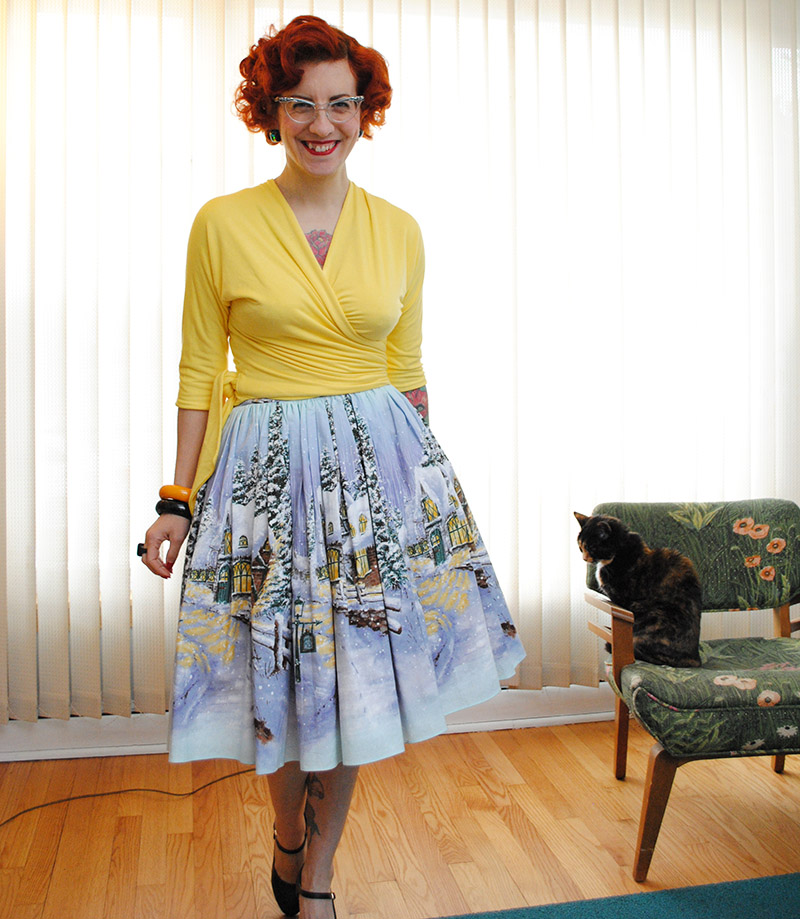
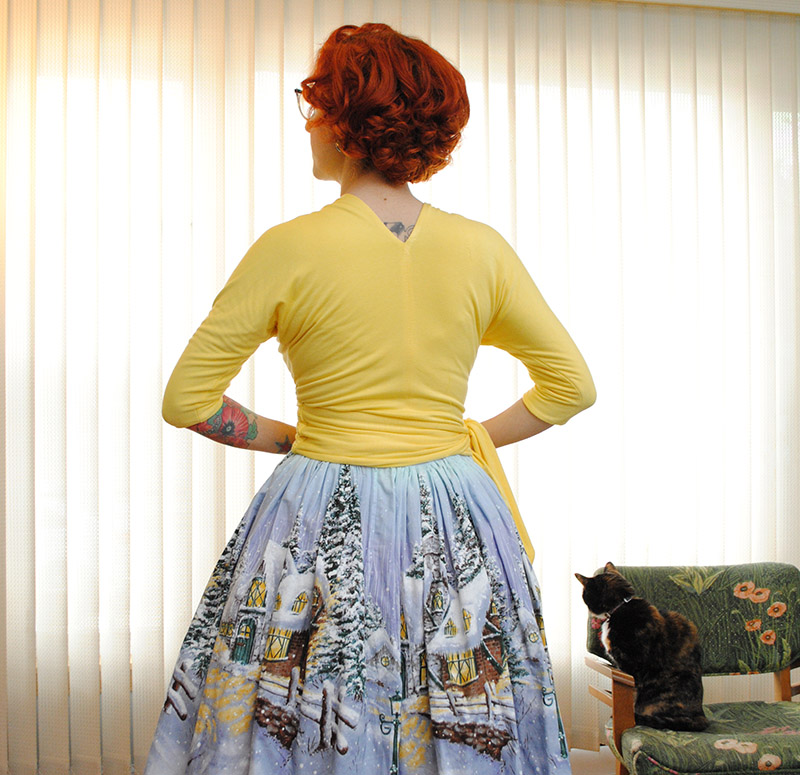
You know from my intro to this week of wrap/surplice top love, that I lengthened the bodice in my next version, and that will be Wednesday’s tutorial! I decided if I wanted to wear it with pants or skirts, I’d need to add a bit of length, and so I did that on my second version, which was in a modal/spandex blend in a cheerful yellow.
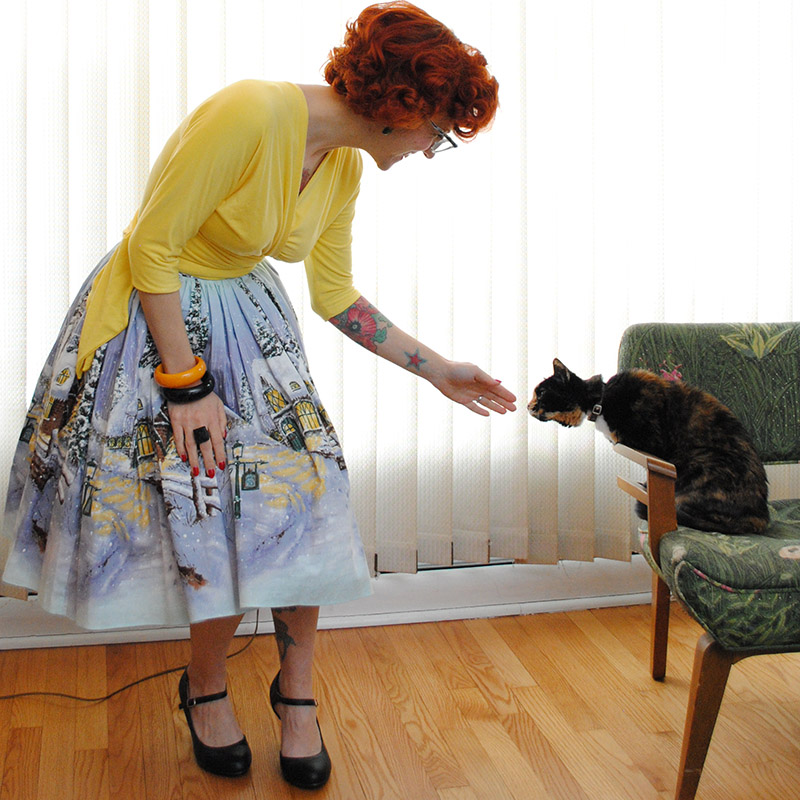
And yeah, I had a little helper nearly the entire time I was taking photos! Thanks, Dinah, for your vote of confidence! 😉
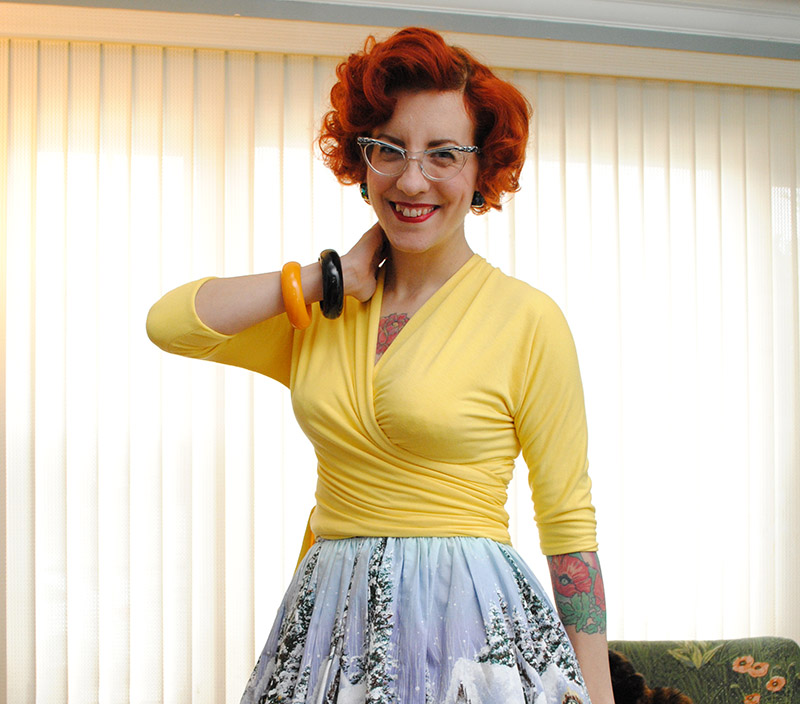
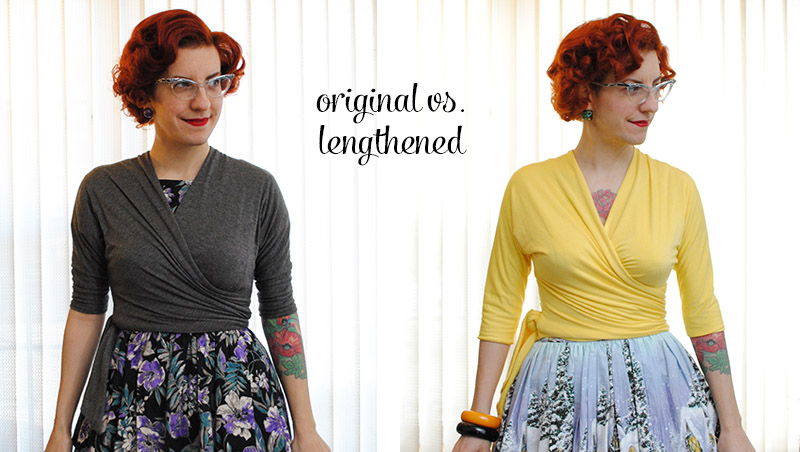
This version is 2″ longer, and that makes a big difference. Here I’m wearing it with a Bernie Dexter dress actually worn as a skirt, with the bodice tucked into the skirt.
Due to the way I decided to lengthen it, I decided it would be best to remove the waist dart at the back, so there’s no darts at all in my yellow version.
Side by side, hopefully you can see the difference 2 inches makes:
I’ll definitely still use both renditions of the pattern—the original (shorter) length if I’d like to make a top to wear exclusively over dresses, and the modified (slightly longer) length to wear with pants or skirts. The longer torso was a bit more difficult than adding length at a lengthen/shorten line (which as I said, didn’t exist), especially because the back is shaped with a waist dart. But I’ll talk all about how I worked around that on Wednesday!
The only downside I’d say to the longer version is that it does put a bit more bulk at your middle, so if you’re sensitive to that, you might want to make sure to pick a thin fabric or maybe one with a higher stretch content, and/or lengthen the hole that the wrap passes through, so it doesn’t bunch up at the side (I thought about that only after topstitching the hole, and wasn’t going to rip it out).
While it’s more bulky, it does sort of pull everything ‘in’, so to speak, which is kind of nice!
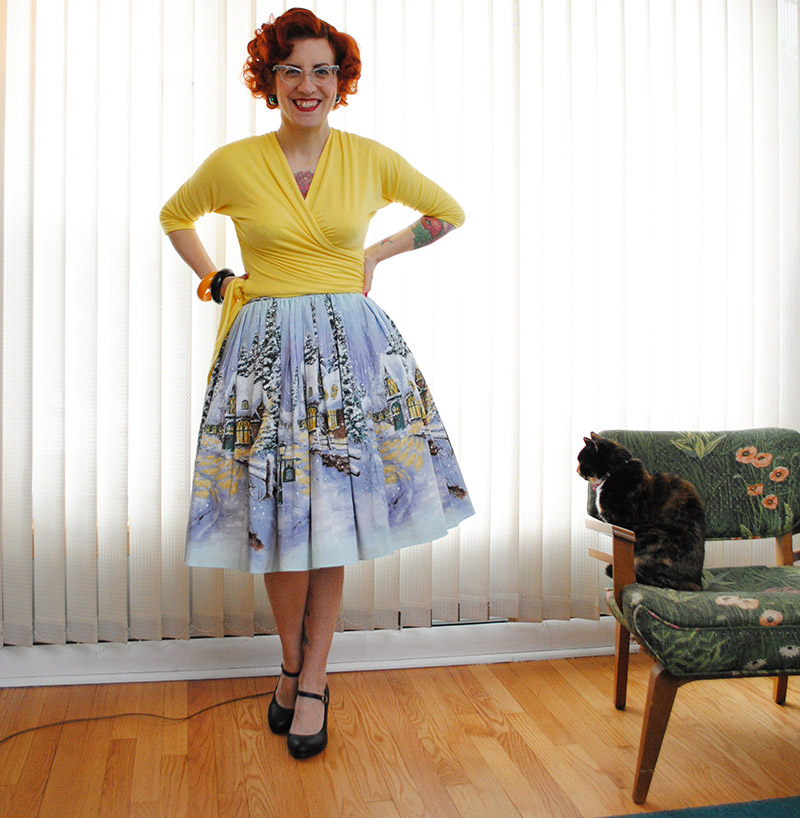
outfit details
wrap top – made by me
dress (worn as skirt) – Bernie Dexter, via Pinup Girl Clothing)
Bakelite bangles – misc.
shoes – Chase & Chloe (via Zulily)
Tomorrow, I’ll be sharing my first two versions of turning this pattern into a surplice top that tucks in, instead of wrapping around with ties. I’m SO excited to have worked that out, I can’t wait to share it!
Wednesday will be the tutorial for how I lengthened the body of the original wrap top (like my yellow version today) and Thursday will be the tutorial on turning the pattern into a surplice top.
See you soon!

Wowza! I initially overlooked this pattern but am having second thoughts now. Looks like a perfect alternative to a cardigan with a dress! Nicely done and thanks in advance for the upcoming tutes.
My thoughts exactly. I wasn’t so keen on the pattern when it first came out – even with Gertie’s photos it just didn’t seem like a “me” pattern. But this is what I love about By Gum By Golly! Tasha puts her own flair on a project and suddenly, I can see myself wearing that outfit! In general, I need to see a pattern on two or three bloggers before I decide if I like it, but – Tasha, you’re practically my body-type-double, so anything that looks good on you is on my list!
Aw thanks, Gia! I agree, it really helps seeing a pattern on a few people, which is one of the benefits of following blogs or sites where people review patterns. And I always fall in love with the pattern art on vintage patterns but it’s taken me quite awhile to kind of train my eye to pick up on what I think may or may not look good on me, and in most cases I can’t find another version sewn anywhere (obviously), so that’s one of the only down sides compared to modern patterns! 🙂
Thanks! And yes, it’s a great alternative to a cardigan over a dress for sure!
WOW! The way you styled the yellow one is PERFECT. Such a standout outfit!
Thanks, Tasha! Which I admit is exciting to say. 😉 I love the yellow one and it’s a great shade that I think will match a lot!
I found the sleeves a little tight too… I just figured I hadn’t stretched them enough ?
Can’t wait to hear your variations! Now I need to find some dressed to wear with my short one!
You know when I started to think about it I realized at that point they have very little stretch unless the fabric is super stretchy vertically, which mine clearly wasn’t. But just that extra 1/2″ was a huge help! Definitely pull out your dresses for your green one! 😉
These look so good! I can’t wait to try this pattern or something similar; it’s in the queue. I think you rock both!
Thank you so much! 🙂
I really liked this top when the pattern came out, but hadn’t realised that it was self lined and was actually a very interesting shape. I totally love your versions and they way you’ve styled them and can’t wait to read all your posts this week! I WILL be making this top, come hell or high water!
Oh yes, it’s a very clever pattern I think! And I think you could easily make it not lined for warmer weather, but it’s nice that the pattern is written for lined since that’s a bit more difficult to backwards architect, you know?
I seriously cannot wait for the surprise top variation. I need one in my life!
You’ll find out sooon! 😉
Such a cute wrap top! And that winter-scene dress. How adorable.
I love the clothes in White Christmas. There’s a black dress Rosemary Clooney wears that has such a cool neckline.
Thanks, Lauren! I know, aren’t all the clothes in White Christmas stunning?! I adore the party dresses all too but of course my lifestyle is more suited to the the turtlenecks and skirts outfits. 😉
Now I’m wondering – that self lining . . . could you line in a complimentary color and have a reversible top?
Totally! Gretchen even mentions that at some point in her sew-along that you could try that, if I recall! I think the only thing would be that the ties would show both colors when you tied or knotted them, and since it’s a knit fabric I’m not sure how well the edge would hold one color ‘back’ at the seam, so to speak, but if you picked two colors that went well together, that would be completely awesome!
I can’t wait for the tutorial. I made this top in her sew-a-long but since I am long waisted it ended up being WAY to short ( barely below my bust!) it went in the trash. Now I may be able to give it another shot.
Oooh yes that’s QUITE short then! I think Wednesday’s tutorial will help you out in the case! You might need to fuss with the length more than I’ll be showing since I only needed about 2″, but hopefully you’ll be able to work it out successfully! 🙂
I love seeing the difference between the two tops and the way you’ve styled them. I bought this pattern as I thought it would look great with skirts. I definitely need to check the waistline before I sew it up. Love you’re versions – especially the yellow!
Thanks, Tanya! Yes definitely check out the length although when you first look at it, it’s a bit of a head scratcher since the pattern piece is kind of kooky looking. I think it will look adorable on you!
I love this top. I was so inspired by your posts about this I trotted right out yesterday and bought the pattern and some soft rayon/spandex jersey in rich plum color. I sat right down to make it, lengthening the top at the bottom edge by 1″. I used the darts, but I will be eliminating them next time. Who needs shaping in a stretchy wrap top??
I also wanted longer sleeves with a little more structure at the hem, so I made 3 inch cuffs of doubled fabric, just like a rib knit cuff. They look very nice.
One thing I found with the fabric I used was that the back is waaaay to stretchy at the back hem, actually hanging loose when the front is tied, so I have opened it up and sewn a piece of firm 1/3 ” elastic, unstretched, along the seam allowance all across the back to give it a little firmness. Hey Presto!
I’m eager to see the hack for the long tucked in version. I think I’ll make it in gray.
Love your blog. Thanks for the hard work you put in to something for us all to enjoy.
Thank you! Sounds like a good solution for a baggy back! I drafted the dart out in my yellow one but had already determined the back was fine on me– sizing down from the pattern size as suggested on the envelope was probably key in that too. The cuff idea on the sleeves sounds really cute!!
Looking forward to see how you lengthened the top! I had the exact same problems with the sleeve being too tight below the elbow and the length being way shorter than I though (even compared to the picture, it’s pretty short!). I’ll make my next version of this top with your changes!
Tasha (auto correct changed your name to Tasmania), you may have already said this at some time, but do you use a regular machine or an overlocker when sewing up your knit fabrics? Am tempted to give this a try (especially for the wrap over dresses) but am wondering how it will all go with just a sewing machine?
Tasmania, now that’s a good autocorrect! 😀
I may have mentioned it in one of my tutorial posts, but while I typically use an overlocker to sew knits, I don’t do that 100% of the time. Especially if I’m unsure of how the fit will be, I’ll use a zig zag on my regular sewing machine (cannot stand unpicking overlocked seams). But for the lined wrap tops, since you don’t see any of the seams anyway so you don’t have to finish them, I used my regular machine and a zig zag stitch. That being said, the instructions for the Butterick pattern actually recommend you use a straight stitch and stretch the fabric as you sew–I find myself a bit all thumbs sometimes at tasks like that, so I went with zig zagging instead. 🙂