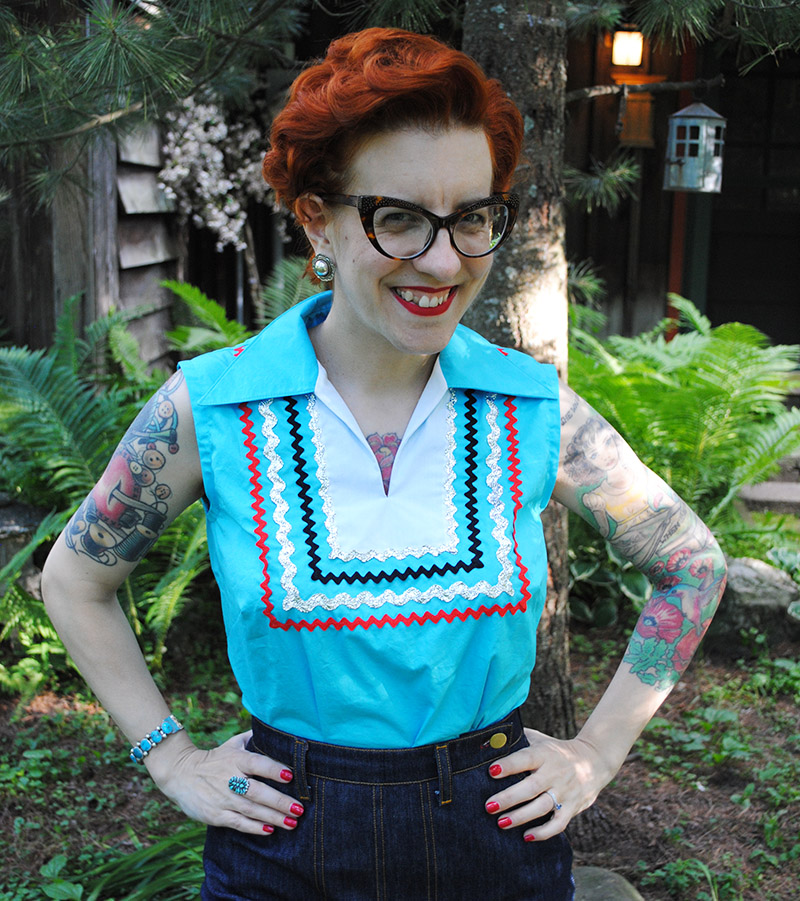
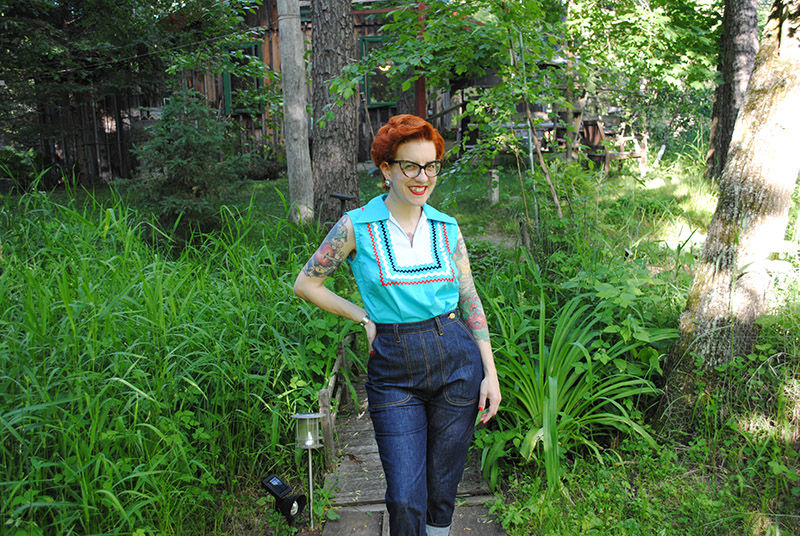
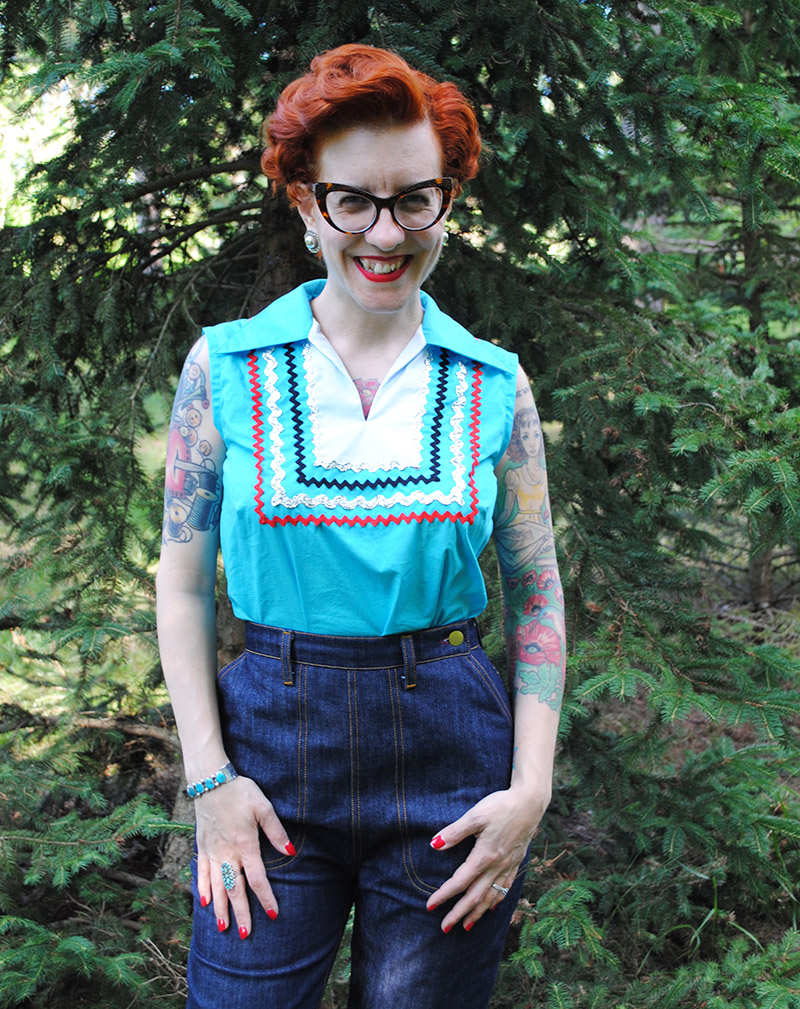
Before I forget completely, I want to revisit an outfit I showed you last month, because it had two things I made and I only talked about one of them. You may have noticed a cool blouse I was wearing with my 1950s pedal pushers. It’s my first patio blouse! Knock another item off my summer inspiration list!
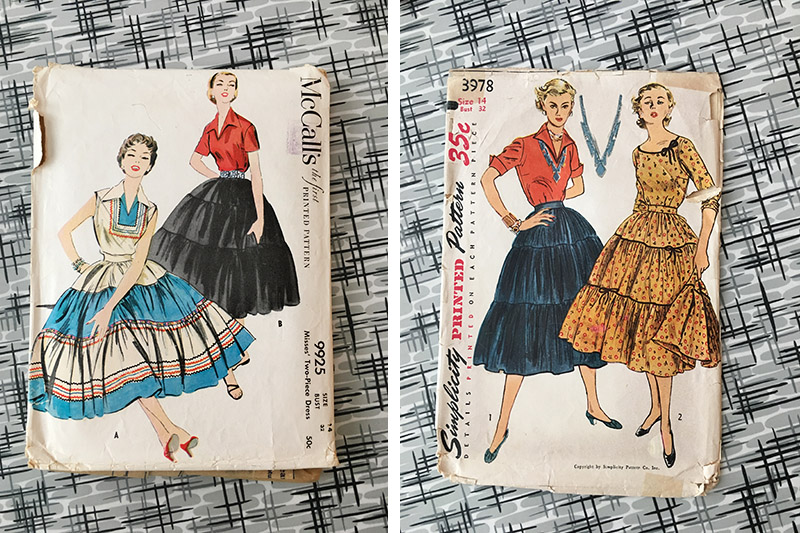
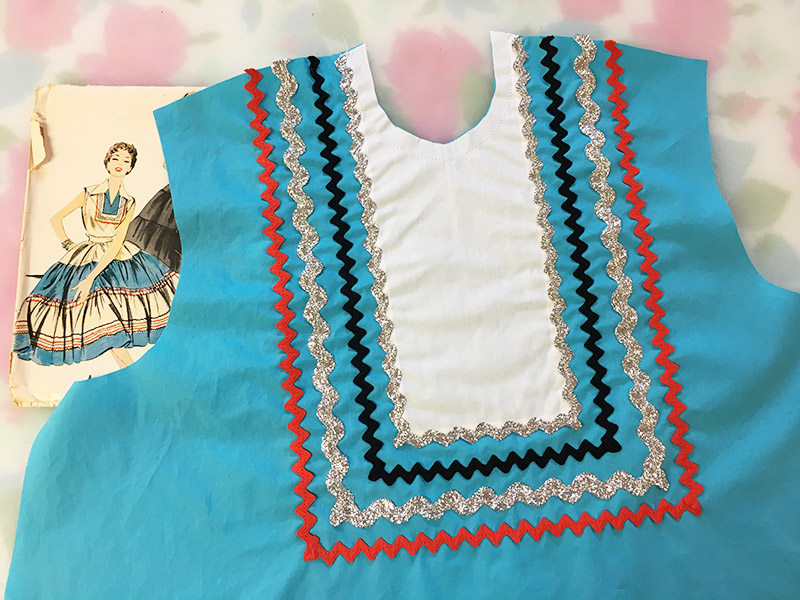
I used McCall’s 9925, the pattern on the left below. So this is another Vintage Pledge item, too! I debated for awhile between the blouses in both of those patterns and finally settled for the one with the contrast yoke and trim, and just decided to flip flop the colors.
I did a muslin, and I’m really glad I did for two reasons. First, I knew I wanted to remove the center back buttons and change it to a side zipper, because… I just seriously dislike blouses that button up the back. And yes, I know the trick to getting into them unassisted, but I still don’t like them. All that time for facings and buttonholes and sewing on buttons and I don’t even get to look at my own work.
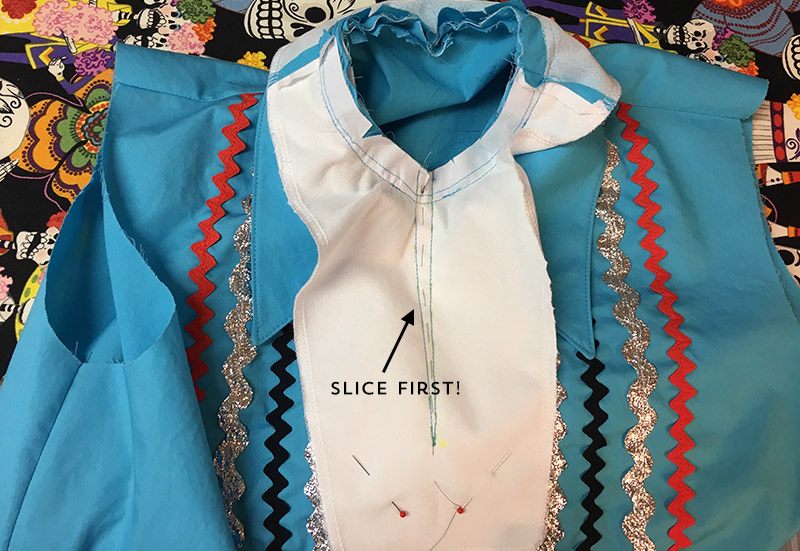
Making that change meant the neck construction was really tight, and I was glad to be forewarned about that with my muslin. Never mind the fact that I coincidentally learned a way to make it a lot easier in the very next pattern I muslined up, a vintage Hawaiian pake muu dress, but at least I know for next time.
Hint: instead of the monkey business you see below where the collar and facings are all in a tight little hole, you just slice the neckline and the facing before you attach the collar and facing. Duh. It opens it all up and is so much easier to sew than the way I did it. Lesson learned.
The second reason I’m happy I did a muslin is that I discovered I could actually pull the blouse over my head with no closure. Huzzah! It has a nice amount of ease, but not too much.
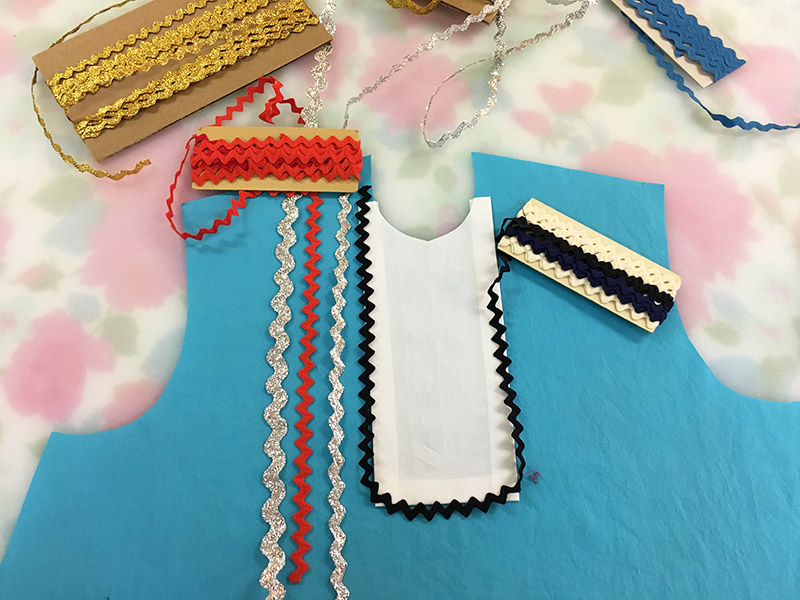
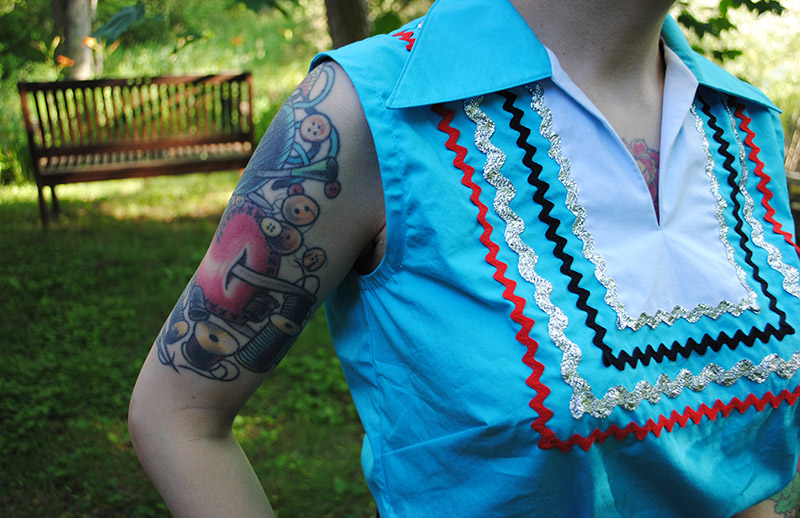
One of the fun parts was planning the rick rack! I had a general idea that I wanted to follow the pattern envelope colors (since red + aqua or turquoise = my colors), but I played with it a bit. Even after I attached the contrast yoke.
Sewing the yoke and the trim required some serious precision. The way I went about it was pretty easy, and just too a bit of time, but the result was worth it. First, I used a temporary spray adhesive to attach the yoke to the front bodice. (Incidentally, I made a couple of minor changes to the yoke shape which I wouldn’t repeat… it shouldn’t go all the way up to the top as you see below, because it makes it bulky in the collar seam. Not a big deal but a minor annoyance when trying to press everything into shape in the end when I had rick rack in the way.)
I have 505 spray adhesive which I learned about for lingerie sewing, but it’s great for places where you don’t feel like hand basting or really want to make sure something doesn’t shift! It stays tacky temporarily and washes out. I don’t have a photo but after spray basting the yoke, I edge stitched it to the bodice.
Then I used a fabric glue stick (more adhesive, yes) to attach the first line of rick rack precisely over the edge of the yoke, so it hid the yoke edgestitching. Again I could have pin or hand basted, but I really wanted it as precise as I could get it, and the glue stick was perfect for that. Plus that silver rick rack is some weird mylar or something and wouldn’t have pinned well, anyway. Then I just slowly sewed straight down the center of the rick rack to attach it.
Then I just carried on with glue basting the trim for the other lines until I was finished! The silver rick rack was new, and the red and black were vintage ones from my stash. I have to say it was a lot of work to put into a project before hardly any of the construction sewing got started, but sometimes that’s just how it goes.
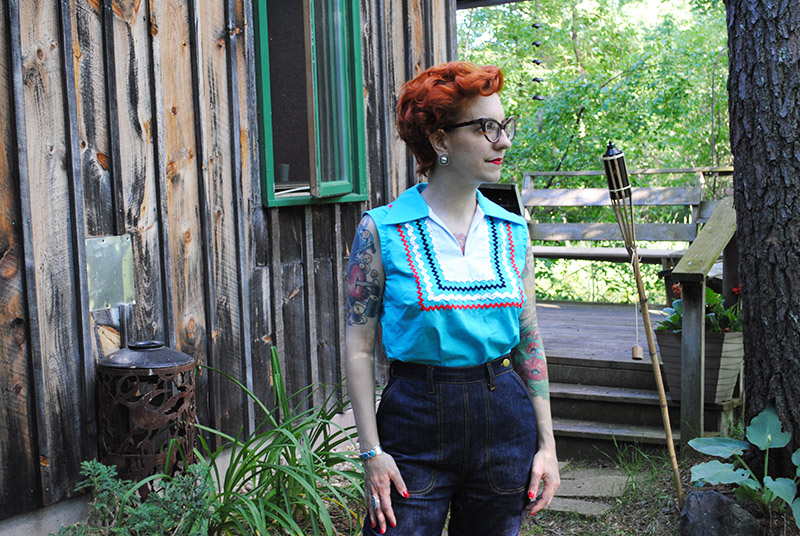
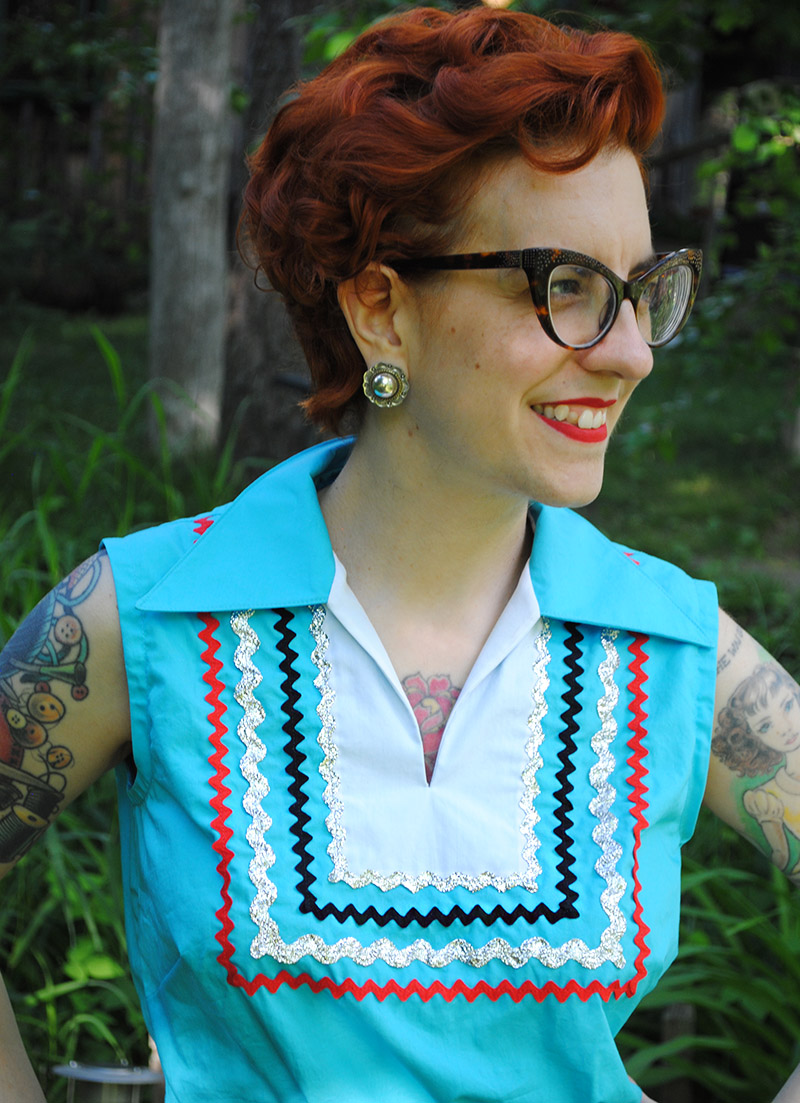
And voila!
The blouse even looked great with a vintage turquoise ring I antiqued. These photos were taken while we were staying up north in Wisconsin, and we crossed the border into Minnesota a couple of times, and one of the days I found this beautiful petit point turquoise ring.
The fabric I used was Robert Kaufman Superluxe Poplin and I’m really happy with it. It’s nice and crisp and lightweight, but still opaque (even the white, which I worried about as the yoke is sandwiched onto the bodice, not inset). Although white fabric plus silver rick rack… not the easiest to photograph.
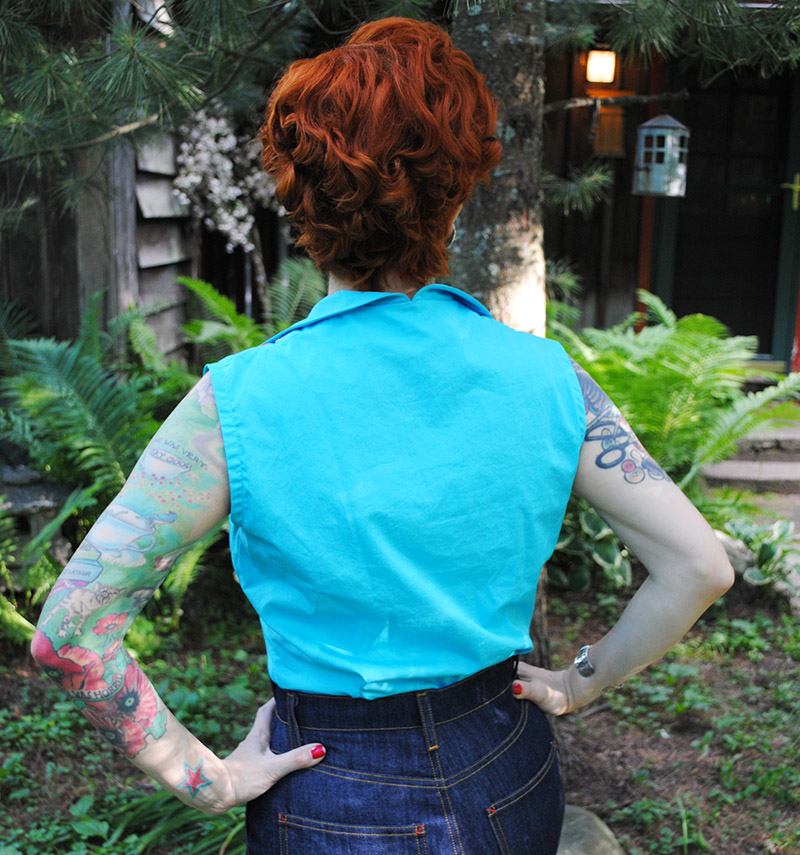
One unexpected thing I like about this blouse is the back neck! Since I removed the button back, I wasn’t really sure how the collar would line up. Turns out it has a nice little scoop from the center back to form the rest of the collar which I quite like.
Instead of armhole facings like the pattern called for, I used bias tape. How in the freaking hell do you bind an armhole without it getting wonky on the really curved parts? Ugh. No amount of clipping and trimming in the minute seam allowance you use with bias tape could help. I should have gone with my original instinct which was to give this cut-on sleeves. But sometimes that gets fussy to work out with bust darts and this was one of those times, so I scrapped that plan early on. I feel like a lot of sleeveless blouses with bias tape look like this, but meh. It still annoys me (and was difficult to sew to boot).
Anyway, very minor quibbles aside, I love this top and I’m glad I finally got around to trying a patio blouse! I also think this pattern would be a great for a plain top to wear with patterned skirts, minus the yoke and trims, or maybe a different orientation of trim and no yoke. It’s nice to have a new vintage blouse pattern in my arsenal!






Beautiful outfit and you have inspired me to have a go adding ricrac to some clothing to give a retro feel.The back of the top is gorgeous and your now shorter hair lends to showing off the neck detail beautifully x
Thank you! I’m really pleased with the outfit. And I’d only used rick rack once in the last handful of years so it’s also inspired me to try it again soon! 🙂
Oh my gosh! That is SO adorable! You look fantastic in it and you did such a great job. I’ve sewn clothes before but they frustrate me terribly. That’s why I do small sewing projects. I also love the ric rac. Great job!
Thank you! Clothes were frustrating for me for a long time when I first started aewing regularly but eventually it all clicked. Though it’s still frustrating plenty of times. 😉
Love the top and well done for working out how to do away with back button fastening – and side zipper. New hair style also looks great. You have inspired me to get out all my cards of ric-rac trim and have a play!
Thanks! I’m tempted to play with it on another garment soon. 😀
Statement blouse and a half! Love this. And thanks for giving me the heads up… I’ve never heard of a patio blouse before! 🙂
Neither have I. Why do they call it a patio blouse? I could find nothing by Googling.
I should have given a bit of an explanation in the post for those who aren’t familiar! Patio sets were a skirt and matching top, but they often came as dresses. So to find them vintage, you’ll sometimes encounter a blouse or skirt without the mate. They were a Southwestern often touristy style outfit from the 50s or so. It’s hard to Google patio set without getting furniture, ha ha! They also went by a a culturally insensitive name which I won’t include, or also a fiesta set. Usually a color color and sometimes an accent color, trimmed with lots of rick rack and sometimes wider trims too. 🙂
Thanks, Tasha. So interesting.
I find that I have to press the snot out of packaged bias tape to get it to lie flat. I sew then press then open out and press then turn it over and press. Then I pin and sew and press again from the inside and the outside. I find the self bias makes for an easier time sewing, unless it’s seersucker, but it’s annoying to make. I have different proportions than you do, so it might also have something to do with the size of the armscye in relation to the bust. Im larger, with a flatter bust so the curve isn’t so tight.
I was going to add that you might be able to remove those armhole puckers with some really heavy pressing and steam.
I used self made bias tape I this case. I try to avoid the package unless I’m auuuper lazy or am using a fabric not conducive to it (like when I tried to make it from the eyelet fabric I was using, ooof). It’s a pretty steep curve for me at the bottom of most armholes, so the inner and outer curves I think just don’t work well with 1/2″ tape.
The good news is the project I’m currently sewing was going to have the same issue, so I tried a bias strip that was much wider and it’s going to work fine I think/hope! (Only roughly tried on the muslin so far.)
Any garment that needs ricrac is a win to me! I love the colour combo that you chose. And the collar is just darling!!
Thank you! I’m quite fond of that collar too!!
Awesome blouse. I love rick rack but I’ve been a little timid about using it.
That collar (both the points AND the back) is making me swoon! Love it!
I am a sucker for anything like this, and honestly ADORE the color combo you selected for this ensemble!
xoxo
-Janey
This looks fabulous. Love all that ric rac.
Lovely blouse, such a great job – and glue! Your new ring matches perfectly. 🙂