
I have a new tutorial on YouTube for you today! If you sew vintage sewing patterns, you might just find that your bust darts are too high. It’s a common adjustment, and one I do alll the time! In my video, learn how easy it is to lower bust darts on vintage (or any!) sewing pattern.
Vintage patterns in particular were drafted for the undergarments of the time, and while I typically wear vintage-inspired bras, even that is not enough to escape needing to lower bust darts. Quite a bit, in fact. Typically, I need to lower them 1 1/2″ or so.
So what happens if you sew something and the bust darts are too high? You might notice one of the following signs:
- some bagginess of fabric above the fullest part of your bust
- the bust dart points sticking out and/or pointing more towards your armpit than your bust
- a tighter or weird fit across the bust
This is definitely more noticeable on a fitted top than a looser one.
In my video, I show you two different ways to lower a bust dart. Plus, I walk through figuring out how much to lower the dart, because it’s not just a matter of guessing, and getting it right can make a real difference in how the finished garment fits. And for good measure, I briefly touch on raising darts too, for those of you who need to go the other direction. (Fun fact: I actually had to do that once for this pattern, since I needed to wear it with a different style bra!)
Want a quick written run-down of my favorite method? I’ll walk you through the way I do it with tracing paper below. It’s my go-to since it’s quick, easy, and ideal for preserving vintage sewing patterns, since there’s no cutting involved!
I also cover the more common box method, and I hope seeing them side-by-side will help you decide which one suits how you like to work best. (You know I love options!)
How to lower bust darts on a sewing pattern, with just tracing paper (no cutting!)
Trace your bodice front
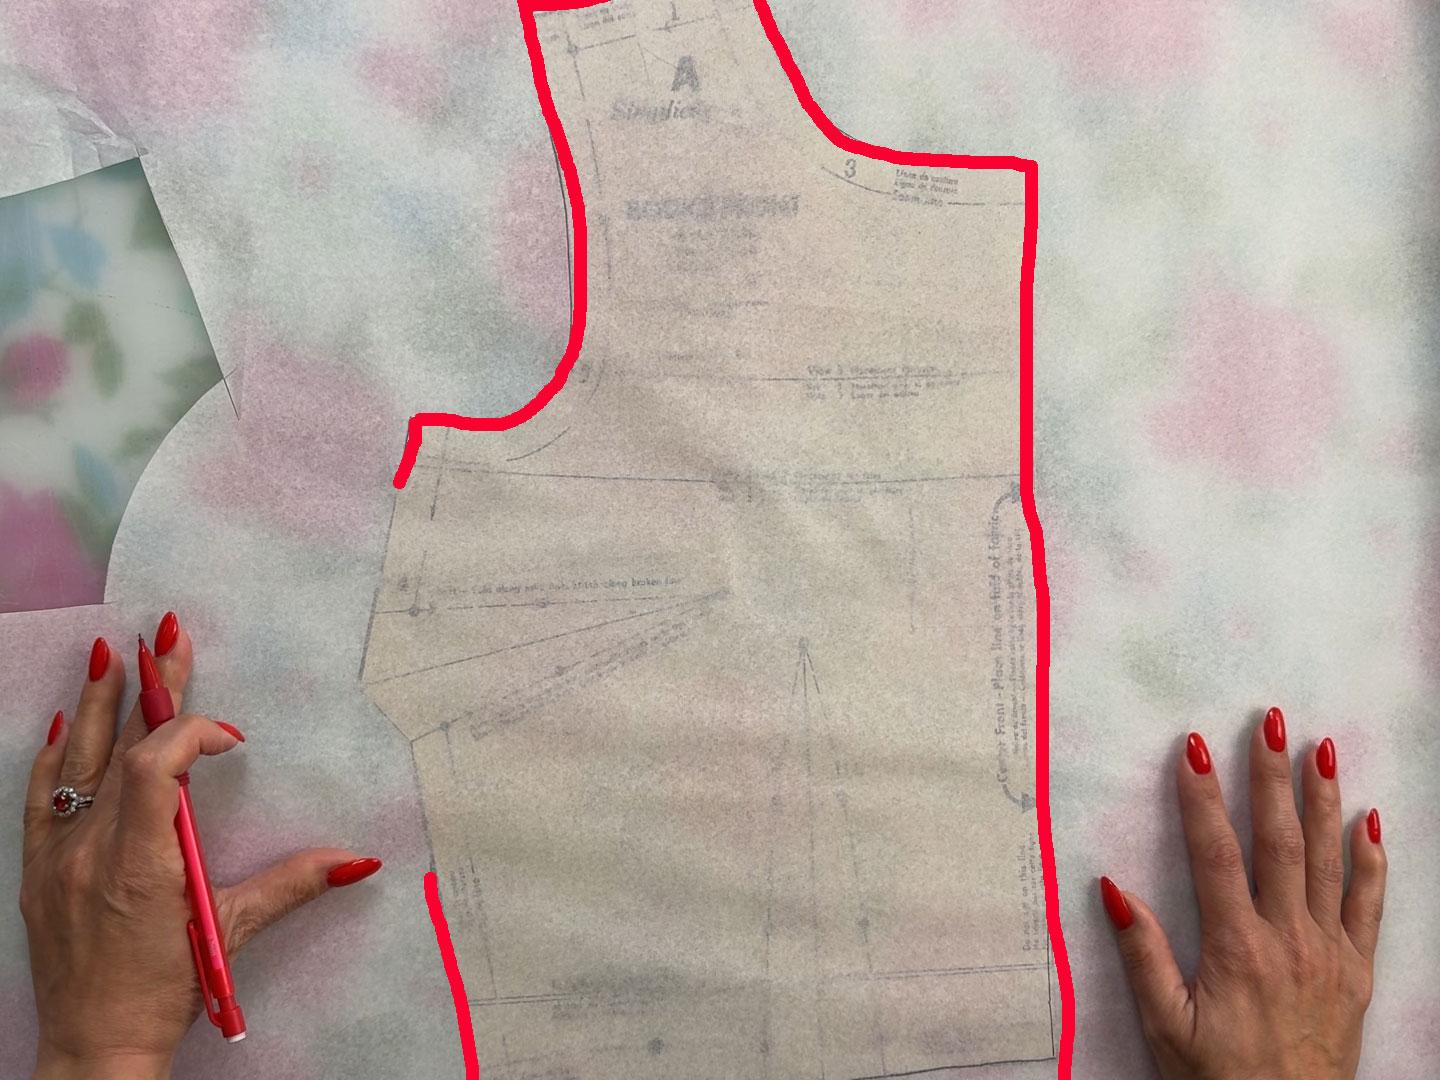
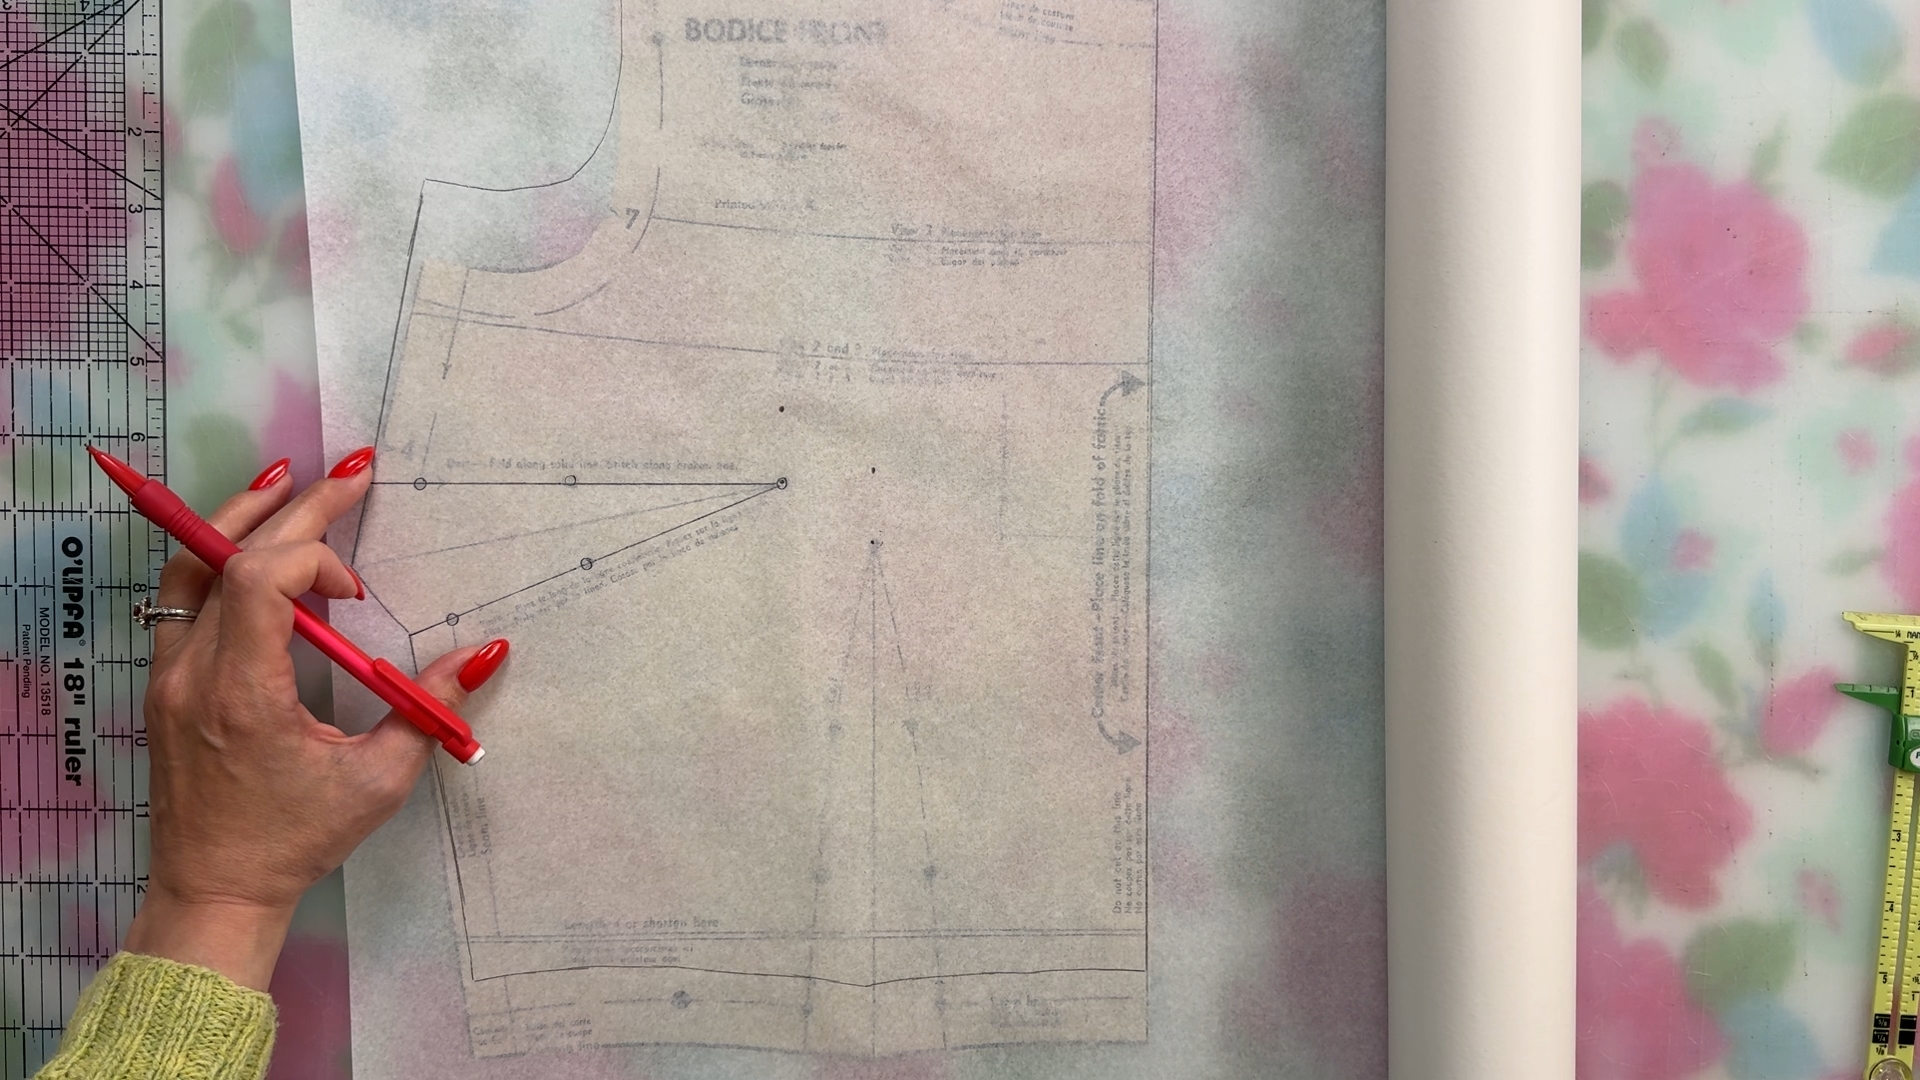
Trace your bodice front onto tracing paper. You’ll trace everything except the side seam area around the bust dart. So most of the front, except an inch or two above and below the bust dart. I’ve drawn in red below what’s traced.
Mark your dart points
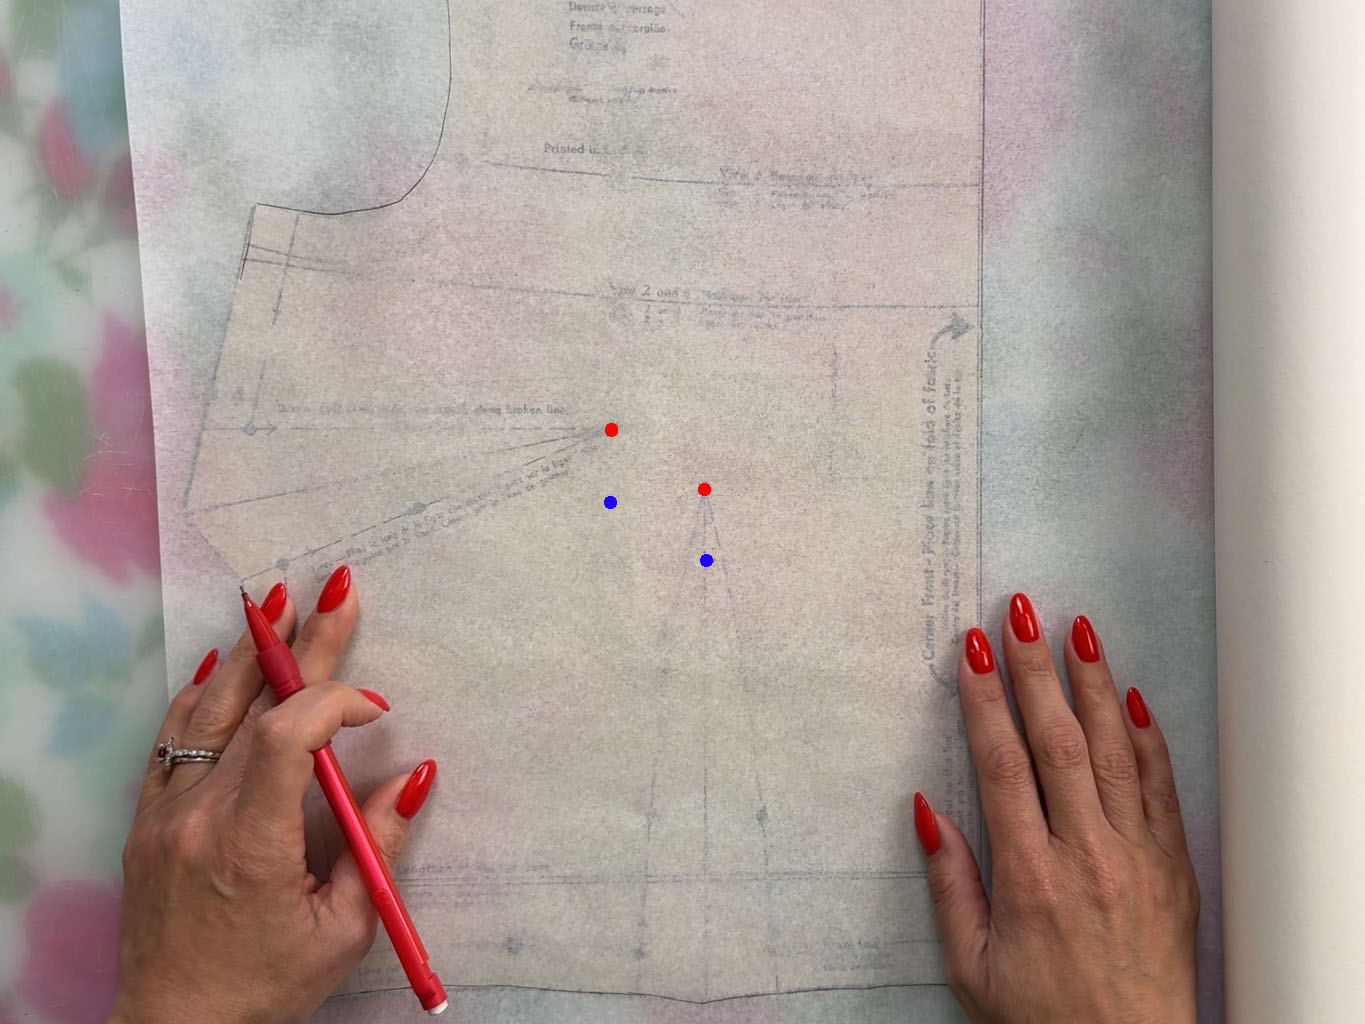
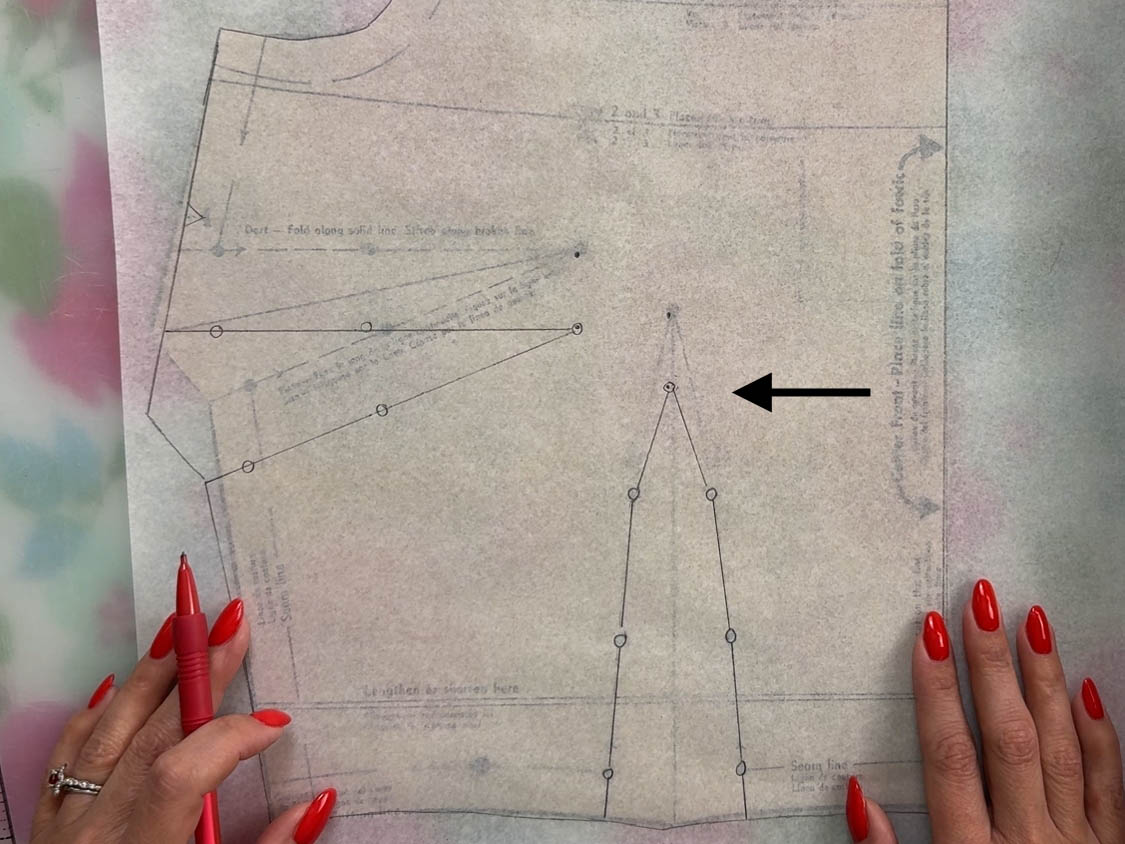
Draw a dot on your tracing paper at the apex (or end point) of your bust dart. If your pattern has a waistline dart, go ahead and mark the point of it too, since you’ll need to lower that as well.
Then, draw another dot directly below the point of the bust dart (and waistline dart if that applies for your pattern), the distance away you want to lower your bust dart. In my tutorial, I went with 1″ down. (And don’t forget, in the video I talk about how you figure out this distance!)
In the photo below, the red dots are the original end points of my bust and waistline dart, and the blue dots are 1″ down, where I’ll lower the darts to.
Slide the tracing paper up
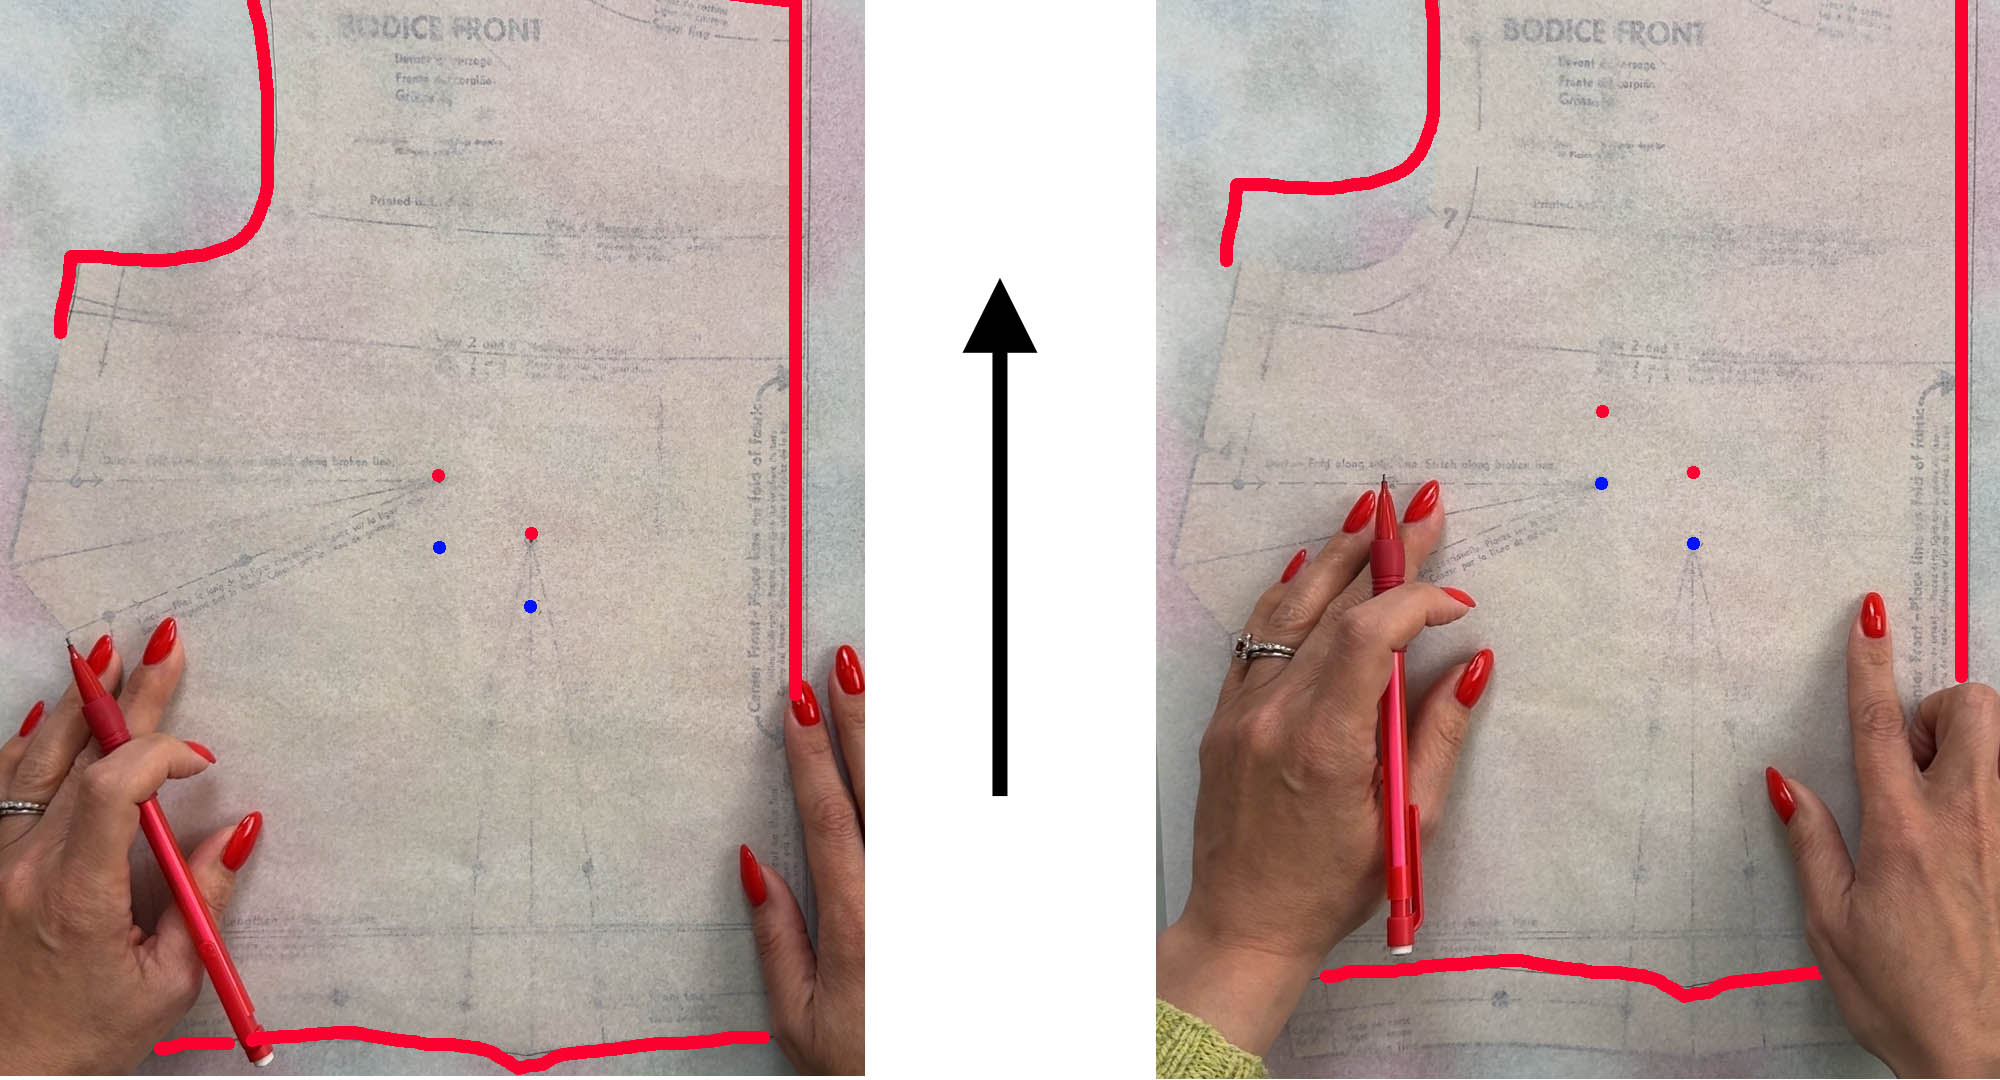
Simply slide your tracing paper up until the lower dot aligns with the original dart apex on your pattern. Yep, it’s that easy!
As you do this, just make sure your center front line stays straight. You don’t want to accidentally rotate the piece.
Finish tracing and true the side seam
Now you need to fill in the part you didn’t trace earlier, so that’s the rest of the side seam and the dart. In the process, you may need to true your side seam a bit, since things won’t line up perfectly.
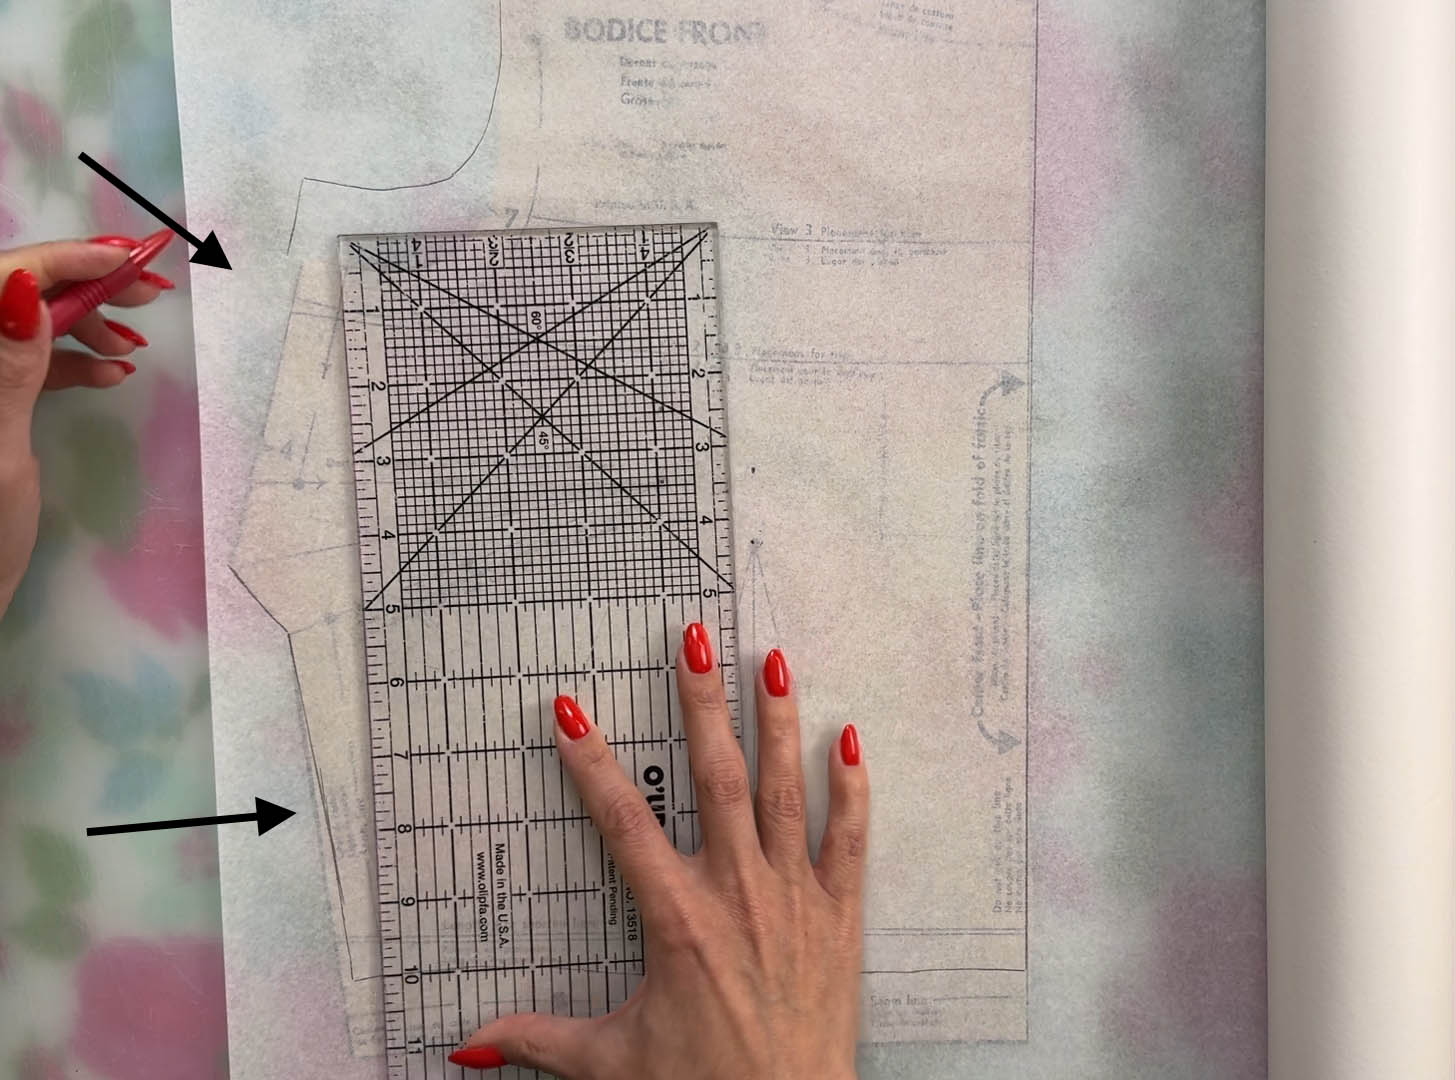
Once you’ve traced the rest of the side seam, trace in the bust dart markings. Don’t mark your side seam notch yet though!
Mark notch and lower waistline dart
Almost done! Now you need to slide your paper back down to the original location, until the armhole lines up with the original pattern again. Mark your side seam notch now.
Last step is just to finish off the waistline dart! Connect the new lowered apex of the waistline dart with your other dart leg markings, and finish tracing those too. It should be smoother than my version below, which was done quickly on camera. And if the top of the dart is too steep of an angle (mine below is approaching that) you can blend the legs in a bit more. 🙂
And that’s it! If you want to see both this method and the box method in action, plus how to figure out exactly how far to lower your dart, head over to YouTube and watch the full video.
Leave a Reply