
Early in September, I was having a hard time finding direction for my sewing. I blame the change of seasons. I couldn’t figure out what I wanted to make, or I’d want to make things I didn’t actually feel like taking the time to make, or I just wasn’t sure what I wanted to be wearing… things like that. I may not follow modern trends in fashion, but that doesn’t mean I don’t go through phases of things I prefer, want to try new styles, particular patterns or prints, and things like that. That’s always even more prevalent with the changing of the seasons, I think!
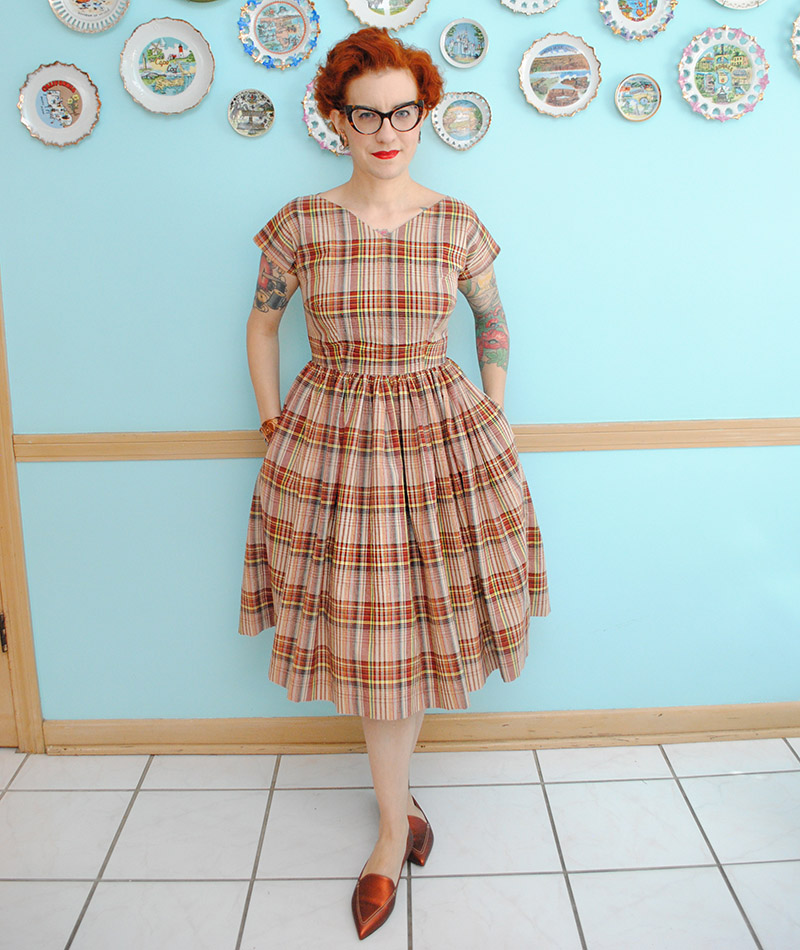
Anyway, to get over my ennui, I decided to just sew a dress. I hadn’t sewn a normal cotton dress in quite some time, so it was like falling back on an old friend. Except, me being me, I had to go and make it complicated on myself. Making it in in just barely enough plaid fabric to pull it off.
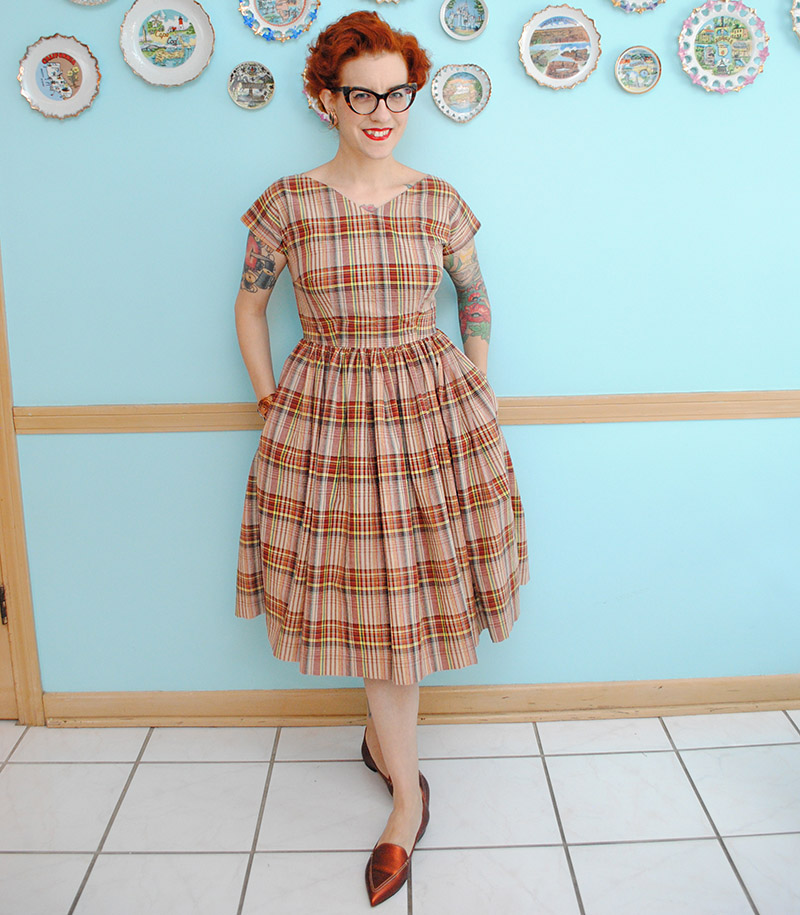
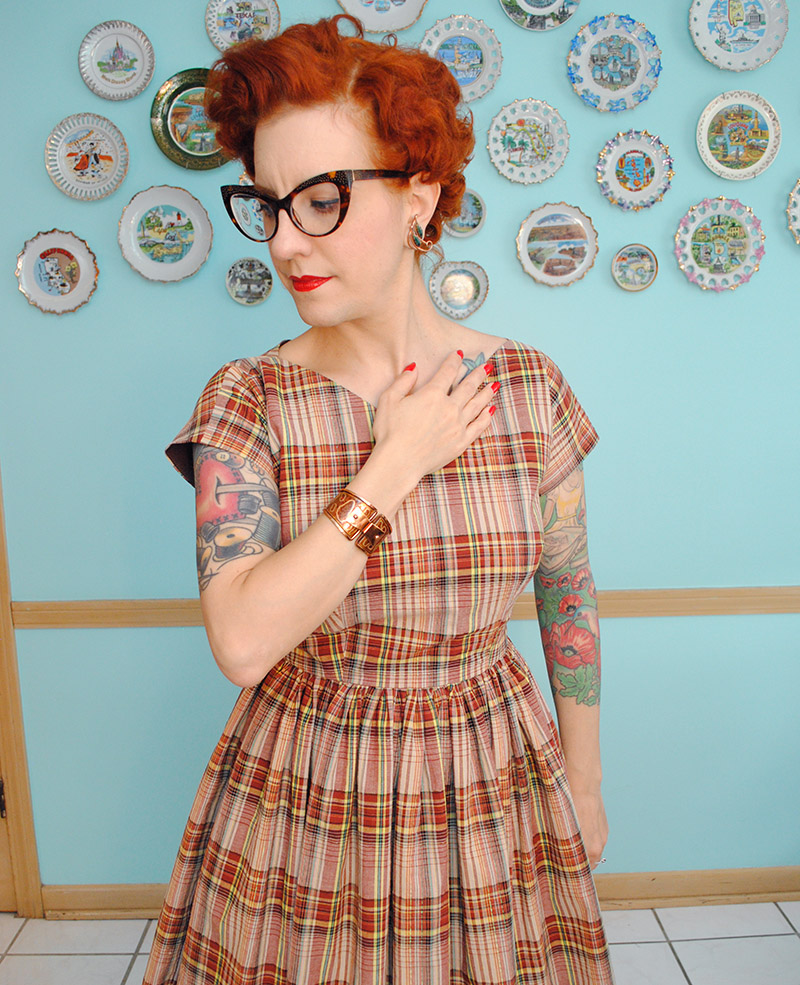
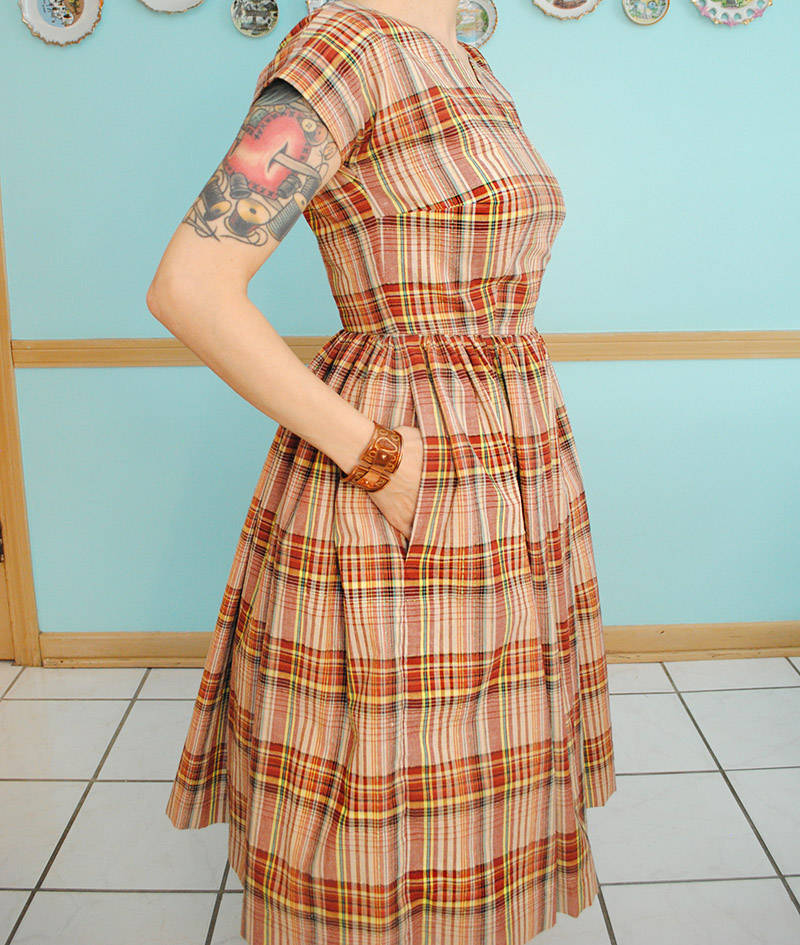
I used McCall’s 3528, a vintage dress pattern that I used to make this year’s birthday dress that I wore in London. I love the bodice shape, but ever since I sewed it the first time, I had in the back of my mind the idea of hacking the bodice to make it have cut-on style sleeves. A lot of my 50s patterns have that style of sleeve and I do tend to prefer it. The only downside: I really hate neckline facings. But up until that point, I didn’t think it was possible to fully line a cut-on sleeve bodice. I mean by hand, sure, but I wanted that great way you can do it all by machine by pulling the back pieces through the shoulder seams when you have a center back zipper… there are several tutorials for this technique (one, two, three) though I just refer back to the instructions in the Elisalex pattern.
But then I started thinking. And I realized maybe I was wrong. Just because I hadn’t seen it done didn’t mean it wasn’t possible! So I made an itty bitty muslin to test it out. After I sewed the lining and bodice necklines together, instead of the step where you’d sew the sleeveless armholes together, I sewed the cut-on sleeve seams together. And lo and behold, I was right! Worked just like a charm, and I was able to pull the back pieces through the front. And before doing so, I could easily understitch the sleeves (though I had to do half at a time).
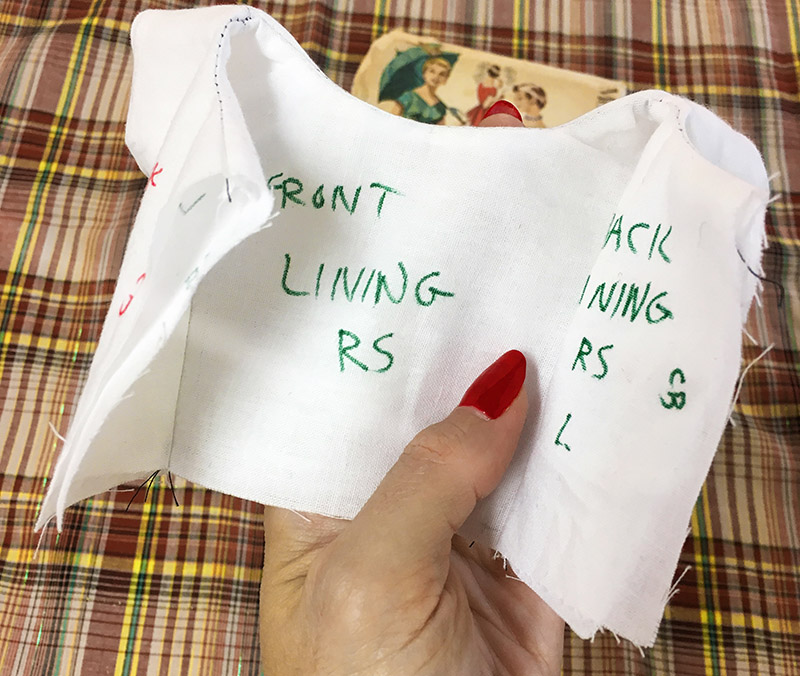
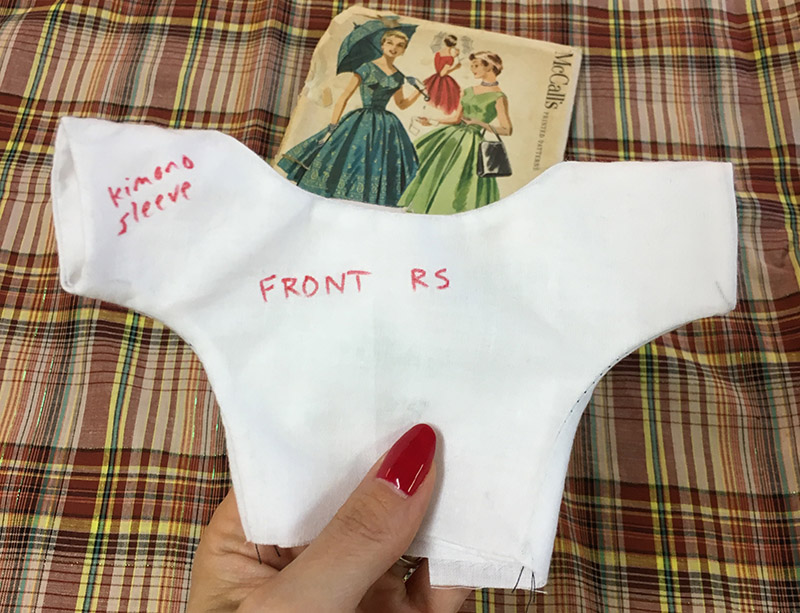
Not only was I super pumped this worked, it also solved another issue for me: I freaking hate finishing cut-on sleeves!! I mean no particular reason why, it just annoys me. So to clean finish them and be able to understitch them tidily along with a fully lined bodice… SO EXCITING TO ME.
Huzzah!
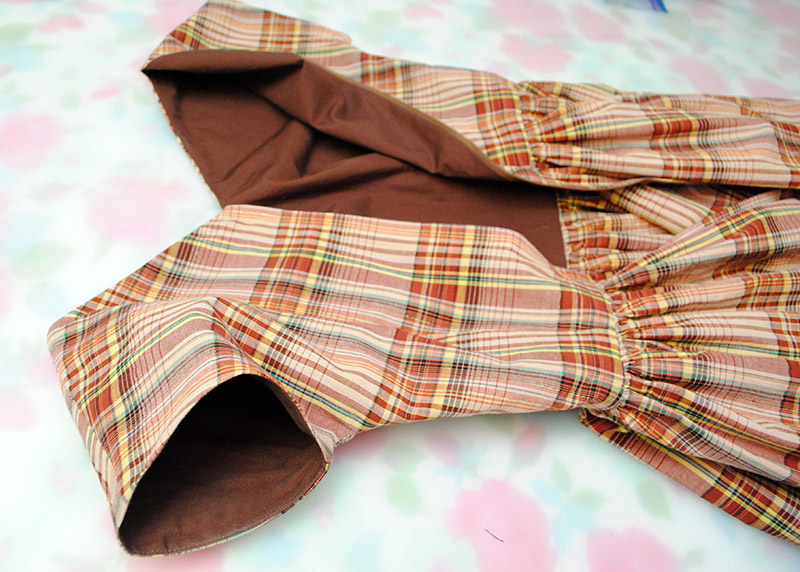
Cut-on sleeves and lined. So happy!
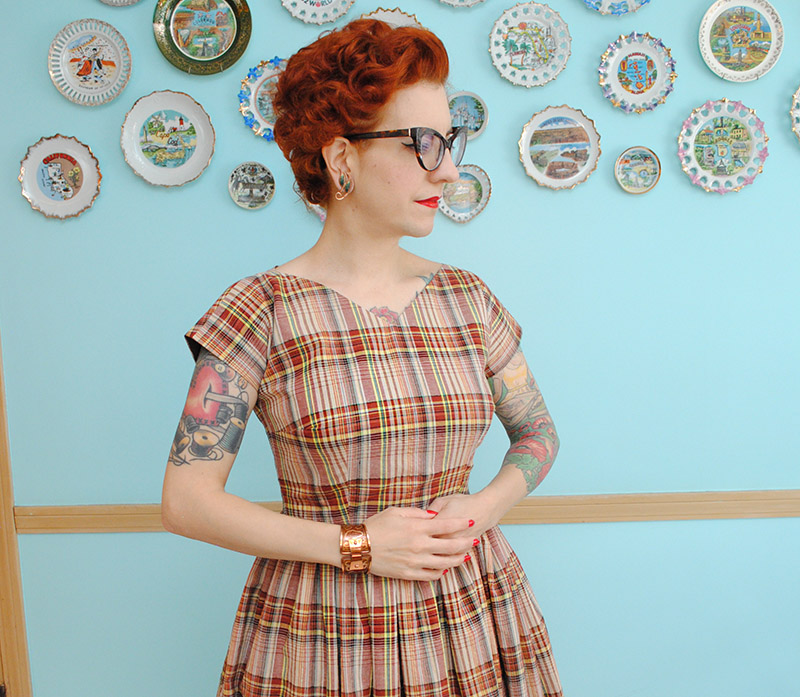
None of my fabric had been singing to me at the time that I sewed this. I’ve kind of been off excessive novelty prints for awhile unless they were vintage prints (holidays excepting, as I made an unblogged kitschy Halloween dress), but I have been really feeling plaid. I mean obviously, as this is my second plaid post in a row with another coming soon. 😉
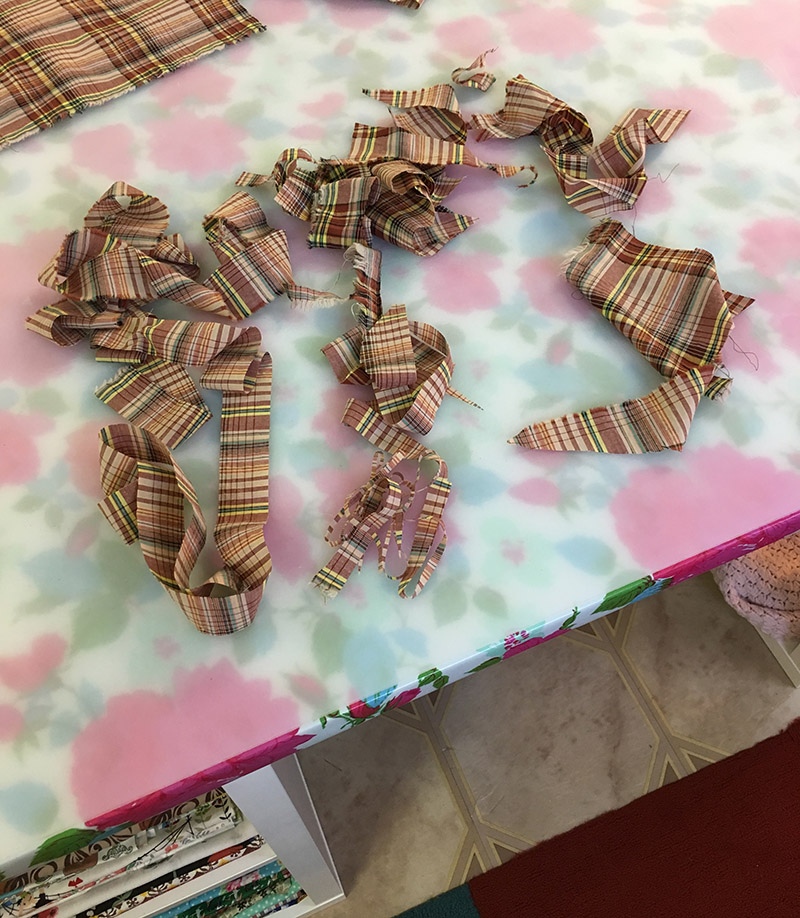
Although browns aren’t usually my thing, I realized I had a plaid shirting in my stash that I’ve had so many years I have no idea where it came from and I was happy to finally use it (although it photographed like crap and I had to take two sets of photos and it still looks a bit blah.. there’s even a couple of metallic threads the camera didn’t pick up). It was thin but not sheer so I didn’t have to line or underline the skirt, and I had just enough to squeeze out a plain gathered skirt and the bodice.
Juuuuuuust enough. This was literally how much fabric I had left.
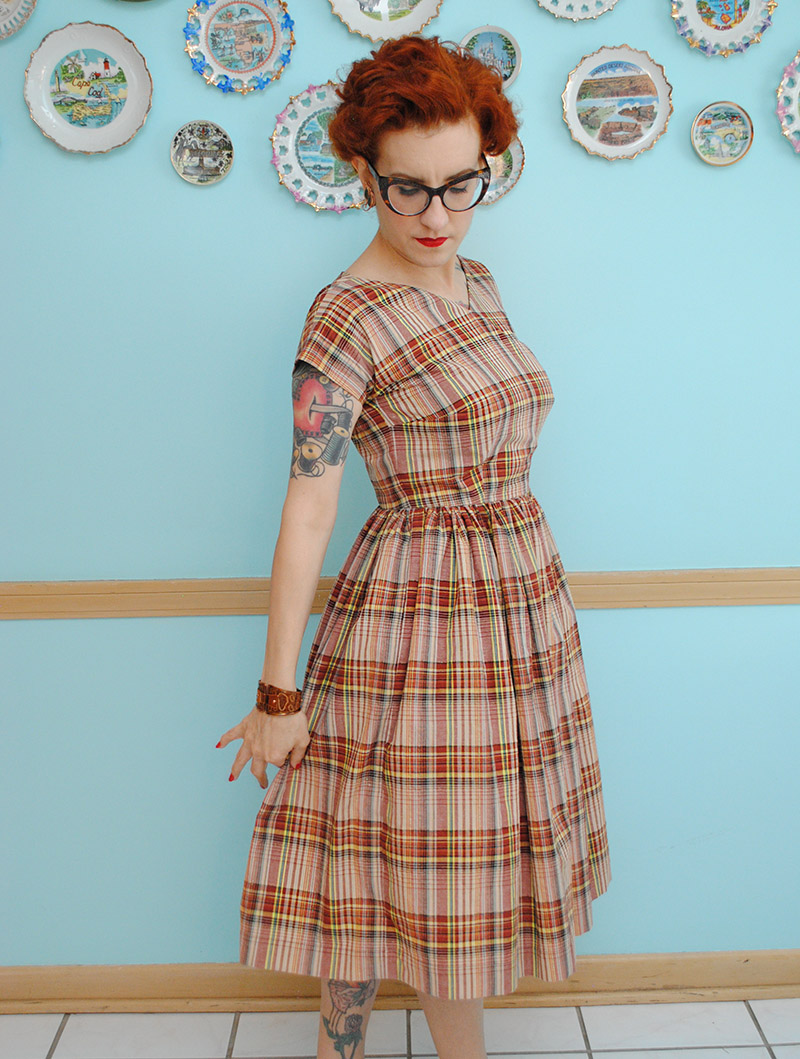
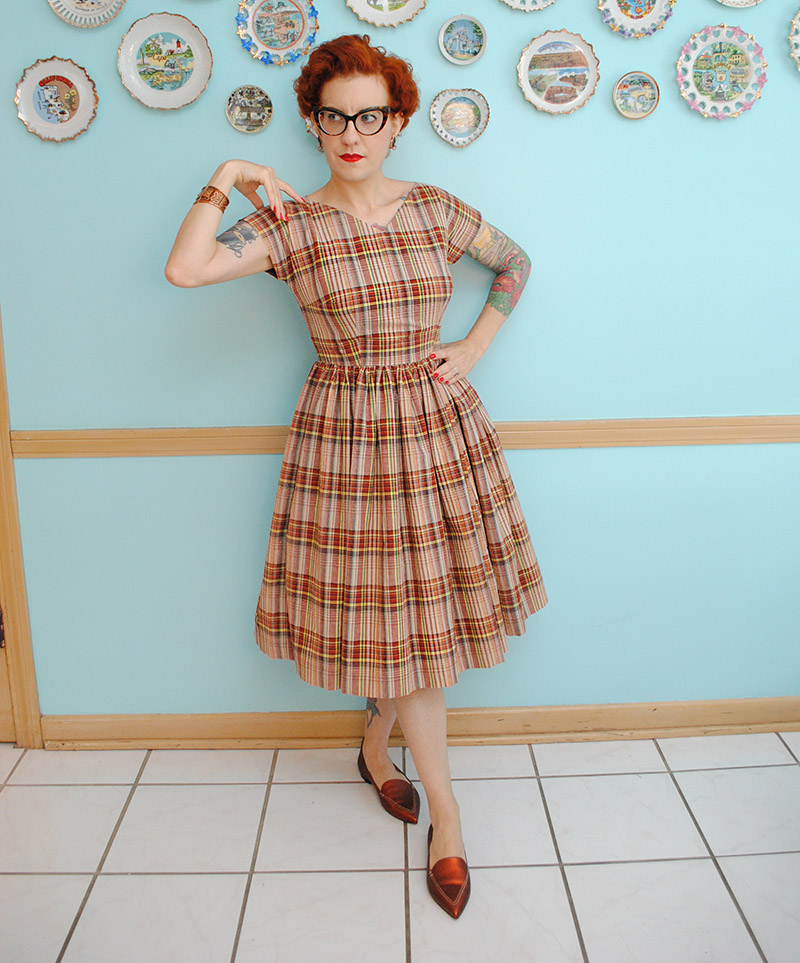
Now I’m going to share something interesting about plaid with you. Matching up plaid takes a lot of time, but so does placing everything in an eye pleasing manner both vertically and horizontally. Sometimes you get it… sometimes you don’t. I very carefully centered my plaid so that the yellow vertical lines fell nicely on either side of the V neck. Up close, you can see that. there’s even a tiny thin black bar coming straight down from the V. I was so pleased.
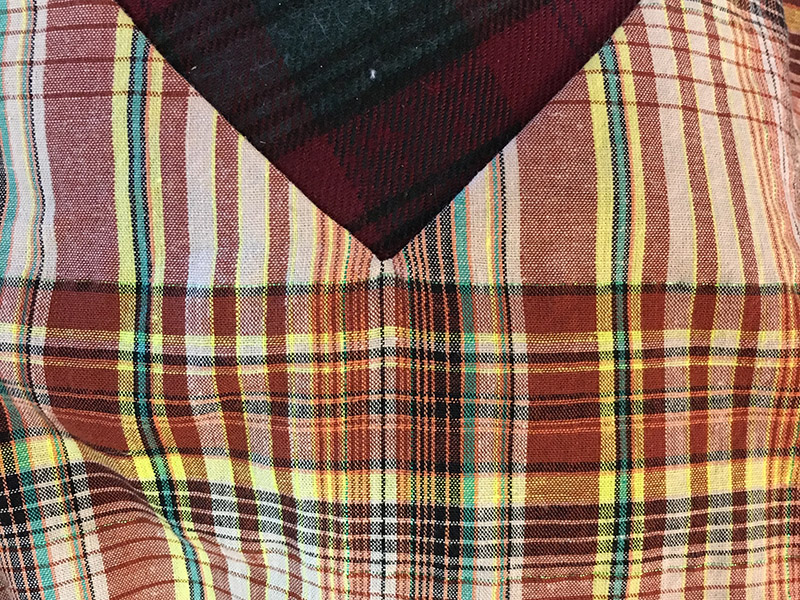
Until I tried the dress on. You tell me what you see. If you’re like me, you’ll see the wider medium brown vertical lines jumping out, so it looks off-balanced. Whoops! That’s a good reminder to to stand back from your fabric when placing the print, too.
No matter, I’m still very fond of the dress. And perhaps as the plaid’s way of making it up to me, the skirt side seams lined up so well with the vertical lines on accident (of course I lined up the horizontal ones) you can’t even see them!
I barely had a chance to wear this before it was too cool (in fact I took these photos over a month ago), but I’m looking forward to wearing it again next year… and making several more versions of my new hack for this dress pattern.
In fact, I’ve already made a version with a circle skirt, and I can’t wait to show you that one, too!
outfit details
vintage dress – made by me
vintage copper cuff – misc.
vintage Matisse earrings – misc.
shoes – M.Gemi
Such a sweet dress! I think it looks really lovely, and so wearable.
I am going to try your bodice lining hack now too, thanks for sharing your success.
Thanks, you’re very welcome!
The bodice hack – So very clever of you!
I don’t quite get how you did it, but maybe I will figure it out with some practice trials for my daughter’s dolls…
Thanks! It was fun and easy to work out in mini form! 🙂
I agree I read and re-read your explanation and didn’t know what you meant by “I sewed the cut-on sleeve seams together” – which seams are these exactly? I would LOVE it if you did a tutorial on this method because I just LOVE that finish on the neck and sleeves 🙂 Beautiful plaid – I don’t think it looks drab at all but then I’m a fan of brown.
The literal sleeve seam– the flat edge that forms the hem of the sleeve. It makes sense when you’re doing it trust me. The part that if you weren’t lining it, you’d either be binding with bias tape, or turning in twice and sewing shut, etc. So where you’d use a sleeveless tutorial, instead of sewing the sleeveless armhole edge together (i.e. the hem of a sleeveless sleeve, if you will), you’re sewing the hem of the ‘cap’ sleeve that’s formed by the cut-on sleeve. That’s the only difference, you still pull it through the shoulders like you would for sleeveless, sew the neckline the same, etc.
Sorry, I am so behind on tutorial promises there’s no way I can say I will do one for this. But if you give a mini one a shot like I first did, you’ll probably be able to figure out what I meant!
reminds me so much of a vintage pattern I had my eye on and missed out on! http://www.rustyzipper.com/shop.cfm?viewpartnum=324659
Wow that IS so similar! How neat!
How did you change the sleeves? Looks so nice I want to try them.
You might be able to find a tutorial online, not sure. Basically I extend the armhole out and deepen it to match a pattern I already have with cut-on sleeves (or you could do it based on an existing garment, so your armhole is deep enough). It can be a bit tricky with a bust dart but I can usually make it work out (I’ve done it to a few patterns).
Thanks. I might try it.
This looks really nice. Looks surprisingly modern with the higher waist.
What a lovely dress! You should sell that pattern, I would gladly buy it. Plaids are so perfect for autumn. I also see the brown vertical lines, very strange, looked so perfect up close. I don’t think I’ll ever dare sewing a plaid dress. You could make a hair bow of the remainings. Merry Christmas to both of you from Denmark. 🙂
I think that plaid and color look delightful on you. Especially with your hair color. And by the time you add accessories, it’s a even more interesting. The neckline is super flattering too.
Really lovely dress! Wish I could sew like you.
Hi Started making a dress with similar bodice to your brown dress with the cut-on sleeve thing! Ha you are so right a doddle doing them your way!! Thanks very much for sharing the tip regards Jo
Ps Hope all is well with you & yours as no posts! You are missed very much. Take care.