Hi everyone! I’m back with some details on my Innsbruck ski pullover. Like I said in my first post, I knew I was going to have a lot to say about the construction, so I wanted to dedicate a separate post to it for the folks who like the dirty details.
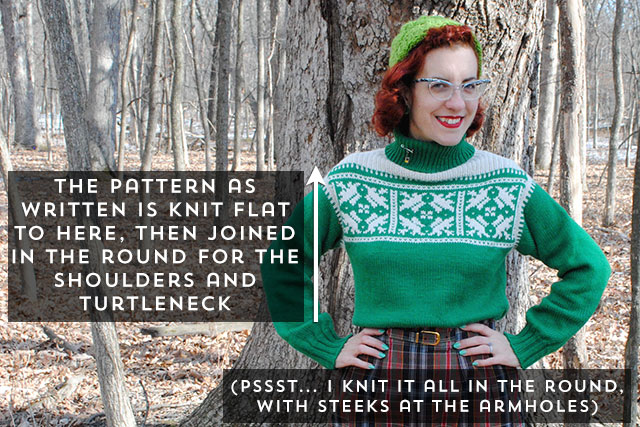
As you may recall, I was initially planning on knitting the pattern exactly as written. It’s an unusual construction, particularly for a vintage pattern: you knit the front and back separately up to the top of the armholes… that’s obviously not the unusual part. But then you join them above the colorwork for the white ribbed yoke on up to the green ribbed turtleneck. So it’s kind of a mixture of a set-in sleeve and round yoke… well not really, since you shape the shoulders at each side more like a raglan… yeah, like I said, it’s unusual!
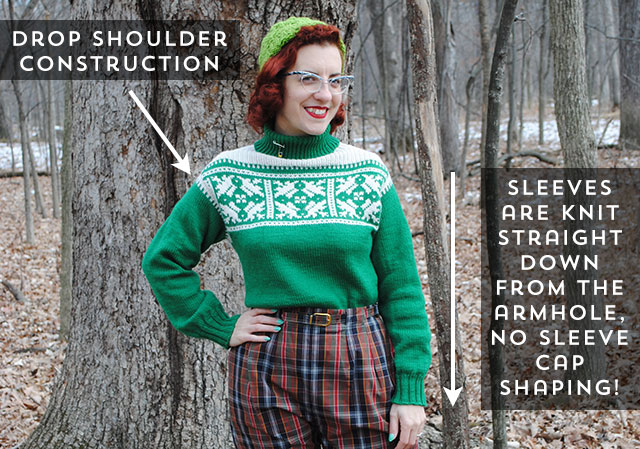
It’s also a drop-shoulder construction. There’s minimal armhole shaping (just binding off a few stitches), and the sleeves are knit straight out from the armholes with no cap shaping (just minor shaping to make the sleeve get a bit narrower at the cuff). Drop shoulders are great for casual pullovers like this and the sleeves couldn’t be easier.
Here’s why I am a huge fan of measuring and swatching and plotting before I start to knit, especially when colorwork is concerned: I discovered that the row gauge given for the pattern couldn’t possibly have resulted in a colorwork yoke nearly as tall as the one in the original picture.
How did I figure that? It was really easy. I just counted how many rows were in the chart (37 rows), and divided it by the row gauge of the pattern, which was 7 rows per inch.
37 rows of the chart ÷ 7 rows per inch = 5.2″
No way was the entire yoke only 5.2″ tall! Considering most vintage women’s knitting patterns for about this size have somewhere the realm of 6 – 7.5″ armholes give or take, and drop shoulder sweaters usually have deeper ones than that, and the colorwork chart didn’t start until after the armhole bind off, the chart on the sweater shown was definitely taller than 5.2″. Granted stranded knit rows tend to be a little bit taller than plain stockinette ones, but that wasn’t accounted for in the pattern, and I was still wary since I know my typical row gauge is a little tighter in general.
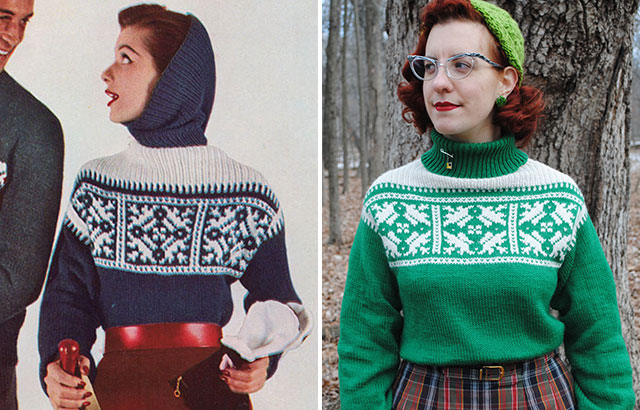
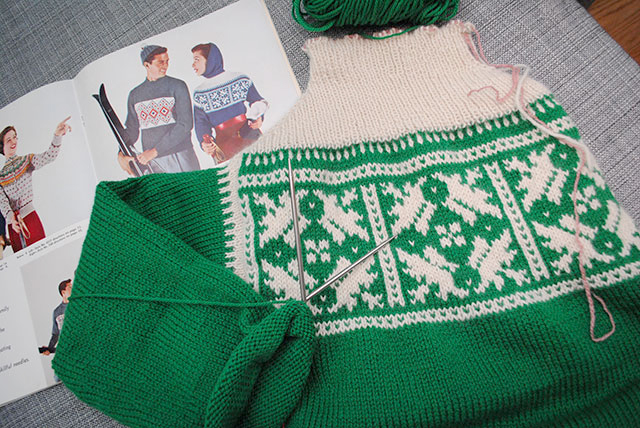
For comparison, in the end mine was about 6″ tall, and look at mine and the original side by side. Not exactly the same but pretty close.
Knowing that the colorwork yoke as written wasn’t going to be as deep as I wanted, I made mine a little taller by adding more rows to the chart. I threw the chart into Excel (I’d usually use Stitch Mastery but wanted to do it quickly) and simply duplicated a few of the rows to make it all just a bit taller. So instead of a 37 row chart, I knit a 47 row chart. You can see that the section still isn’t as tall as in the original photo, but it’s pretty close. I also opted not to have the white columns between each motif extend to the bottom and top of the chart, because it would have meant stranding the white across 25 stitches. I could have caught the yarn every several stitches but I didn’t want to chance pops of white show through, so I just omitted that. It definitely doesn’t detract from the design. (And if in hindsight I felt it did, I could have just duplicate stitches those few white stitches.)
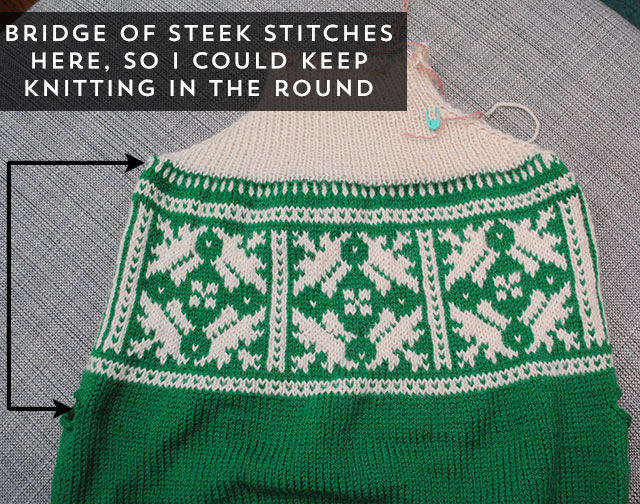
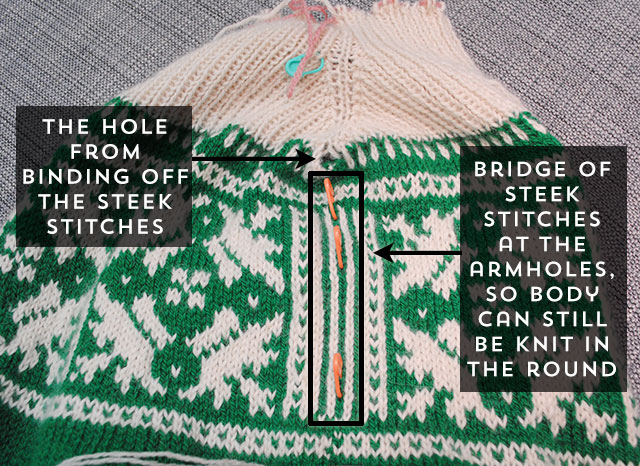
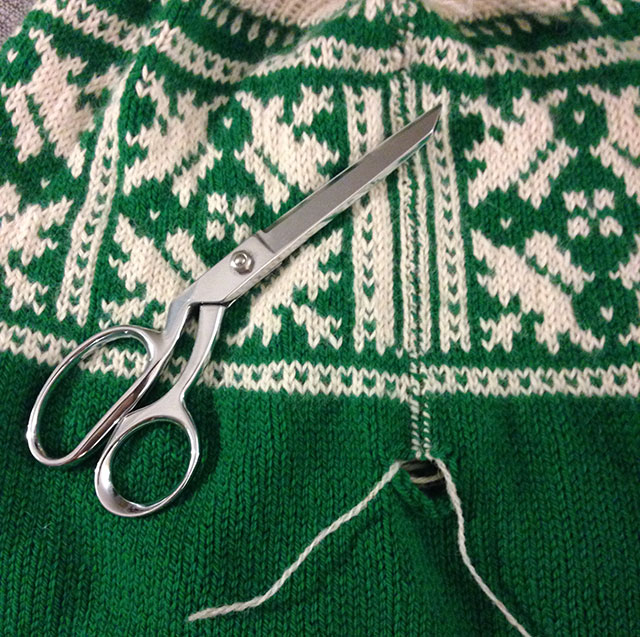
The other change I made is that I knit the entire thing in the round after all, even though I was going to knit it flat up to the white yoke, as written. This didn’t change anything except how I approached the armholes. For them, I used a bridge of steek stitches at each armhole so that I could continue knitting uninterrupted. I think I scared the hell out of a lot of people when I posted a video of cutting one of the steeks on Instagram!
Basically, I bound off the number of stitches for each armhole that the pattern told me, then in the next round cast on several stitches at each side for a steek, and carried on knitting in the round.
From the front, it looked like this: basically, a sweater without a way to get your arms in!
From a side view, it looked like this:
While neither of my yarns were superwash, they weren’t very sticky or hairy, either. I’ll be honest, I initially made the wrong choice for how to reinforce my steeks. As I’ve done more than once in the past (note: with stickier yarns), I used a tight whip stitch on either side of the cut, basically stitching one leg of one stitch to the neighboring leg of the stitch next to it. I should have done this twice—stitch one leg of the center stitch to the leg of its neighbor, and then the other leg of its neighbor to its neighbor. That makes a reinforcement over 3 stitches on each side of the hole (and in terms of hand sewing reinforcement methods, it’s a way I personally prefer slightly over taking small stitches in a vertical column with thread). Or, I should have used my sewing machine to reinforce the steek. (Note: a crochet reinforced steek wouldn’t have helped with the less-than-sticky yarn.)
I knew better and I still didn’t do either. Sometimes you’re just lame like that, what can I say.
I actually had planned to use the sewing machine but when it came down to it, I felt too lazy to go down to the basement and actually do it, so I hand stitched instead, but just once, not twice. It was a mistake. The alpaca was way more slippery than I anticipated, and when it came time to start picking up stitches around the first armhole, it was getting, well, a little ravel-y, so I felt concerned. I didn’t actually think it would ravel all the way to where I was picking up stitches, but I didn’t want to take a chance. So I just took the sweater to my sewing machine and did two lines of tiny zig zag stitches.
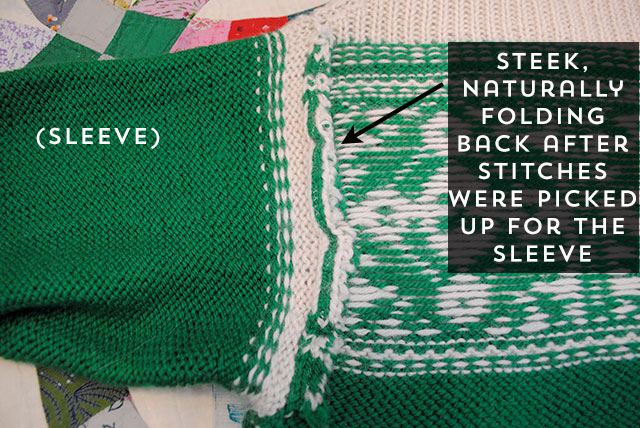
I decided just to leave the edges as is without covering with a separate facing or anything, or trimming the ends close to the machine-stitched lines. The steek stitches turn back nicely and make a little facing of their own, folding back against the work. Mine isn’t so tidy at the edge, but eventually with wear it’ll felt in. Quite frankly, it’s inside my armpit and it doesn’t bother me. If it was on the center front edges of a button band, I’d cover with a nice decorative ribbon. But it’s not, so I’m not going to.
I should say here that I generally much prefer to use steeks when knitting with woolier wool that’s more sticky like a Shetland wool, and I don’t reinforce them at all. But in this case, I was working with the yarn I wanted to use for the project. But as I was doing all this, I must admit I was reminded why I prefer steeking wooly wools that play ball better. 😉
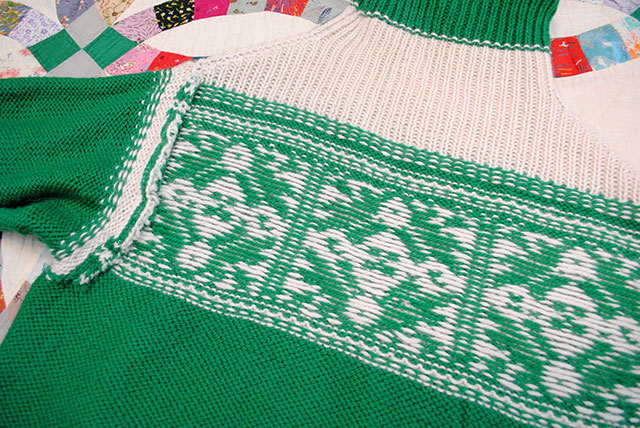
But hey, look at the nice floats behind my colorwork. I love the way stranded knitting looks from the inside! I give some tips in a couple of my previous posts (discussed in an older post here, and more recently here) about how to keep your tension even in colorwork, if you’re looking for more info on that.
And if you’d like to learn more about steeks, Eunny Jang did a great series several years ago that I encourage you to read, and you should also read Kate Davies’ more recent wonderful series on steeks, with lots of gorgeous examples of Shetland knitting.
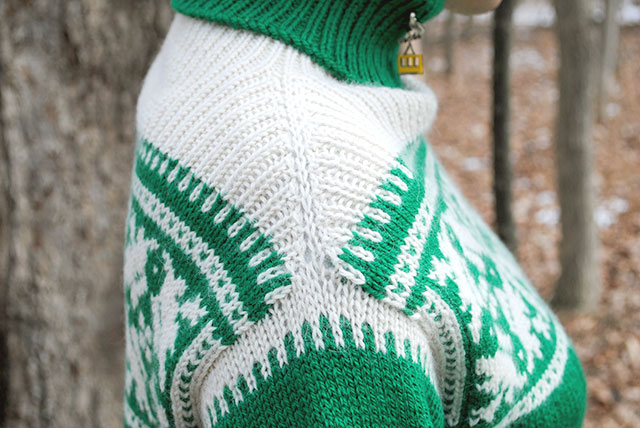
Anyway, after the steeks, I knit the white ribbed yoke and the turtleneck in the round. If I’d knit the sweater as written, I would have knit both pieces flat up to this same exact point, and then join it all in the round and proceed exactly the same way until the end. The ribbed yoke was shaped at either side, kind of like a raglan sleeve. Shaping in ribbing can be perplexing, but in this case you just leave a stitch in the middle (or actually 3 I think; I changed the pattern slightly but can’t recall why), so the decreases don’t interrupt anything. And it looks neat, too:
The turtleneck is actually white up until close to the fold. I knit the entire body up to that point and then put the white turtleneck stitches on hold while I cut open the armhole steeks and knit the sleeves.
I mainly did this because I thought I was going to run out of green yarn. I was pretty confident I had enough to knit both sleeves, but thought I was going to run out on the turtleneck. So by knitting the sleeves first I could ensure that if I did need to get another dye lot, I’d use it for the whole turtleneck, and it wouldn’t be very noticeable since it was broken up by the white ribbed yoke. Though as it turns out I had plenty of yarn! So when I finished the sleeves, I picked up the white stitches and continued on in green for the rest of the neck.
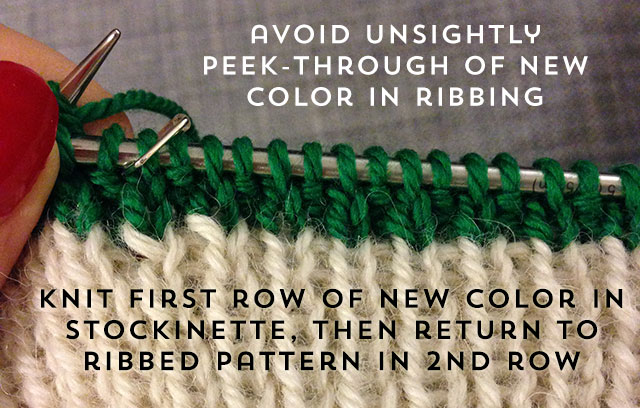
If you’re ever transitioning between two colors in ribbing, here’s a tiny tip: after the last ribbed row in the first color, knit one row plain in the new color. Then begin the ribbed pattern in the new color. It makes a much tidier transition from color to color without seeing the second color peek through the last row of the first color. (TECHknitter has a super in-depth post all about those dots that peek through, for the curious!)
So that’s an inside look at my Innsbruck ski pullover, bottom to top to inside! An unusual construction, cutting knitting, and colorwork. All aspects of knitting that I really enjoy! And it’s a frigid day today, so you better believe I’m wearing it again. See, I knew I’d finished it right on time. 🙂

I always love your technical posts about knitting. I’ve learned tons reading your blog!
thanks for all the detail on what you did. this is super neat, and it turned out quite lovely, lady!
Huh! That is an unusual method of sleeve/shoulder construction! I probably would have knit in the round like you chose to do, but even after steeking, I’m still terrified of it! 😀
You did such an amazing job on this jumper. Your stranding is amazing, I don’t think I’ve ever seen the back of strand work look that even. Thank you for the links on steeking, I haven’t tried it yet, but it is in my list of knitting goals for 2015. It’s good to know that it will be a bit easier with the stickier yarns.
She Knits in Pearls
I’ve just got back into knitting, I wish I’d known about the two colours in ribbing on my last project because I was kind of stressing that it looked bad and it was a present but the recipient seemed happy enough. At least I know for next time. Lovely post and lovely jumper.
xx
Thank you so much for sharing these details. You are right about measuring and plotting before knitting; this saves much frustration. I will definitely be studying patterns more thoroughly before picking up my knitting needles. Thank you again, for sharing your thought process, it is very helpful in detailing what things to look for in patterns.