
Today is day three of my mini series on nail care. And I’m going to show you how to use a gel polish kit at home!
There are lots of places you can buy gel polish and kits to get you started (I’ve even seen gel polish at Target). When I started using it a couple of years ago there weren’t quite as many options readily available that I knew about, although you could still buy the individual supplies at places like like Sally Beauty. But when you’re starting out, that hand-holding can be kind of nice, you know? At least it was for me. So I bought the Gelshine kit from Sephora and OPI, although now there’s a bigger variety available and most are at least somewhat less expensive. (And I’ll be reviewing a different kit later in the series!)
Basically, the main supplies a kit comes with are usually something like this:
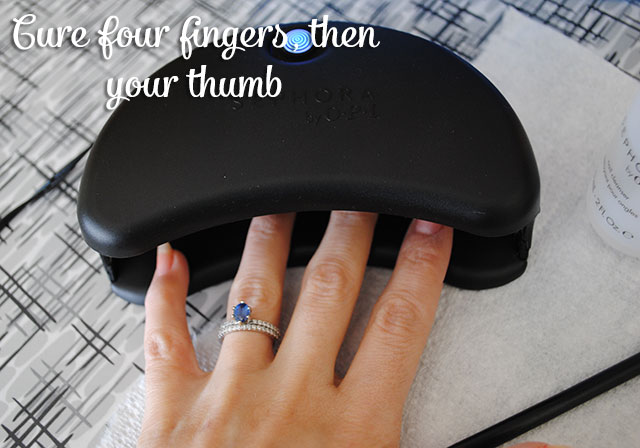
- An LED lamp to cure the polish. This is a small little guy that can fit in a drawer. Don’t worry, it’s not huge! With an LED lamp each coat cures in 30 seconds, pretty speedy. I do all 4 fingers together, then my thumb separate. Gel polish can also be cured with UV lamps, but it seems like more companies are going towards LED, which is nice.
- A base coat and top coat. Some brands combine this into one.
- A cleaner. Before you start to polish and after you use the top coat, you must clean your nails. You don’t need anything fancy… the ingredient in the cleaner that came with my Sephora kit? 100% rubbing alcohol (aka isopropyl alcohol). Cheap as can be at any drug store!
- Remover wraps of some kind. Gel polish soaks off, so your kit will come with at least 10, one for each finger. You wrap your fingertip with it while you soak off the polish with an acetone-based remover. (More on this later in the post.)
- Some incidentals. Usually a sanding block, an orange stick, a cuticle pusher… things like that.
One thing worth noting: depending on where you buy it, I’ve noticed that some beginner gel polish kits do not include an LED lamp. If that’s the case, you’ll have to pick one up extra. For example, Sally Beauty has a Gelish Basix kit, but you have to buy the lamp separate. Although you don’t have to get a lamp that’s the same brand if you’re going à la carte. Some kits to consider:
- Sephora by OPI Gelshine kit
- Couture Gel Polish Starter kit
- Gelish Basix kit and separate LED lamp
- NaiLuv Starter kit
Now, the rest of this post isn’t a tutorial per se. If you buy a gel polish kit you’ll find instructions with it. But the quickie run-down is about like this:
- Clean your nails.
- Paint on base coat, cure under the LED lamp 30 seconds.
- Paint on each color coat, cure under the lamp.
- Paint on top coat, cure under the lamp.
- Clean the sticky layer off your nails.
- Go and do anything, you’re done.
So I’m not going to reinvent the wheel! But I thought you might appreciate me running through the steps and adding my two cents of things I’ve learned along the way. As I do. 😉
Preparing my nails to apply gel polish
Before I do my nails, I have to remove the old nail polish first of course, but since we’re starting at the beginning here, let’s just pretend I’m starting out with nekkid nails, shall we? (They look extra dry here since I had just cleaned them, and as mentioned above, the cleaner is rubbing alcohol which temporarily dries everything out.)
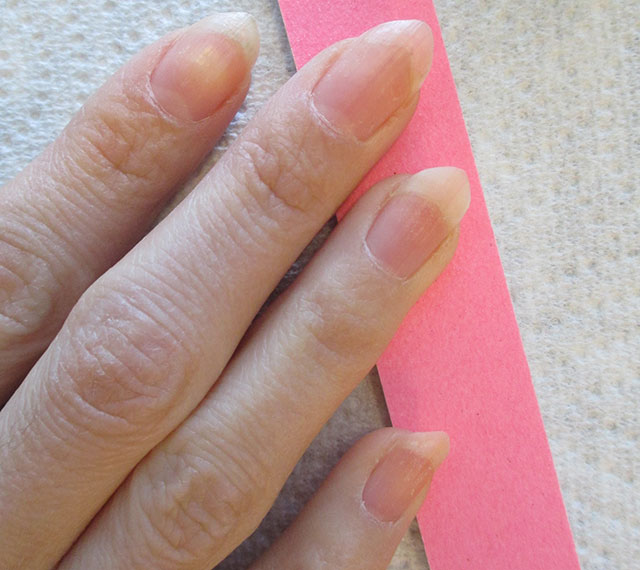
Don’t apply hand lotion the day of. I do not use lotion of any kind on my hands that day. Why? The extra oils can contribute to the polish lifting over time.
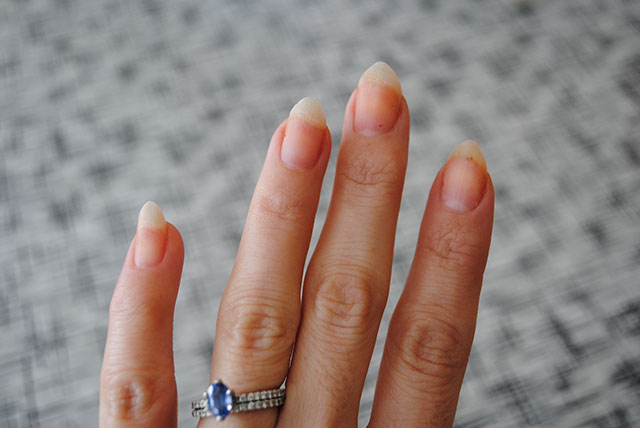
File or trim nails as desired. I’ll talk more about trimming and filing in tomorrow’s post. In terms of shaping, lately I’ve been trying to get more of an oval shape to my nail, but it’s difficult as I have narrow nails and short nail beds, so the look isn’t as dramatic and glamorous as the vintage ideal I’d love to have. In fact as my nails grow longer they start to curve at the sides, so they just refuse to take on a nice oval shape at all. Ornery buggers.
So, I just do my best to make them look nice. Also, the added pointiness tends to make me catch them on things more often and break the tip. (Which I did last week. Twice.) But when I do shape them like this, I simply trim my nail into a slight point, then file to shape.
If my cuticles need any managing, I’ll slightly push them back with a cuticle pusher, but I never, ever cut them. I find I don’t have to do much with them to keep them looking nice with my regular nail care routine, which I’ll talk about in tomorrow’s post! It’s worth noting that, as I mentioned, I was always a nail biter and my cuticles looked like utter crap. When I’m nice to my nails, my cuticles definitely respond in kind.
I don’t buff my nails at this point. Instructions for gel polish kits have you do this step, but I have been skipping it for over a year. (And I’ll talk more about that tomorrow.)
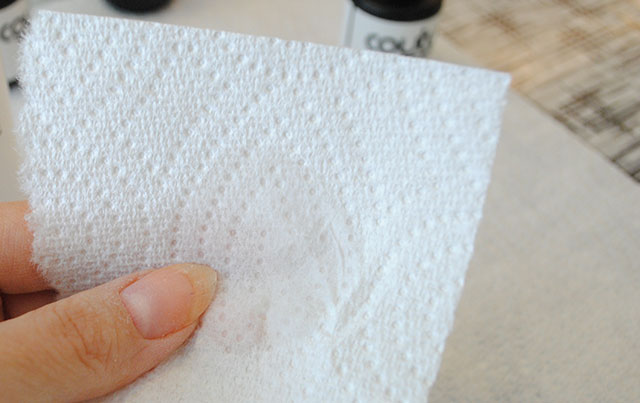
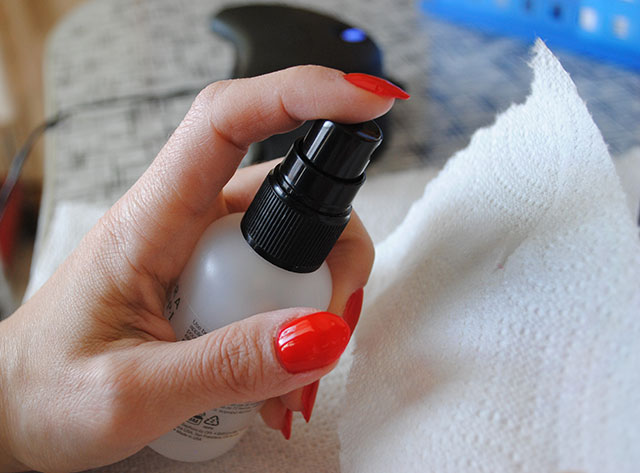
Clean nails. Don’t skip this step! As directed in your kit, you’ll need to clean off the surface of your nail with a lint-free pad of some kind. (Honestly, once the fancy pads in my kit ran out, I’ve used a paper towel ever since.) You just spray the cleaner (rubbing/isopropyl alcohol!) on your nail and thoroughly clean off the top and if you have any free edge, underneath and the free edge, too.
Don’t be scared that it’ll leave your skin all shriveled up and white (and don’t be scared of my fingers looking like that in some of these photos, ha ha)… that’s just the rubbing alcohol drying things up. When you’re done painting your nails, you can wash your hands and apply lotion and all will be well again.
Painting my nails
If you’re reading this, you probably get the concept of painting your nails so I won’t reinvent the wheel. Plus, it’s damn hard to photograph your hands close up, and I just couldn’t get any even halfway decent photos of me painting my nails. I honestly don’t do anything different in terms of painting them, except what I’ve mentioned below. So I’ll give you a few tips I’ve picked up that will help the polish look better and last longer!
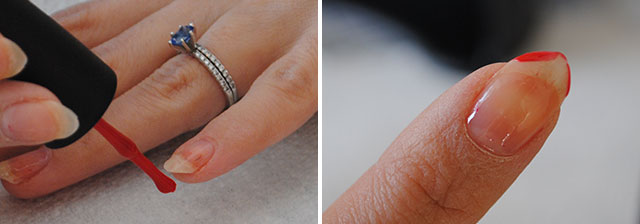
Wrap / cap the tip of your nail with every coat. This is a hard one to explain but if you have any free edge (i.e. length) to your nail, it’s crucial! And it helps even with regular nail polish, too!
With every coat (including the base coat), you want to take the length of the brush bristles and run them against the tip of your nail. If your nails are short it’s hard to do this without getting polish on your finger under the nail, so if that happens just wipe it off with a cotton swab soaked in acetone. I wrap the tip of my nail in polish, then paint the coat on from base to tip like normal. It’ll look something like this:
Use thin coats. Gel polish is thick, so you want to go relatively light with your coats. The coats will still be thicker than normal nail polish, and the polish is less runny and thin, so it’s much easier to control. Good news for those of you who (like me) had a hard time keeping normal nail polish off the skin surrounding your nails!
Some polishes say they can be opaque with just one coat but I’ve yet to find one. (Same goes for regular nail polish, too.) I use 2-3 coats usually, although for very light colors I’ve done as much as 4. I really prefer opaque polish though, so you may find you need less, especially depending on the brand and color. Pretty much exactly the same with any polish too, right? Nothing new here.
Do your four fingers and thumb separately. Especially with smaller lamps, you can’t fit your whole hand in. So I paint all 4 fingers, cure the coat, then do my thumb and cure that coat. Plus, it means you’re less likely to ding up your other nails when you change your hand position to paint your thumb!
This stuff self-levels. It’s kind of genius, and one of the reasons the polish looks so good! Gel polish self-levels, meaning you won’t get lots of lines and ridges and brush strokes. But my tip on this is when you finish the last finger before curing the coat in the lamp, let it sit for a few seconds. The other fingers will have sat around while you’ve painted the rest, but you want that last finger to have a chance to level off, too. Just 2 or 3 seconds should do it.
Do one hand at a time. Don’t try and do one coat on one hand, then on another. It just gets confusing. Plus, gel polish is tacky between layers and you’re more likely to mess up your polish if you try that. Finish one entire hand first, then move to the other.
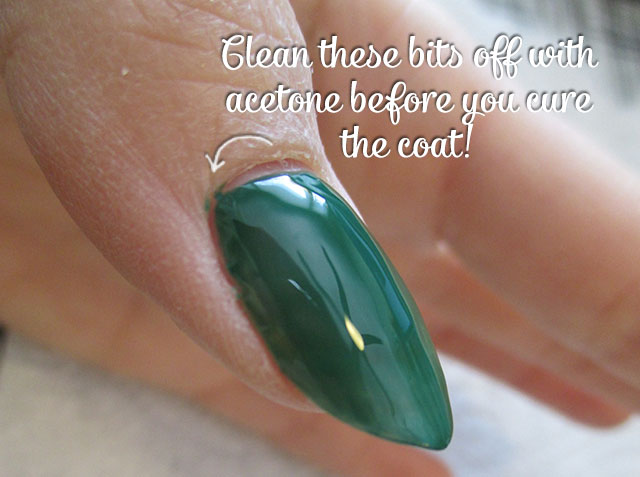
If you get polish on your skin, remove it before you cure that coat. If you accidentally get a little polish on your skin, it’s not like regular nail polish that you can just rub off in, say, the shower. If there’s any polish going from your nail to your skin or cuticle and you cure it, it will lift off and mess up the edge of that nail! So use a little acetone on a cotton swab or cuticle pusher or orange stick (or even a toothpick) and get that off before you cure that coat.
I admit: I Photoshopped this photo to make it look worse. Because, as I mentioned, the polish isn’t as runny, I actually find it easier to apply gel polish, so I’m much neater polishing my nails with it than regular polish. I confirmed this when looking back at every photo of my hands I could ever find to compare nail polish. Ha ha!
(And yes, gel polish is so glassy you can see the reflection of your ceiling fan in it. Strange but true.)
Do not forget to clean your nails at the end. The polish will be sticky until you wipe it off. You use the same cleaner (rubbing alcohol) to clean off your nails after you’ve applied the top coat. If you buy a kit it’ll tell you to do this in the instructions, but somehow some people forget as I’ve seen occasional complaints about it being sticky even when you’re done. That’s only if you didn’t clean it off.
And then it’s like a little nail miracle! They’re dry, they’re hard as a rock, they’re shiny and brilliant. Wash your hands, apply lotion, and voila!
 Couture gel polish in Pretty Little Liars
By the way, you can still do nail art! I don’t do it a lot, but you can totally still do fun nail art with gel polish. Just cure between each motif you’re doing, at the point when you’d let it dry between coats normally.
I’ve had less success with half moon manicures, sadly. 🙁 I can only do those with stickers (not adept enough to freehand it), and my attempt with stickers and gel polish didn’t work well. I did manage to do it by ‘sandwiching’ normal nail polish between a gel base and top coat, but it kind of defeats some of the purpose of using gel polish. So my hunt goes on for a good method for this.

You can also mix and match brands. I’ve had no problem using Sephora, Gelish, Couture Gel Polish, or IBD brands of polish. I love having options!
Removing the polish
I rough up the old nail polish with a sanding block. Just lightly to remove at least the top coat, not enough to get to your actual natural nail, of course! But it does help the polish lift off much quicker. Below, you can see what it looks like:
Soaking off the polish. When you’re ready to remove your gel polish, you can’t just wipe it off with acetone. The base coat helps it bond more with your nail. You have to soak it of. There are different type of ‘wraps’ you can use, which you literally wrap around each finger to soak off the polish. I used to be partial to the type that kind of look like little band-aids (like these), but now I’ve switched to using the type that makes a little foil package around your finger with a cotton pad inside (like these).
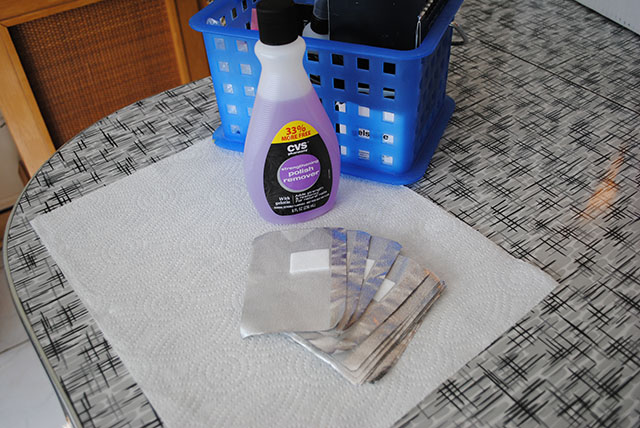
(And actually, if you don’t want to buy wraps or you run out, you can always cut out little squares of aluminum foil, plop an acetone-soaked cotton ball in it and wrap those around your nail, instead.)
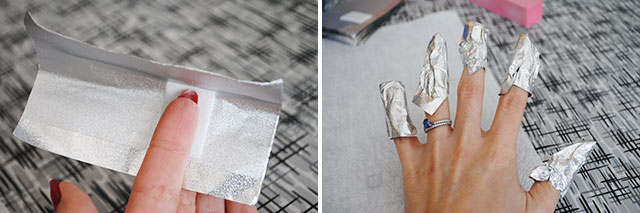
When I started using the band-aid type, I’d put my hands in little gloves that came in my Sephora kit (like the type you use if you’ve ever dyed your hair at home). It would take about 20 minutes for the polish to fully remove. However, I’ve discovered I can cut that time in half when using the foil wraps. They don’t fit as tightly so it feels like maybe it’s not going to work, but it does every time. Only 10 minutes to remove the polish every two weeks or so? That’s totally worth it in my book! Even if you want to do one hand at a time (which I sometimes do just because it’s annoying trying to get little wraps around one hand with them on the other hand), it’s only 20 minutes or so. Not bad, considering how long the polish lasts.
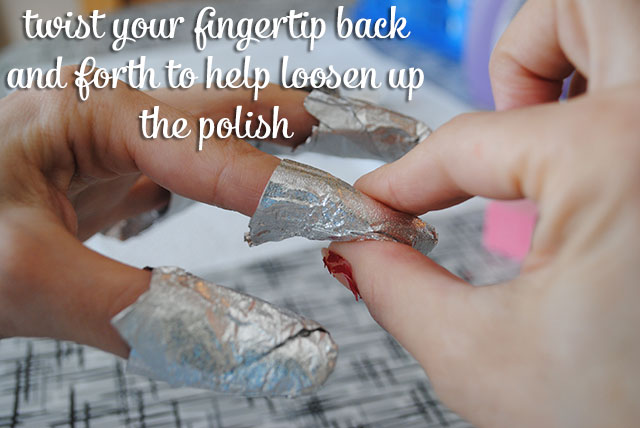
Twisting your fingers. Sounds like a funny tip, but I highly recommend it: when I’m sitting around watching TV while I wait for the acetone to do its thing (because what else are you going to do?), periodically I give my fingernail a little twist with the thumb and forefinger of my opposite hand. This helps loosen up the polish. I do it when I remove the wraps, too.
Don’t peel off the polish. Please don’t. Because the polish bonds more with your nail than regular polish, you can accidentally peel a bit of your nail away if you start to peel the polish! Okay I’m not going to pretend I haven’t done it, but really, don’t do it. If you remove the wraps and the polish isn’t coming off in big chunks, give yourself a few more minutes, don’t start peeling or scraping away at it.
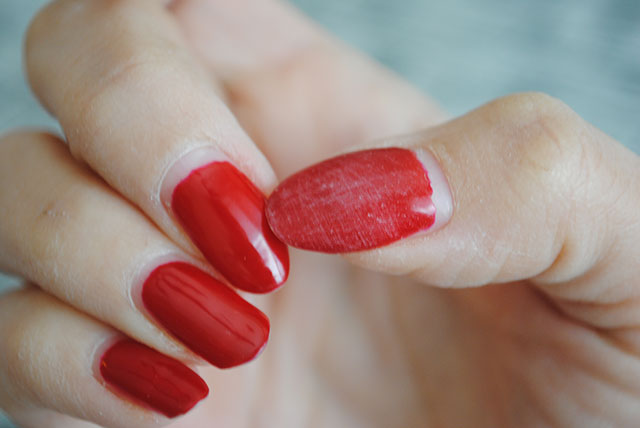
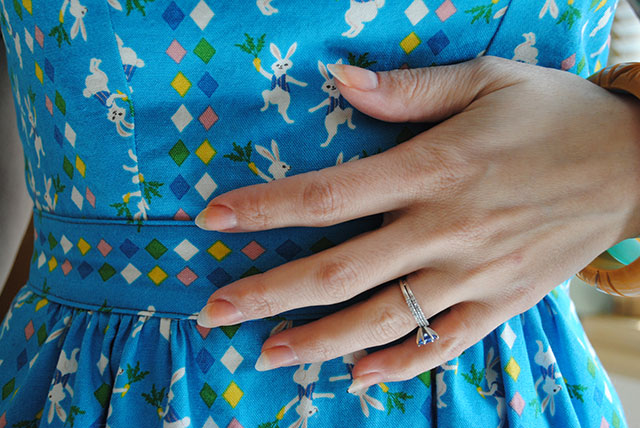
What does it look like when it’s done? About like this. (Pardon the slightly orange nature of my nails, the polish before this one was an orangey coral–Gelish Tiger Blossom–and for some reason that one stains, although usually gel polish doesn’t.)

Hot tip! This is a great way to remove thick glitter non-gel polishes, too!
If there’s any extra bits of polish left, you can very gently push it off with an orange stick or a fingernail. Then I wash my hands and I’m ready to file them and paint them. Although sometimes I’ll pamper them a bit and give them a rest until the next day, when I paint them again.
Next time…
Curious about my in-between nail care that keeps my nails looking good? It’s just a few easy things but it’s helped a lot. Stay tuned tomorrow to find out more!
I’m loving this series, Tasha! I have a lot of the same problems with my nails as you did – peeling, ridges, etc. Because of that I’ve been afraid to try gels; I was always worried that the removal would be too damaging. But your nails look great! I’m slowly becoming convinced that I should try it 🙂
How cool! I actually just picked up a gel mani kit. I didn’t do my thumb separately and it looks like all the polish kind of slipped to one side so that’s a really good tip!
I’m really enjoying this series because I LOOOOVE nail polish but it HAAAATES me! It always chips within 48 hours and I find myself redoing my nails after about three days. I have tons and tons of regular nail polish – when you mentioned sandwiching regular nail polish between a gel base and topcoat, how did that work out for you? You said it defeats some of the purpose of using gel polish, so I’m assuming it didn’t last as long? My huge collection of polish plus the somewhat limited colors of gel polishes are the only things holding me back at this point, so if I could use regular polish with a gel base and topcoat, that would be perfect!
Thanks for this great series! Iam only worrying about aceton because I have so dry nails and hands.
Your nails look so great, thats a really good argument.
I’m really enjoying these posts! They are so informative and are answering questions I didn’t even know I had! Can’t wait to see the rest 🙂
I’m totally loving this series! I have a birthday coming up and I think I’ll be asking for a gel nail kit.
Lisa.
I have been avidly reading your series. I think we’re nail twins! I adore gel manicures, but it’s just not feasible to do them constantly in the salon. They’re so expensive! My nails sounds similar to yours though — weak, won’t grow, peely, etc.
So here’s my question. If you were going to purchase one of those kits tomorrow, since you said there was less choice when you bought yours, which kit would you buy?
I am really enjoying this series too. I also have switched to doing my nails at home. Its far more economical plus if you don’t like they way they turn out, you can fix it! And I love having the option of filing my nails in different styles that would never have lasted without gel. I have a few ideas that might be helpful. Red Carpet Manicure which I think is also made by Nail Harmony/Gelish is slightly more opaque, at least I’ve found it so. Not sure if you’ve tried that brand. I make my own foil wraps, but instead of cotton wool, I use make-up sponges I cut to fit. I find that the sponges really hold the acetone which helps remove the colour. Also, I often do two coats of base, then a top coat (all cured btw each) so I can then use my nail varnish over it (with another normal top coat). I get the strength of the gel but get to use shades I already have and might not purchase in a gel.
I don’t have any Dublin tips, but check the weather. I know you’ve been this way before and probably know our ‘springs’ can be wet and warm or cool…we’ve had a varied one this year. I live in the UK but close enough…bring tights! 😉
OOO! Such great advice, especially for glitter nail polish.
Are the curing lights just like any led light or are they specialized? Could I stick my hand under any light with a strong led bulb for it to set?
I want to give a tip to those doing a half-moon manicure. A lot of people seem to think that half moon = giving a super round shape at the base of the nail bed. After watching that makeup video Glamourdaze had posted awhile back, I took time to really study everything. While illustrated ads did show a very round half-moon, if you look closely at that video, you see that it’s only very subtle. I’ve always taken it as painting your strokes with the Lunula in mind. I don’t care for doing a half-moon manicure anymore, but when I did, I used the 3 stroke method. It comes out looking like this: (screenshot from video). http://oi62.tinypic.com/33th5x1.jpg
So if you’re trying so hard to make it look round, don’t worry about it. It’s not even authentic anyway. Using those binder stickers was always annoying for me. If you’re lucky enough to find non-manicure tips, or use your own brush with thinner bristles and a blunt edge, it’s much easier to do an authentic half or full moon (no tips). For a full moon, go sideways instead of base to tip.