Thanks for your patience, everyone! Your comments on my last post were very much appreciated by both Mel and I, I can’t even tell you how much! ♥
I now can get down to a little bit of Knit for Victory business. So let’s talk swatching and casting on, for those of you knitting my Victory beret!
There are different ways to swatch for projects that you plan to knit in the round. And if you’ve already done it, then you can pretty much skip this post entirely. But for some of you, I hope this will help you out a bit.
Even though you might be tempted to knit your swatch flat (working back and forth every other row), don’t do this. Why?
Because your gauge may not be the same knitting flat and knitting in the round. Even if you normally don’t find this to be the case, you may when you start knitting with two (or more) colors in a row. Some people knit colorwork looser than their normal tension, some tighter, some just the same. And depending on the project and yarn, your results may vary.
So you need to swatch in the round. By nature, it’s kind of a pain. I won’t lie. But there’s a couple of ways you can do it.
One way to swatch in the round
One thing you can do is to swatch in the round using double-pointed needles, or two circulars (dividing the work half on each needle–a method I use a lot for small-diameter circular knitting), or one long circular using the Magic Loop method. There’s dozens of tutorials online for knitting in the round on two circs or using Magic Loop! Here’s one for two circs, and one for Magic Loop to get your started.
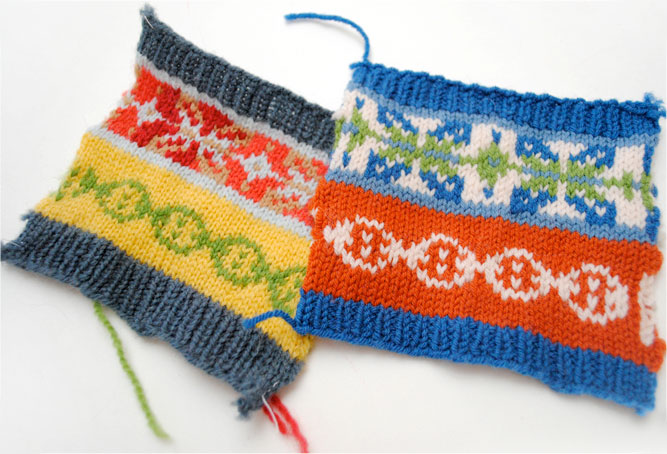
A nice-sized swatch should be at least 4″, but even if you add in another inch or so, that’s a pretty teensy tube to knit. And that’s fine, you can certainly do it. You may want to cut the swatch up the side to lay it flat to more accurately check your gauge. I used this method for the two swatches at the bottom of this post (and shown below), and you can see I just cut it up the side so I could wash and block the swatches flat.
Caveat emptor: there’s one issue I sometimes encounter when swatching in the round this way. My swatching gauge doesn’t always match my working gauge. Teensy tubes tend to cause me to tighten up in my knitting. Also, if you use double-pointed needles for the swatch but you’ll be using circulars for the main project, you may find that can cause a difference in your gauge, too. So your mileage may vary.
Another way to swatch in the round
This is the way I do it more often than not. Using one circular or double-pointed needle, you simply knit each row flat, sliding the work to the other other end and leaving big loops at the back of your work between rows. Though note: you cannot do this with a straight needle that has a stopper of some sort at the end.
It’s quite easy, and the paragraph above may be alone to set the lightbulb off in your head, but I’ll walk you through it a bit.
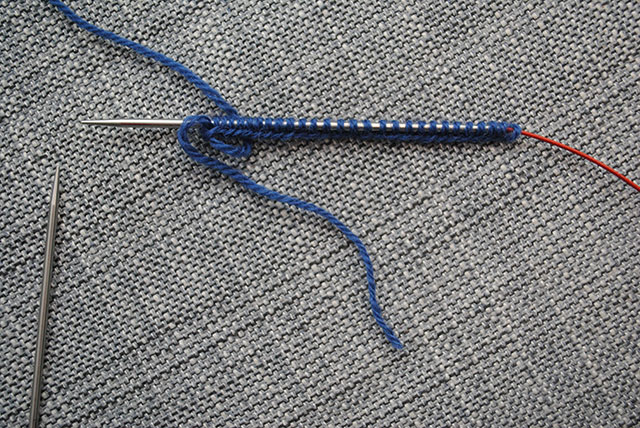
First, cast on the number of stitches you want for your swatch onto a circular needle or DPN of the size needle you expect you’ll use to get gauge (if you’re going by the pattern, that’s 2.75mm, or US 2). I used long-tail cast on, which I use for pretty much everything.
You’ll have to forgive me that I didn’t cast on a full swatch size because, well, I’ve already knit a Victory with this yarn, I know my gauge! However with this method you may find your first few stitches on either side very loose and wonky, so I’d recommend a swatch size of at least 5″.
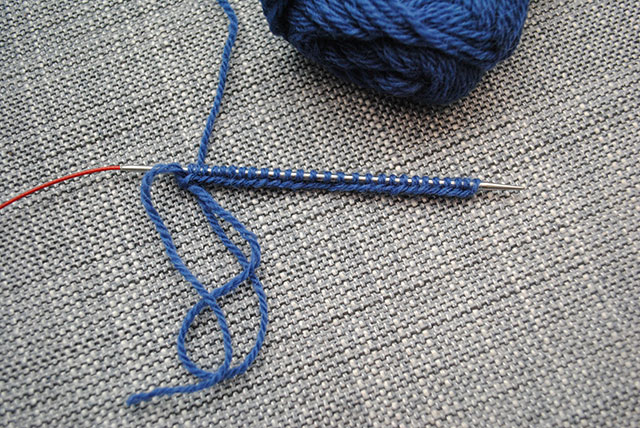
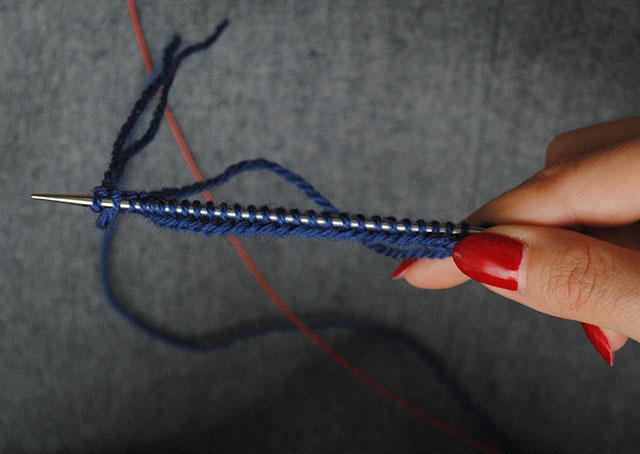
Then slide the stitches to the other side of the needle.
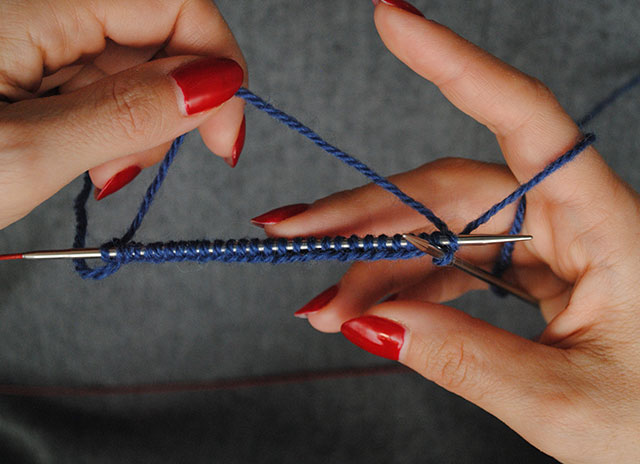
Leaving a very big loop at the back of the work (you do not want to pull this tight!), knit the first row of your swatch.
When you’re at the end of the row you’ll see the big loop at the back. Then just slide the stitches back to the other end and repeat for the next row.
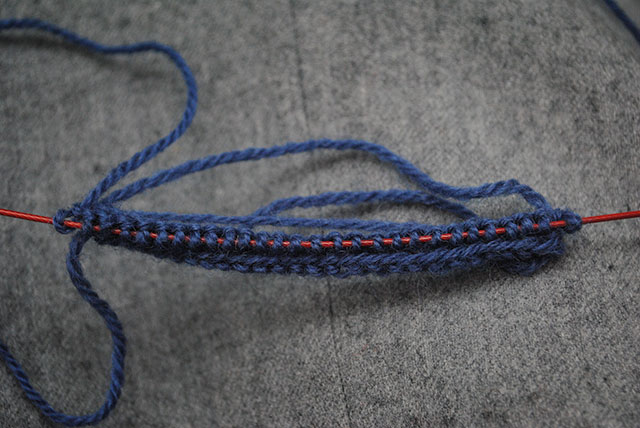
Keep on doing this for your entire swatch: knit a row, slide the stitches back to the other end, and repeat.
After a few rows, it’ll look something like this.
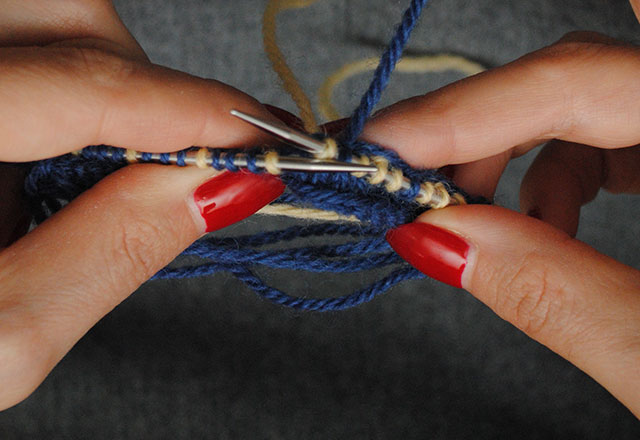
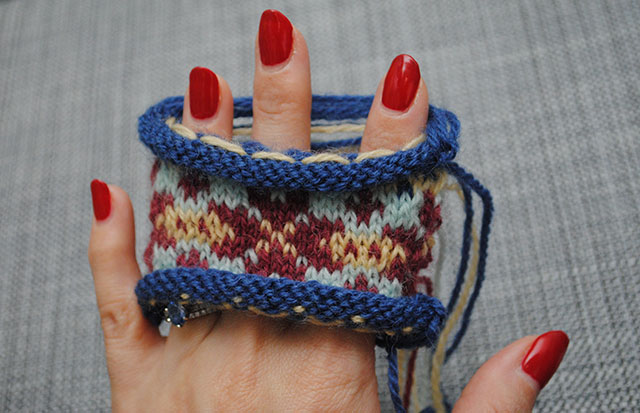
And when it’s time to start the fair isle pattern, you just launch in with the second color. You can tie it into a knot with the first color, since this is just a swatch. Or just leave it loose and you can pull it taut later to cinch things up. Just keep on leaving those really big loose floats at the back of the work for each color as you go.
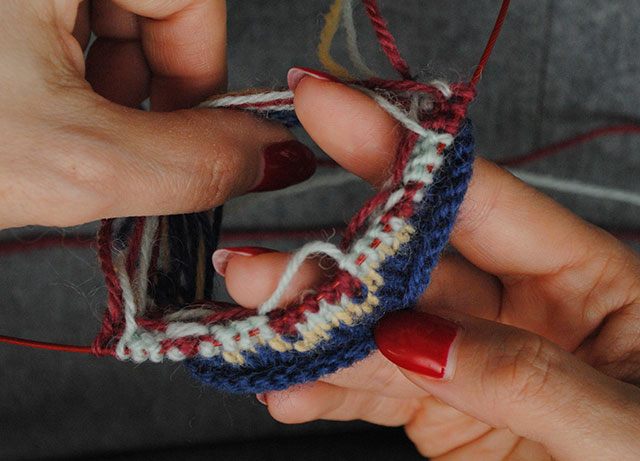
Feel free to knot off or let each new color hang, as you prefer. You can see how this starts to develop with the knitting on one side and the loops on the other, below! (There’s also a great photo on Liz’s blog for her own Victory swatch using this method.)
And just keep on going until you’re done with your swatch, casting off at the end like normal. Remember all the tips I’ve given about keeping your tension even, and you’ll be off to a great start!
Here’s what my swatch looked like when I was done. You can do garter stitch or ribbing or something at both ends to combat the stockinette curl, but I didn’t bother.
What next? Cut that bad boy open along the floats at the back (it makes it easier to block it flat and measure your gauge). I promise it won’t all fall apart. But feel free to yank on those free ends to tighten things up at the edges a bit.
Wash and block your swatch how you plan to take care of your final beret. I soaked mine in lukewarm water and a bit of wool wash, then patted dry. Since it’s a stockinette swatch and wants to curl, I pinned all the edges.
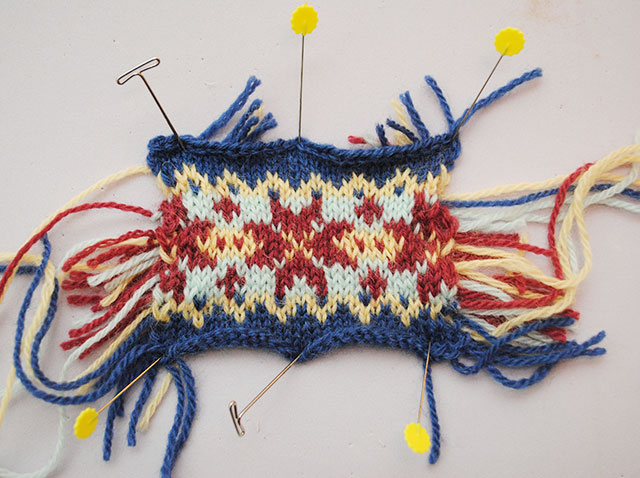
Here’s what the swatch looked like prior to blocking, with a few pins thrown in so you could see it better. Those loose stitches at either side are the reason I said to make your swatch at least 5″ if you’re using this method and measuring over 4″, because obviously you want to measure across the nice, even stitches, not the wonky outside ones.
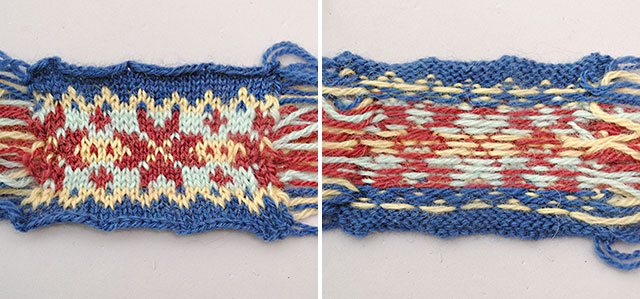
And here’s the swatch after blocking and once it dried, both front and back.
And there you go! Just like all swatching experiences, stranded is no different: you’ll have to go up or down needle sizes if you find you don’t get the pattern gauge of 32 sts / 32 rnds = 4” / 10cm in stranded stockinette.
Casting on
You’re just about ready to start your Victory beret at this point, after swatching and getting gauge! Very exciting, I hope.
In the pattern I don’t specify to knit the ribbing in a smaller needle size than the hat because there’s a large increase of stitches after the ribbing (patterns often call for one or the other, you’ve probably noticed, and sometimes both). However if you’re concerned about the ribbing being too loose, or you know you’ll want it tighter, I’d recommend using a smaller needle size for the ribbing, one or two sizes smaller than the needle size you used to get gauge. I may be doing this myself for my own beret.
I’ll be casting on my Victory soon. Don’t forget to chime in with your progress on your Knit for Victory project in our Flickr group and Ravelry group. Have a great weekend!


You’re so awesome Tasha, your instruction is so easy for me to understand! Thank you! 😉
Liz, (zilredloh) shared your tip with regard to steeking and swatches with me the last time we gathered to knit. It’s BRILLIANT! I’m going to steek my Knit for Victory sweater, and I think cutting my swatch prior to cutting my sweater will help to put my mind at ease. 😀
YAY! I’m so glad to hear it, Michelle! Both that what Liz shared helped you out, and that you’re going to officially steek your first sweater. I know you wanted to! 😀