
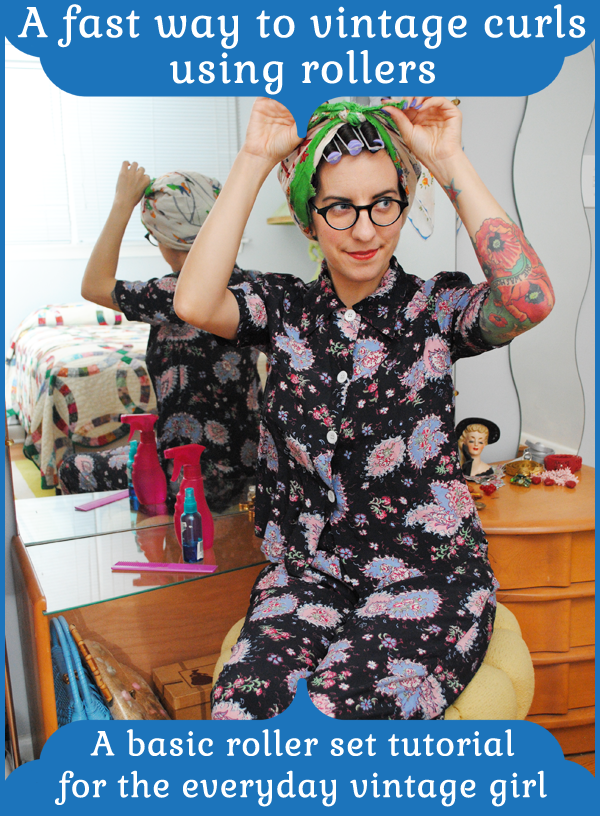
Two years ago I did a long tutorial on a sponge/foam roller set, and it continues to be one of my most popular posts. It’s time for an update, I think! So today I’m going to show you my fast and basic daily roller set for everyday vintage hair, and how I brush it out.
While I try other techniques, setting patterns, methods and products now and again, this is my tried and true. I go for casual curls, an everyday look you might see in vintage catalogs or photos. Remember Solanah’s post on 1943 yearbook hair inspiration? That’s just what I aim for: casual vintage hair. Not special occasion hair, but everyday hair.
But I aim to do it fast. People are sometimes surprised at how little time I spend on my hair. While I like having a vintage hairstyle, I’m just not interested in spending a lot of time on it. (And vintage or not, that’s always been the case.) On freshly washed hair it takes me about 10 to 12 minutes to set it. On previously-set hair any other day (i.e. “next day hair” that’s still holding a curl), about 6 or 7 minutes. A few minutes to brush out in the morning and that’s it. If it took longer, I probably wouldn’t do it. Seriously.
This is truly a tutorial for the everyday vintage girl who doesn’t want to (or doesn’t have time to) spend a lot of time on her hair, but wants something relaxed and casual she can do any day. So let’s get to it!
Supplies
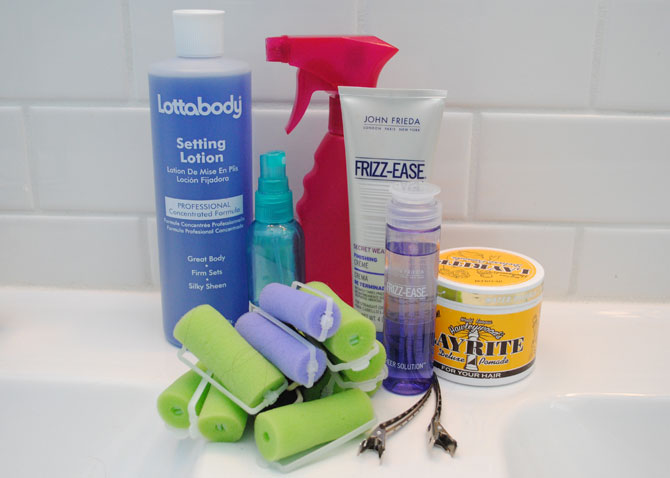
- sponge/foam rollers, about 1″ in diameter for the length of your hair… you can use rag rollers, perm rods, pillow rollers, bendy stick rollers or any other type and still follow this tutorial! (And hey, if you like the result of sponge rollers but they bother you to sleep in, check out Fiona’s brilliant roller hack, that’s a cross between sponge rollers and rag rollers!)
- duckbill clips (optional)
- Lottabody setting lotion or Motions Foam Wrap Lotion (I tend to change this up about once a season)
- a frizz control serum, cream and/or pomade (whatever you find works for you on damp hair and dry hair after brushing out)
- a spray bottle of water
I slowly whittled away the number of rollers I use over time, until I discovered the minimum number that still gets me good results: 8 or 9, not including whatever I do with my bangs. Lately I’ve added a couple back in, so I hover around 11 currently for collarbone-length hair. If I want more volume in the back or on the light side of my part, I add more. The more rollers you use the longer it takes, naturally, so feel free to use more or less and play around until you get a number that works for you.
The rollers I use for my whole head are about 1″ in diameter. The rollers I use for my bangs are 3/4″.

Do’s
- Use setting lotion! I use Lottabody in a small spray bottle (about 3 parts Lottaboddy to 1 part water) or Motions Foam Wrap lotion (which is a foam you pump out). I know some people like Layrite Grooming Spray which I keep meaning to try, but vintage hair expert Lauren Rennells updated a post last year saying it now smells more like a man’s product, so I’m less inclined to bother to try it.
- Like in a pin curl set, if you’re going for a 1930s or 1940s look, don’t place the rollers at the back of your head higher than just above the top of your ears. If you want a tighter 50s ‘do or just more of a full head of big, bouncy curls, higher is fine. But the goal for most earlier styles is a flat crown, so if that’s your goal, don’t roll too high up your head.
- Apply setting lotion to each individual section of hair as you set it, not your whole head before you do it. It’ll dry too fast.
- You can comb each section through as you roll it, but it’s faster to just use your fingers. I have noticed no difference in results. If you have naturally very curly or wavy hair though, you might need to use a comb.
- If you use sponge rollers and they get dented in the middle over time, just run them under water and squeeze out the excess. When they dry, they’ll be back to normal.
Dont’s
- Don’t set your head straight out of the shower unless you are planning 12+ hours in your rollers. It takes much longer for hair to dry in rollers than normally. If you shower before bed and set your hair right away, your hair won’t be dry enough to take out your rollers when you wake up. This is a wet set, but you really want damp, not wet. (Unless you have a cool vintage hood dryer!)
- If your hair dries before you get a chance to set it, give it several spritzes with a spray bottle of water to dampen it.
- Don’t use rollers that are too big. You will not get curls, you’ll get waves or just body. Likewise don’t use teensy ones unless you’re going for a poodle ‘do.
The Setting Process
After I wash my hair, I use a little bit of Layrite pomade and/or Frizz Ease in my damp hair… if I remember. How’s that for honesty? When it’s still wet I part my hair how I want to set it, then I go about my day or evening until I’m ready to put in my rollers.

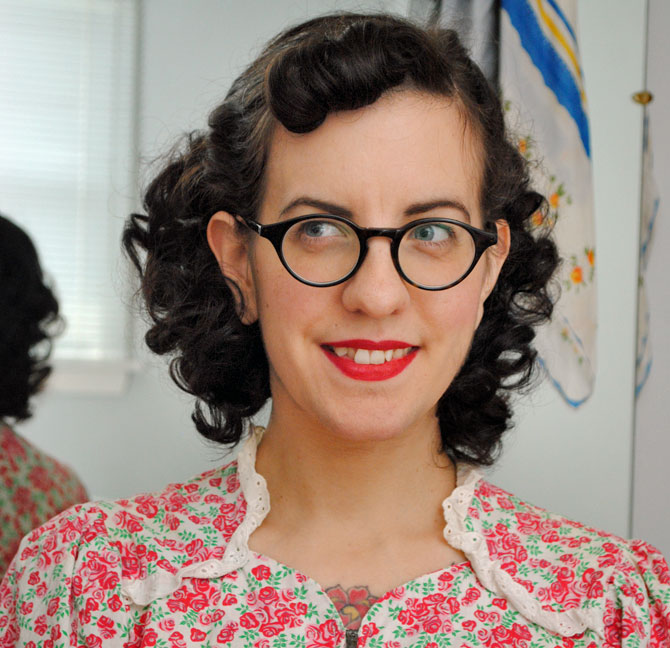
(Please pardon the fact that I’m growing out the black dye and going back to close to my natural medium brown. I currently have a lot of roots and grays but haven’t gotten a touch up since I might be getting a perm soon, which will strip out some of the dye anyway. Moving right along now that the pardons are out of the way…)
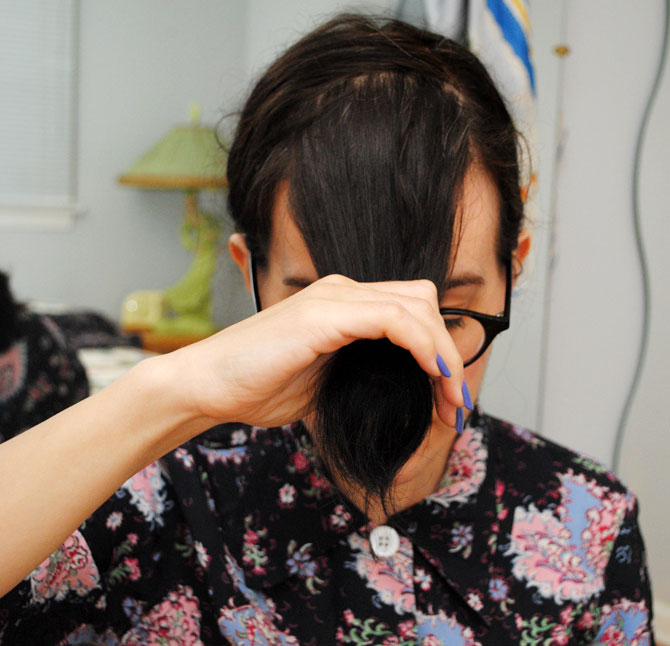
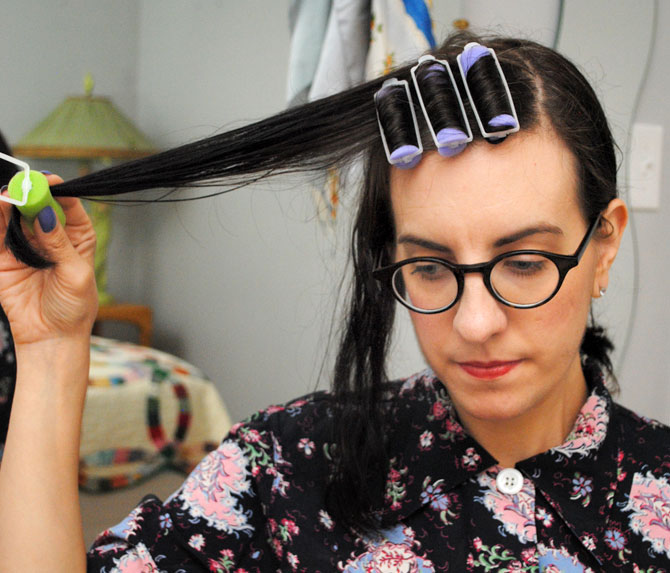
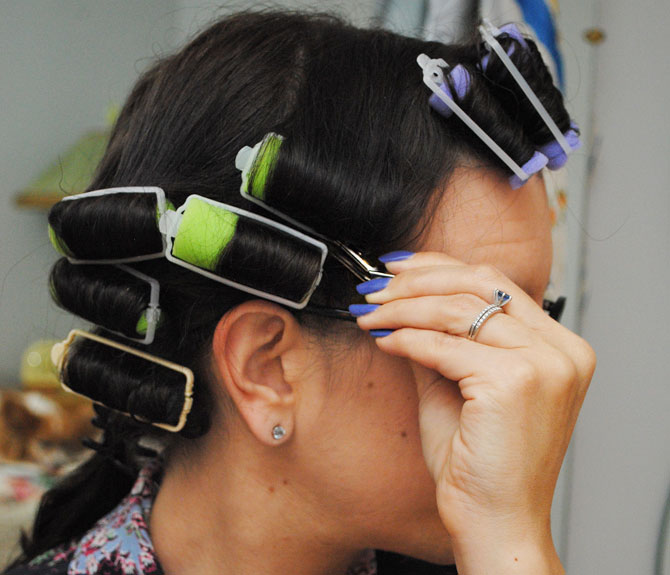
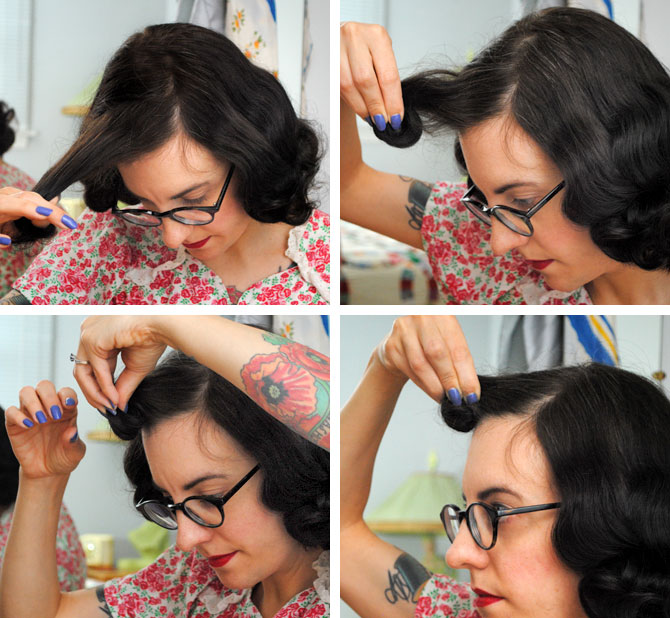
I start by fixing my bangs, which are about chin length. (Should I even bother calling them bangs at this point, isn’t it just a long layer? But I digress again.)
I have the rest of my hair clipped back just so it’s easier for you to see. I don’t bother clipping my hair back at any point during the setting process as it slows things down. We’re going for speedy, remember?
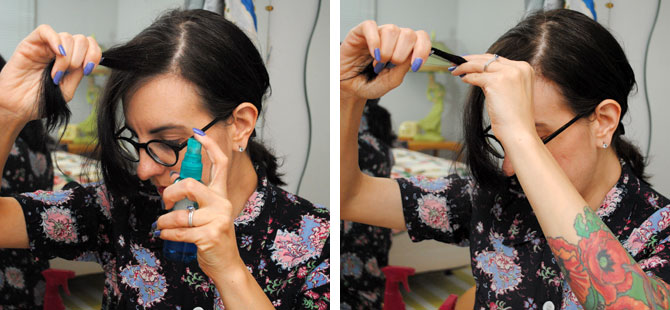
I use three small rollers, rolled away from my part. My goal here is a small forward roll with them, but I can also backcomb them a bit and get the hair to go backwards if I want (I did for this updo). Sometimes if I know I want to do something different with my bangs, I do a series of standing pin curls that alternate rows facing towards and away from my part, but those don’t fall into the quick-roller-set category today, so you’re seeing what I normally do.
I start with a small section of my bangs closest to the part, spraying it with setting lotion. Then I run my hands along the section of hair to make sure the setting lotion covers it. Again, you could use a comb, but it’s faster this way.
By the way, you may notice this is the part of the tutorial where it switches to “watch my dog watch me in the mirror.”
I roll up that section to the base of my head, while holding the hair at a 90° angle to my head (i.e. straight up).
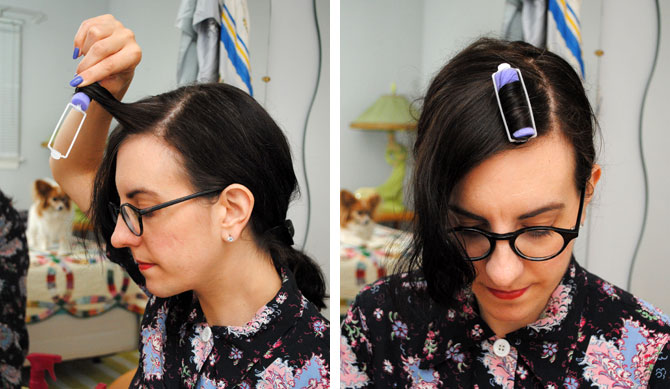
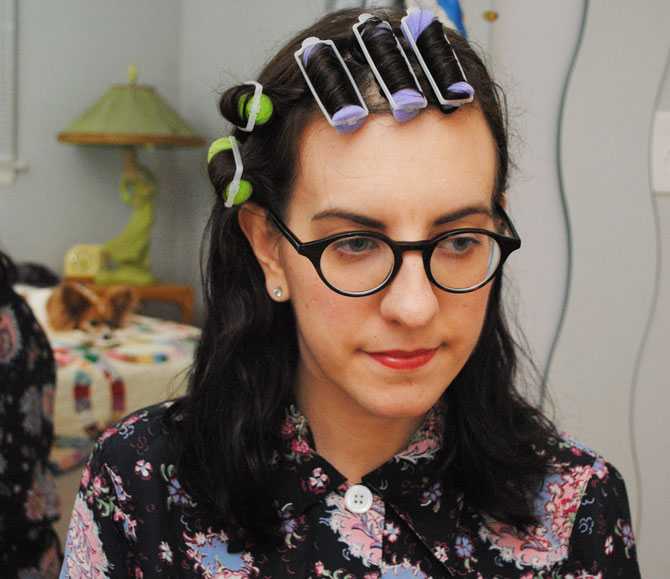
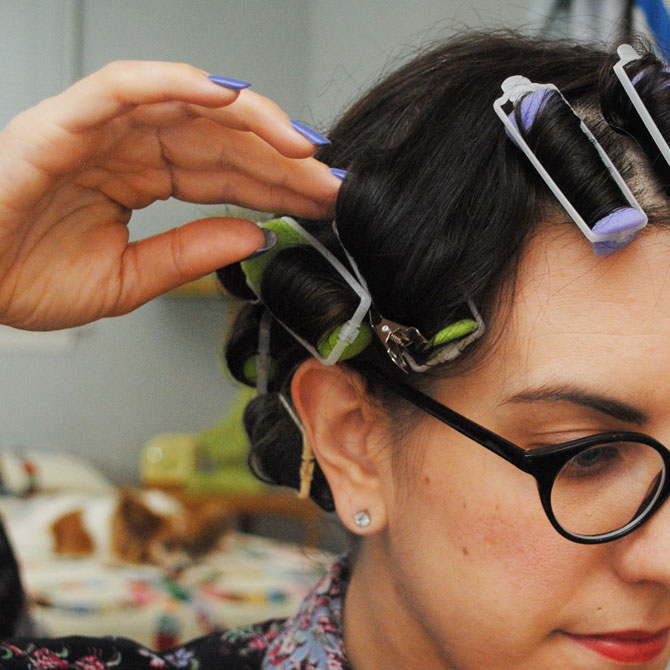
And then do the second and third rollers the same way. If I didn’t have bangs, or this section was much longer, I’d use one or two 1-inch rollers going either backwards or forwards to give my roots more lift… my hair doesn’t have a lot of body naturally.
(By the way, it’s using small rollers like this that allowed me to successfully grow out Bettie Page style bangs twice. I used 4 half-inch rollers and just brushed it into a little curl fluff and called it my 1959 Barbie bangs.)
Then I move to the heavy side of my part, on the side of my head in front of my ears. Again, the rest is clipped back here only so you can see what I’m doing.

I use two rollers above my ear, rolling to the base of my head (but not so tight it pinches). I start at the top and work my way down because it’s faster than starting at the bottom, clipping up layers of hair and unclipping them to do the next layer. Again, going for speed here.
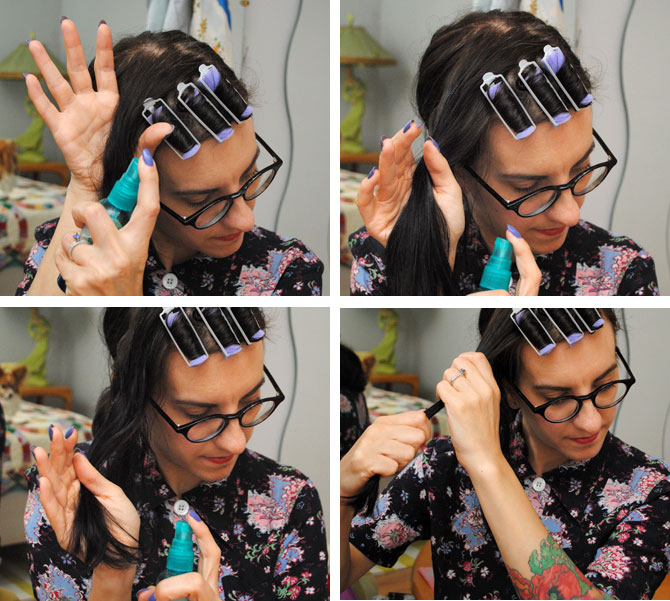
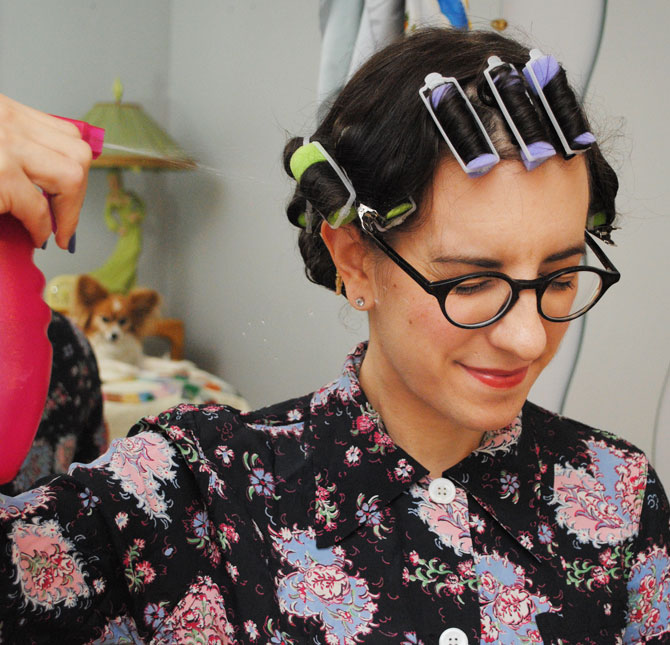
For each section I roll, I spray with setting lotion. To keep it from spraying everywhere, I kind of cup the hair in my hand, and spritz it 3-4 times down the length of the hair. Then I run my hands along that hair to get the setting lotion all over. If you use Motions Foam, you’d just pump some into your hand and run it along the section of hair.
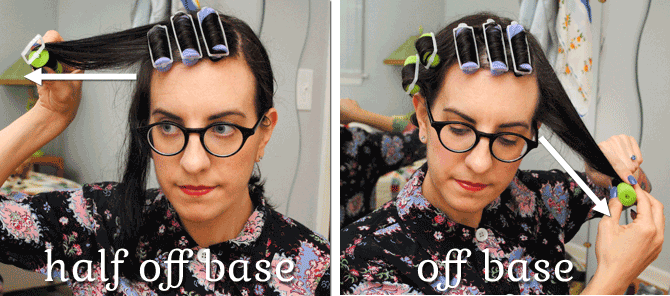
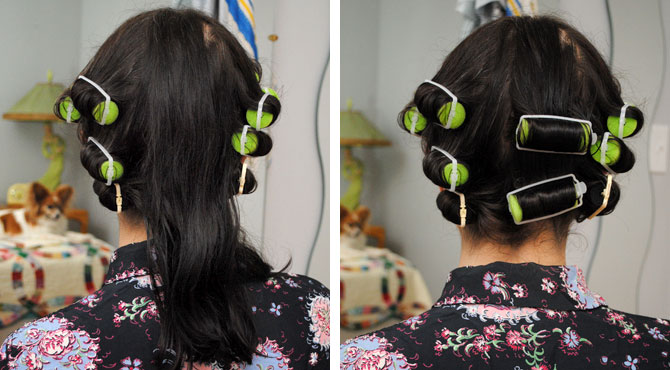
The way I set my hair, the majority of the rollers are placed off base, meaning they are held at a 45° angle to the head in the direction rolled. This results in less fullness higher up your head, which is usually what I’m going for with my everyday style.
However, I personally like the heavier side of my part to be fairly full, so the two rollers at the front I place half off base, which is held at a 90° angle to the head.
Here’s an example of the difference between these rolling styles:
So this is how I roll the heavier side of my part in front of my ears.
The roller below it goes in the same way. Every other roller after this I place off base, so I won’t bother mentioning it again. Experiment and see what you like! This is actually inspiring me to try a set with half off base rollers and see what happens. 🙂
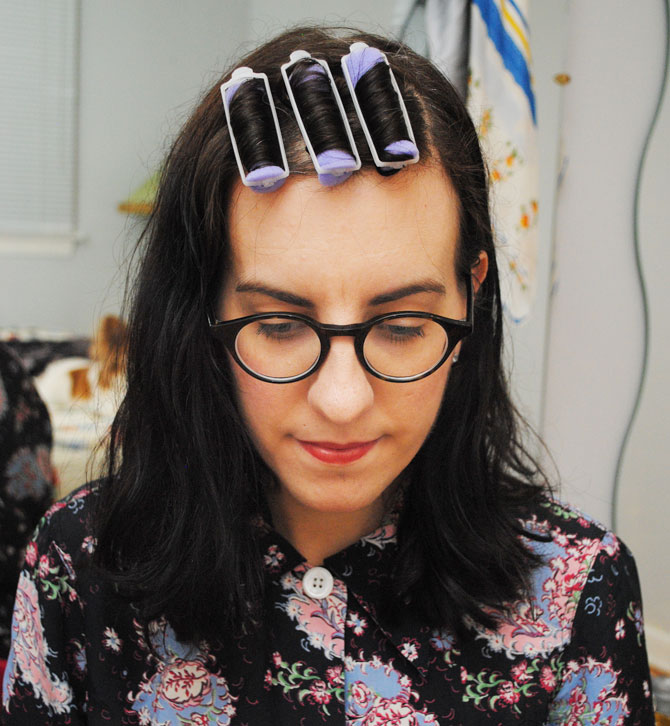
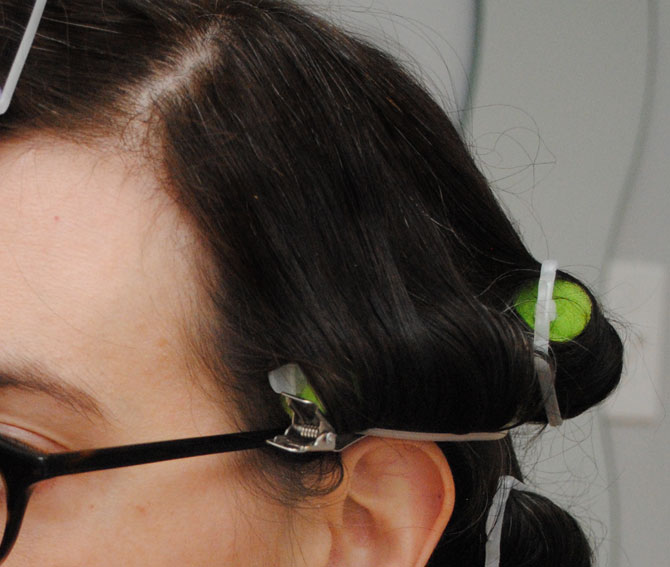
Next, I make a section just next to the front. This section will get 3 rollers, with the topmost one just above the top of my ear, but not higher.
You can see how the rollers are placed, below.
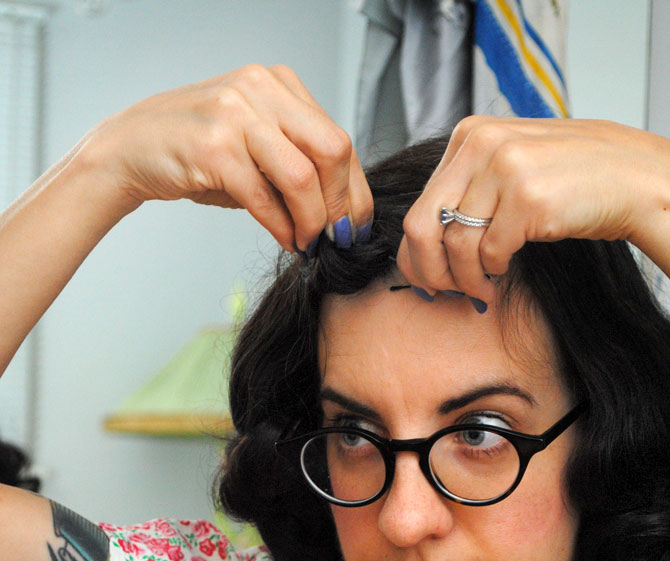
Before moving to the other side of my head, I turn the bar of the top front roller down towards my head and insert a duckbill clip to keep it there. That helps prevent a dent from forming and you can’t even feel it when you sleep. I used to do that on every top roller but lately have only bothered with the sides. You can do it or not do it as you like.
Here’s a tip: I sometimes like a little wave at the front side of my head on the heavy side of my part, so I tilt the top roller down a bit. If you do that, make sure when you put your scarf on to sleep that it’s still facing that way.
Then I move to the light side of my part and use one roller. I personally like this side with a little less curl, as I often tuck it behind my ear. But if you want both sides of your head to be more equal or if your part is less deep, you can use 2 or even 3 rollers. Sorry, this is the one bit I forgot to photograph! But you can see the one roller in the photos below.
Next is the hair beside that roller, which I separate into two or three rollers like I did on the other side of my part.

Then the front top roller (there’s only the one in front in my case) gets a duckbill clip, too.
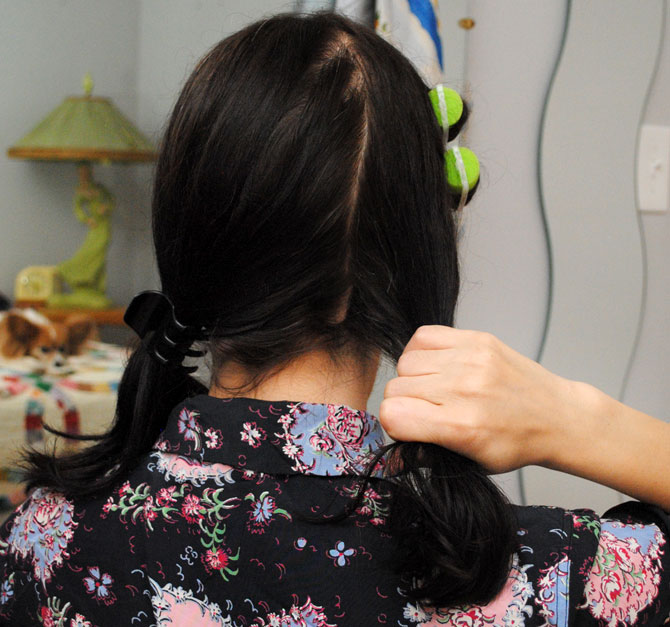
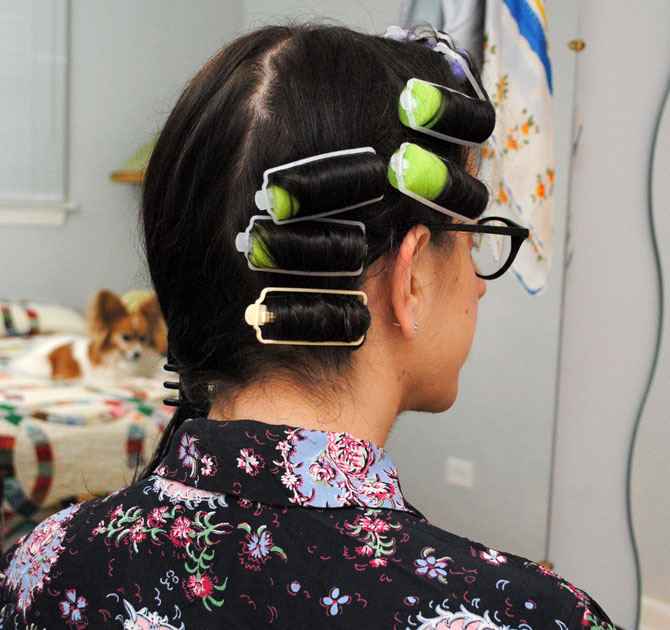
What’s left is the center back. Again I use 2 or 3 rollers. On occasion when I get to this spot it seems extra wide, so instead of cramming all the hair into one vertical row, I’ll put in 2.
And those are all the rollers!
Last, I spray my whole head a few times with water.
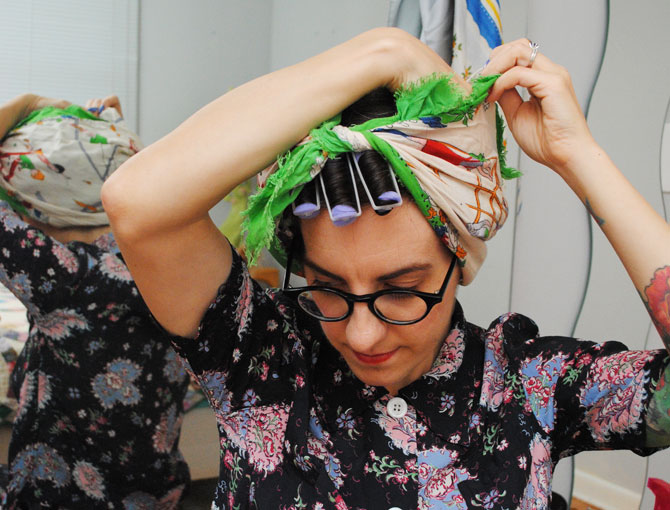
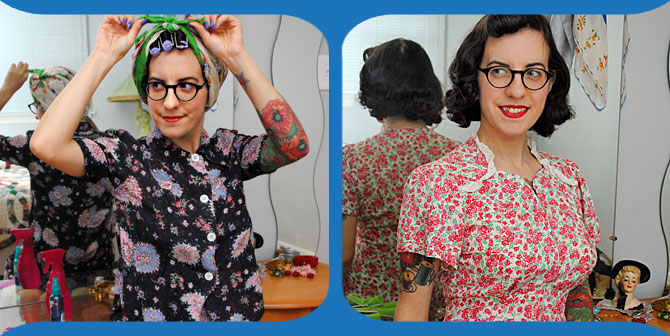
Then I don a cotton scarf (it moves around less on my head than silk). I like to make sure my rollers aren’t all poking around in funny directions, so I push them down a bit when I put on the scarf.
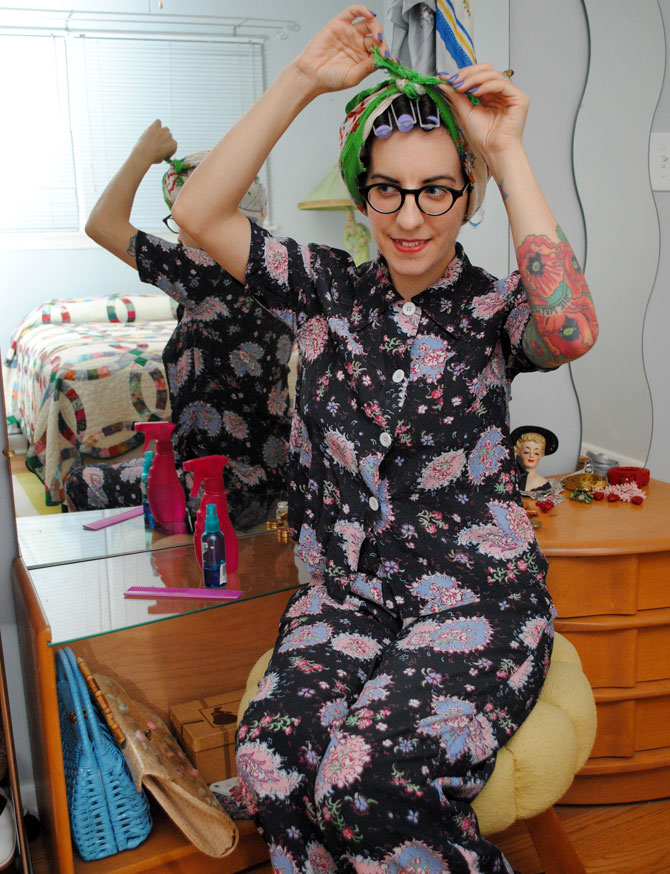
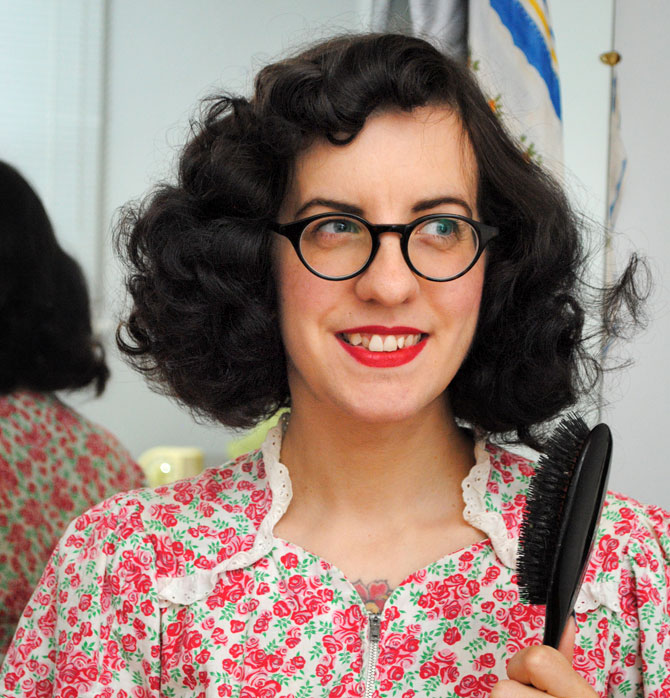
Hey, can I talk about my PJs here for a sec? This was about the most exciting vintage find I’ve had in ages, a 1940s rayon pajama set and matching full-length quilted robe (which unfortunately ran quite a bit when I hand washed it so the colors are darker than the pajamas, but I almost never dry clean anything so it was an understood risk). I bought the set last year at a local antique mall for $25, in a booth I’ve had luck finding clothes in for literally 10 years. At the same time in the same booth, Liz found two wonderful vintage dresses at a reasonable price, too. I didn’t think the pajama pants would fit as the waistband looked too small but I tried them on anyway, and I was giddy to find out they did indeed fit. Oh happy day!
So back to hair. Well actually, it’s time for bed. (In boxers and a tank top, in the interest of full disclosure.)
Now for the next morning…
The brush out
Vintage hair is as much about the brush out as it is the set. Different techniques, lengths of brushing and the texture and length of your hair can lead to different results from the same setting pattern. But I’ll show you what I do, and how just a little bit of change can get you different looks, all easy and casual and perfect for everyday wear.

When I take my rollers out, I unwind them gently, and in no particular order. Don’t tug them out! I often hold the curl high up and twist the roller in a clockwise direction to free it.

When the rollers are out, it looks a little something like this.
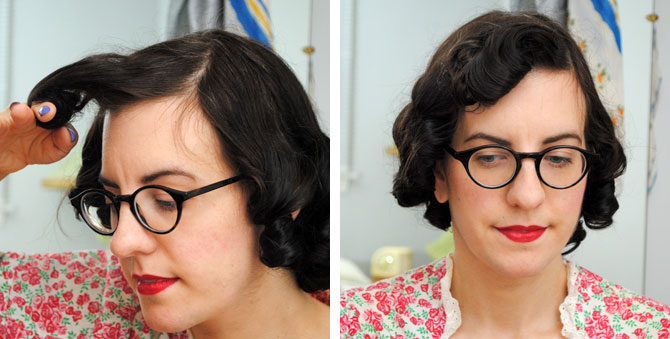
Time to brush! I brush my bangs out a couple of times with long strokes. Looks really hilarious!

Because it gets in my way while I’m brushing the rest of my hair, I sometimes just loosely curl that lock of hair around my finger so it stays out of my way (though sometimes I like the result and I’ll just pin it to my head that way). If you don’t have bangs to contend with, you’d just be brushing everything out at this point.
Onto brushing the rest of my hair. I take one section at a time starting at the front right (personal preference), and brush from the base of my head down to the end, smoothing the hair in that section with my hand as I go. It goes kind of like: brush / hand stroke / brush / hand stroke.
I don’t brush my actual scalp much as my hair tends to end up greasy quickly when doing that with a bristle brush, so I usually lean my head out a little bit as I brush. (Just telling you since I didn’t do that taking these photos.)
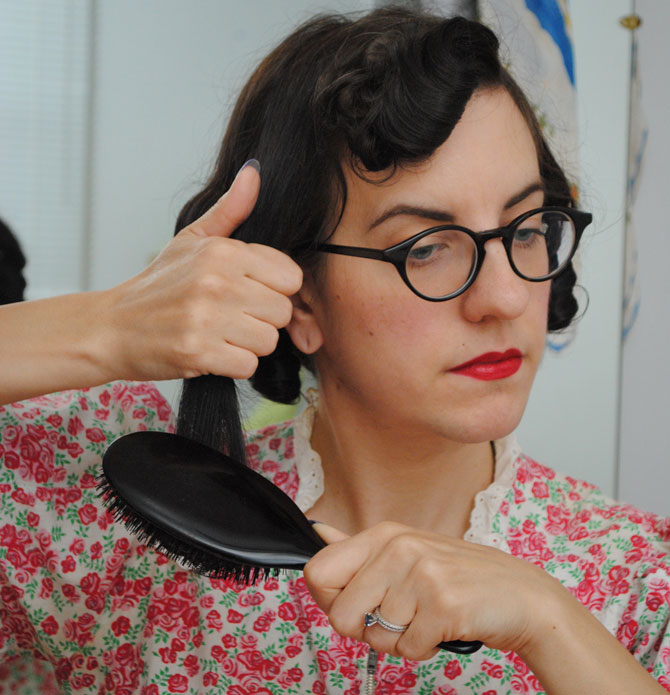
I repeat that a few times with the same handful of hair, then I grab another handful of hair and do the same thing, just going around my head until I get to the other side.
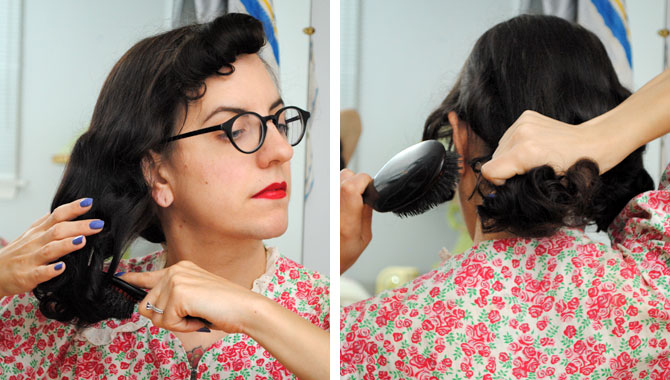
Sometimes what you end up with is totally different on each side (especially if you have different amount of rollers on each side like I did). Keep going if you get weirdo results like this, it’s okay!
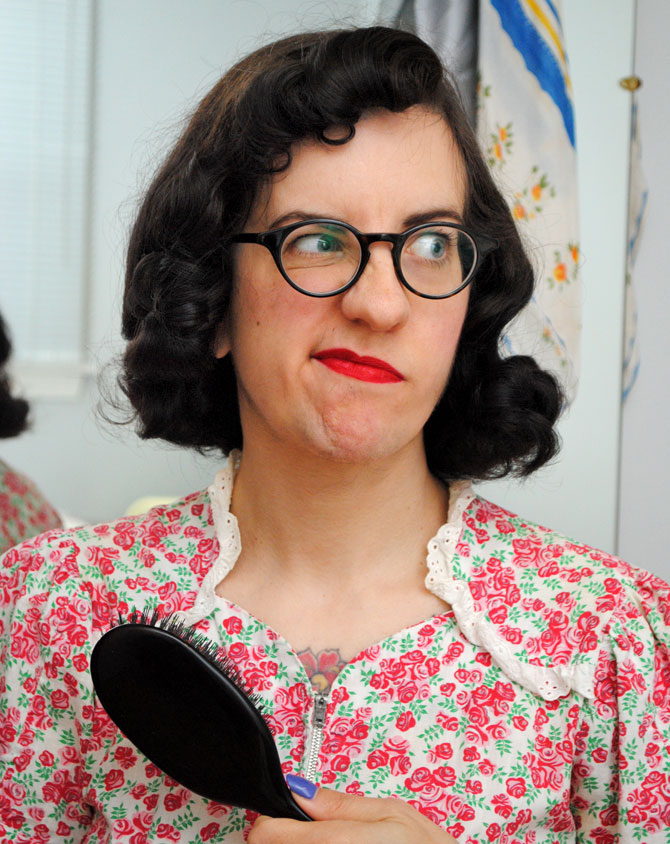
If you do find that you have a troublesome section, don’t smooth the hair down as you brush. Go over your whole head once or twice until you get something resembling clown hair, then just start back at it.
But if you want a fluffy and bouncy head of curls, you can stop when it’s starting to look something like this! Or, you know, somewhere between sleek and clown.
Then go back around and touch up as needed, smoothing the hair down slightly with a hand to tame it back into submission.
At this point you are just going to have to learn how your hair reacts and what you want it to do! This is what my hair does… and your hair won’t be the same. 🙂
Once I get my hair about how I’d like it, I do my front roll. If you aren’t doing one you can obviously ignore this step. I brush this section of hair out again, then starting at the end and keeping the hair fairly taut as I go, roll it into essentially a large sculpture pin curl. I roll it tightly to the base of my head.
(Sometimes I actually remember to put a little pomade on it beforehand. Not here, so it’s a bit fuzzy.)
Then I insert a bobby pin in both ends to anchor it to my head.
And now I have a happy little roll!

It takes me less than 5 minutes to brush out and fully style my hair in the morning, but keep in mind I’ve been doing this for years. It will take you longer at first, but the more you do it, the more adept you’ll get and the faster you’ll be at it. You’ll always have occasional days where your hair acts like absolute crap, and those are great days to hide problem areas with hair flowers, headbands, scarves, hats and the like.

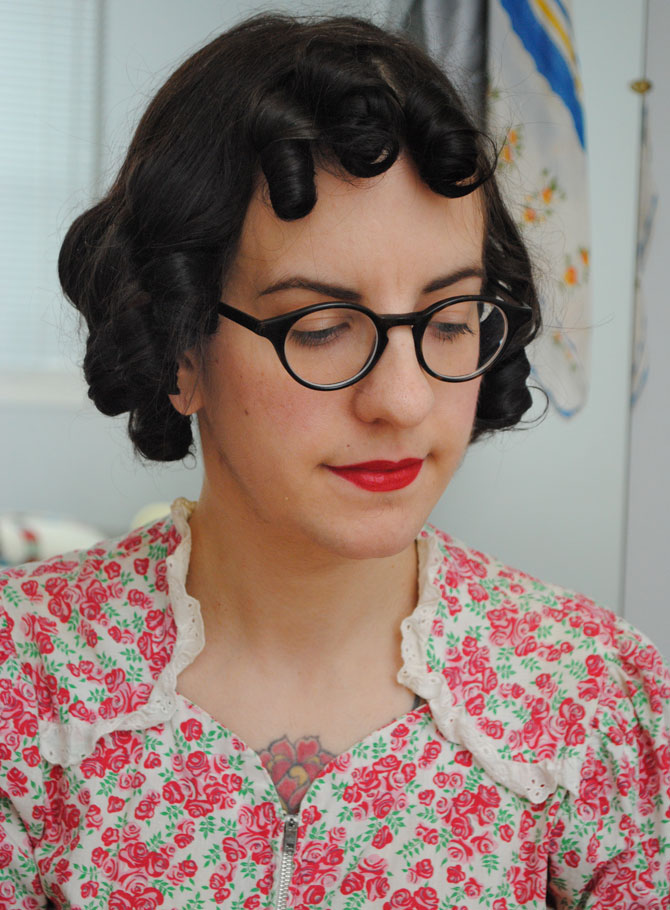
What I showed here is a somewhat sleek style, with most of the curl brushed down towards the lower half of the length of my hair, and smoothed a lot with my hand as I went along. (If I were stopping here, I’d usually add a little pomade or frizz cream, use some hairspray and go about my day.)
Your results will vary, of course. It depends on how tight your curls turn out vs. how loose you want them to be, how thick or fine your hair is (mine is pretty fine), how long it is, etc. In the summer I tend to brush my hair out more thoroughly as I know it’s going to drop more during the day, since humidity is a curl’s worst enemy. Also if you’re new to hair setting, it’s worth noting that the way it looks when you finish brushing and the way it looks even 15 minutes later when things start to settle into place can be a little different.
Oh, remember how I said you can try and work a little wave into your hair if you angle the top side roller down? Check it out after a little more brushing, where I used the brush to angle the hair forwards a bit and then back towards my ear once I hit the curly bottom:

That wave is much more pronounced in the way I styled my hair in this post.
Now, if you want a looser style, are planning victory rolls or intend to pull back sections away from your face with combs or barrettes, you may opt to skip smoothing your hair down with your hand as you brush, and just brush through your hair freely.
For instance, below I brushed my hair until it was getting closer to clown-hair, and then pulled the side back with a comb and a hair flower, and you can see the curls are more fluffy and full:
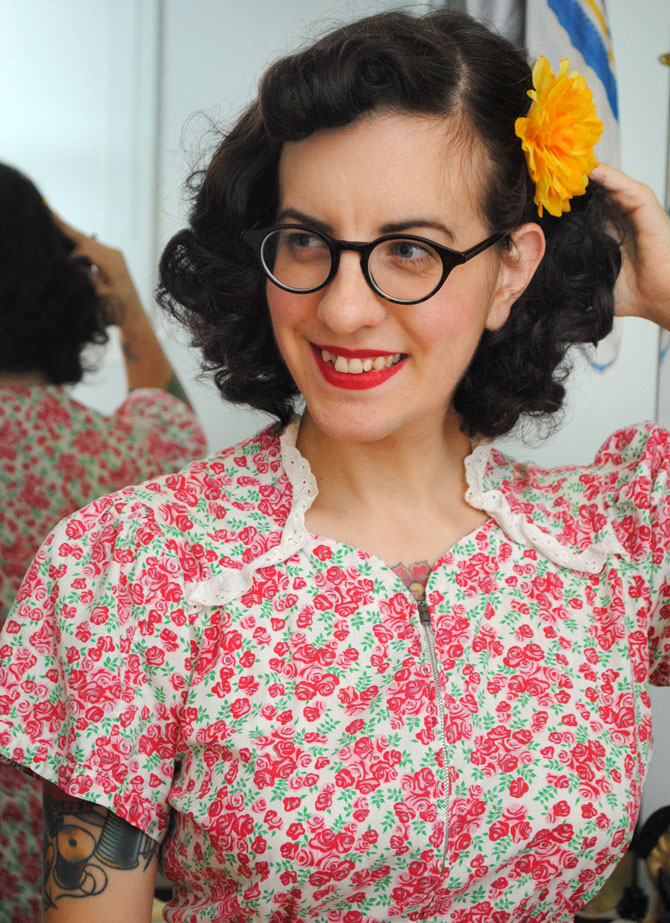
You could also brush and run your fingers through the curls a bit for a looser look, then pull it back on either side with a comb (Grip Tuth is the only brand that works in my fine hair). That’s how I styled it below:
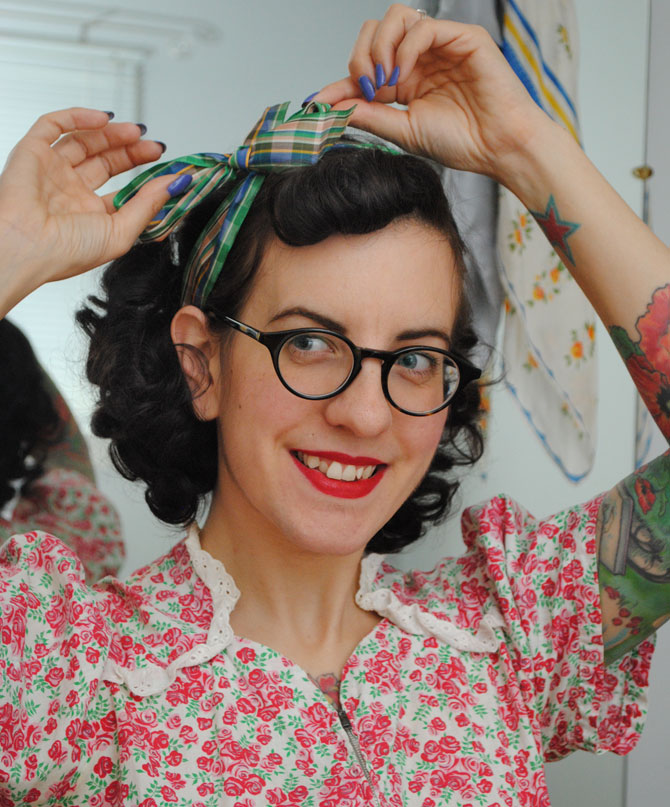
Or maybe use a wide ribbon as a headband to pull it away from your face a bit:
There’s lots of possibilities with this set! Of course, you can use it for fancier styles and updos, but this tutorial was about fast and easy. About 10 minutes a night with practice, and a few minutes to brush out in the morning.
Re-setting on 2nd days and more…
Just some info on what I do later that night. If I set my hair fresh the day before, I can go one night sleeping on my curls and have a similar-but-longer-and-wavier version the next day, but that’s it. And in summer, I can often only get very loose waves the next day. You’ll quickly learn what your hair will and won’t do! When I’m not being lazy, I just re-set my hair that night and each night thereafter until I need to wash my hair.
To re-set my hair I use the same setting pattern, but I dip my fingers in a small bowl of water and run it over the section I’m rolling to very slightly dampen it, then roll it, without using more setting lotion. (Some days I just use the spray bottle with water again, but don’t get it so wet that you lose the curl.) The rolling is really easy as the ends of the hair just spring back into position on the roller, so it goes much faster than a fresh wet set!
When I’m done I give my head several spritzes with water, then I wrap it in a scarf. The next morning’s brush out follows the same routine as the night before. And I simply repeat that process until I need to wash my hair again. I find that just before my hair gets gross enough to wash, I can do fun and slightly more sleek styles than my usual casual curls.
And that’s it! A fast way to vintage curls using rollers, from an everday vintage gal who’s spent a lot of time over the years figuring out how to spend the least amount of time possible on her hair!
oh great ideas…will try this
OMG I love all the hairstyles! Especially with the headband! Super cute 🙂 Sponge rollers are the ONLY thing that will get my hair to curl and stay curly – lol – blasted stick-straight-strands.
Thanks! Mine is so annoying that is actually *has* a natural wave that’s so flimsy it can be combed out in an instant, and won’t come back until another shower. lol
This is a great, and very thorough tutorial! Thanks!
What a great tutorial! It makes me miss my curled hair. I’ve no patience for my hair these days though. Some days I contemplate chopping it all off like Mia Farrow…
Oh Moe, I totally have those days too! 😀
Thanks so much for this excellent tutorial, your hair looks fantastic!
THIS IS GREAT! Thanks Tasha! I’m excited to try your method. I usually stick to hot sticks but the curls don’t last very long with my fine hair. I use foam rollers sometimes and like the results. I have a feeling that setting lotion is going to change my life..I have yet to try it. (crazy, right?!?)
xoxo,
Tina
Thanks for sharing your go-to method Tasha 🙂 I’ll definitely give it a whirl!
Brilliant, going to give this a go. You look so cute even when you just took the curlers out and left it…Thank you
Great tutorial! I’m also figuring out what works best for my hair. I have a hard time keeping scarves on my head so I use a mesh scarf I bought at Sally’s. It allows me to pin it more securely to my head.
I saw something that Vintage Current (aka SKM) did and decided upon using myself. She custom sews her own turban scarves so that they’re a light weight covering for her curl sets. If you just buy some cotton with a nice soft hand, usually quilt quality works, you can just buy a yard of your favorite prints and cut a very wide triangle. I can typically make 2, which is nice if I want to match an outfit I have. I like to have fun with the prints I choose, especially if it’s turbans I wear before I go sleep.
WOW thanks so much for this! I really need to get some foam rollers – have had terrible luck with pincurls since my hair slips like a b****. I suspect ours might be similar – dead straight, fine, and slippery.
And thanks also for the link to Grip Tuth! Just what I need. YAY!
Yes, I should have mentioned my hair is very slippery, too!
Grip Tuth combs are amazing!
Wonderful Post! Your photos are nice and clear, and your directions are concise without missing out anything! I really like when you do tutorials and of course, you look amazing all throughout x
So cute, I love it, I love it, I lahooooove it!
I need to try this, although my hair is very long so not sure it will hold the curl. Great tutorial I’m sure it wil make even more sense as I do it. Thank you 😉
Awesome! And those glasses are grand!
Thanks for this! I’ll definitely give it a try as it seems similar to my own current set but much much quicker.
Awesome tutorial! Your hair howtos are truly amongst the best modern version of vintage styles I’ve ever seen. If ever you wanted to write a book about them, I swear, I’d happily be your first customer, dear gal!
♥ Jessica
Hey. loved this. I tend to get super frizz after I spongeroll that takes a couple of hours to calm down. How much anti-frizz stuff to use?
I just read the directions on the package, so a small dollop, basically. I think the results may be less frizz-prone if your hair is less wet when you set it, even almost dry!
Also, I find a little Frizz Ease finishing cream after I brush out helps, too.
Thanks Tasha I will try this!
So excited to try this out! I have as of yet not been able to get foam rollers to work me how I feel they should 🙂 thanks much!!
Hey lovely! I found your blog through Pinterest and I am SOOOO glad that I did! Great hair tutorial <3
Thanks for this! I like quick and easy so this is very helpful. I can only hope it will work because I have a lot of hair! 11 rollers to me seems tiny in comparison to what I usually have to use.
Love your jammie set!
I think I used to use in the neighborhood or 20 or more rollers! Especially when my hair was a little longer. If your hair is thick you might not be able to get away with as few as I’m currently using, but you might be surprised that you can omit a few and end up with almost the same results. I was surprised over time to discover that! 🙂
Great tutorial!!!! I’m definitely going to try this set!! It’s definitely not going to look like yours as I recently cut my hair into a mock middy and its still a little short but I think I can get a cute style out of your set!
Great tutorial thanks, will definitely be giving it a try.
Nice tutorial Tasha – i’d given up on setting (thick hair = lots of rollers) but your post makes me want to try again.
PS some super cute outfits you’re wearing! 🙂
Thank you so very much.
My hair is only slightly longer than yours, but very thick and straight, so I really have problems to keep curls only for one day. I will try to make it work with your tutorial, maybe using more rollers than you did. And it seems as if I really have to buy sponge rollers, they seem to make a difference to hard rollers (I own vintage plastic and coated wire rollers, but they are both very static and don’t give in as sponge does).
And what a difference the hairstyle makes, you look so different with straight hair.
Thanks for such a great and helpful post, I’ll certainly be using your ideas. My hair problem that its fine and never holds a curl for long 🙁
P.S. Lovely PJs too!
Yes this kind of currls thing we use in the 1960-68 every day and go to bed with it. But my curls were not good the next morning, as a child with thin hair the curls waved/goes the wrong side. and not in a good shape. this are youth memories! but nowadays you can buy this in the Netherlands still bij the shops. kind regards miek
I did this last night, and woke up to a very nice set of curls. It took half the time it usually did and I got great results. Thank you for your great tutorials like this!
Very cool.I’m always envious of people with vintage blogs who can set their hair and not need to wash it every other day.As an everyday gym goer this is sadly not an option for me. Kind of takes some of the fun out of the effort if it’s only going to last 24 hours.
Heidi in L.A.
Another awesome tute from you! x
Thank you so much!
I love all of your hair tutorials and have used them with great success and this one was no exception. I did a slightly modified version last night and today I have, quite frankly, adorable hair. In fact, I achieved a perfect front roll which hardly ever happens!
Thanks again!
i was planning on cutting my hair, but i think i will buy some curlers instead :P.
honestly i had wondered about your hair routine cause it looks always very natural and not overdone, i thought “how can she do it every day, i always look like angry cotton candy when i’m done!” and i can only “dress up” in special occasions.
Also you look so cute with your rollers on!
How wonderful! You look fantastic. I am going to a 50’s Fair this Sunday, so this shall come in very handy. Thank you!
You make it look so easy. I’m going to have to give it a go. I am horrid with hair so admit to being afraid but then again, it’s only hair and it will wash out if I screw it up.
LOVE your new blog design!
Oh Wow, this is just an amazing post – you make it look easy and you give great instructions. I am going to buy some setting lotion today!
Great tutorial – I think I need to try to set my hair again… but it’s so long at the moment I’m worried it won’t dry overnight!
A quick question for you – what nail polish are you wearing in those photos? It’s a gorgeous colour!
I used to do about this same set with hair about 5 inches longer, I just had to make sure I either put it in rollers prior to 7pm at night or make sure it was pretty dry before setting (and then just spritzing with water). lol
As for the nail polish — I’m wearing Gelish gel polish in He Loves Me, He Loves Me Not. 🙂
This was a wonderful tutorial. I’ve been pincurling my hair for years but never thought I would get the same curl with sponge rollers (and better sleep!). Thanks. Took me a time or two to get the right amount of dampness…I blew dry by hair to almost dry and that worked great.
Great tutorials. I have been setting my shoulderish length hair for a few years and am starting to try out some vintage styles for a different look. Your site is easy to follow with some fun styles.
i’m dating myself here…but who cares, right? In the 1950’s, I was always amazed that women spent the entire day (even going to the grocery store) with their hair in curlers with a scarf tied just like yours. In the summer, the young women dressed in capris or gaily printed cotton dresses with hair always in rollers. By the time, fathers got home at 5:00 PM, all the curlers had disappeared, everyone’s mother looked beautiful and dinner was on the table. It was a happy time.
Thank you for taking the time to put up such a wonderful tutorial with so many photos.
I have been wanting to try this for awhile now.
Curling irons are damaging for your hair. How refreshing to see someone else rolling their hair in curlers.
Hi Tasha!
I just wanted to say thank you for this great tutorial. I’ve been pretty loyal to pin curls and was afraid to make the leap to foam rollers. But I bought some on sale last time I was home in Hawaii (they’re pretty hard to find in Sweden) and have just been looking at them for a few months now. Your tutorial encouraged me to just dare to give it a whirl…and it turned out great! The end hairdo result was not too different from my pin curl set except a little tighter…and with a lot more possibilities! And I liked your pouffy bang grow out idea – I’ll get to put those tiny rollers to good use! Thanks again!
I know you called it clown hair, but that first picture where you have it brushed out and big and fabulous is the kind of hair that makes me “ooh” and “ah.” There’s something about big ridiculous curls that I find appealing. Maybe it’s the Southern woman in me. I’ve recently chopped my hair off into a crop, so curls aren’t possible for me right now, but when I was pin curling my hair when it was longer, I wish I would have found this. I always used too many rollers I think, and that’s why my hair just ended up being a mess–more electrocuted chic than frizzy clown. I will have to bookmark this and return to it when my hair grows out.
Thanks so much for this fab tut. It was super helpful and you are all kinds of adorable.
Wow, thank you so much for this! I can’t wait to try it.
Can I also ask where your glasses are from – love them!
Polly
Glad it helped! The glasses are from classicspecs.com. 🙂
Hi Tasha!
First of all, great tutorial and website. You look fabulous with the vintage curls. It’s my favourite look. I too have fine hair, actually it’s baby fine. I do a wet set with Lottabody lotion and use a hairdryer, but the curls only last that day. Once I sleep on it, the curls droop down loose (and I want the classic 50’s Marilyn type curly bob). So, after reading your tutorial on the section ‘second day hair’ – I went out and bought the sponge rollers and I misted them with water and will sleep on them. I’m trying this tonight and hopefully this should retain my original curly look. If you have any other tips please let me know. Also, as I said, Lottabody is good, but I’m looking for a product with a little more holding power, i.e. Dippity Do, but before I spend anymore money on products (and I’ve tried a lot) to keep a curl in longer, do you have any suggestions what would work to really hold curls in? (Lottabody isn’t quite strong enough). Thank you Tasha! 😀 – Kat
Hi Kat, thanks for the compliments! I really can’t comment about a setting lotion that has more holding power, plus you can’t really compare it to a styling gel like Dippity Do (at least I’m assuming what that is, I remember the name from the 80s) since the purpose isn’t the same. Plus I only know what has worked for me. I’ve also used Motions Foam wrap lotion as I mentioned in the post, I know some people use Layrite Grooming Spray even as a setting lotion, and I’ve seen that Lisa Freemont Street also likes a product called Sahag Sculpt Nourishing Mousse. However I’ve never tried either of those. You’ll have to play around and figure out what works best for you, sorry. 🙂
OK, I have curly hair and yet I still prefer to set it in some way. I like waves better, and I am against heat-styling simply because it’s so damaging and I do have a goal of growing it really long. (When it’s at ridiculous lengths I will probably have to wear snoods to be vintage).
Could I mention other ways to set it?
–For Veronica Lake waves I do large pin curls.
–For a 1930s curly ‘do, I make 2 to 4 rope braids with sponge curlers at the ends and set finger waves in my bangs (or do pin curls). It’s not the typical waved-to-the-scalp look, but maybe something Esther Williams-like? It looks really cute put up with a scarf.
–Twin french braids will give waves with a 30s feel. Actually, dutch braids (“inside-out” french braids) are more comfortable to sleep on. I recommend a curler at the end of each of any kind of braid.
As a former long-hair, I can say that it’s very difficult to “look vintage” and have long hair. If you do snoods, braid your hair and style it in a bun first. Otherwise hair will be falling out all over the place. I have Asian-straight hair, being part Asian. There were times I didn’t style it and I fully regretted it. Since we shed tons of hair regularly, that new growth doesn’t like to stay in place.
There are fingerwave clips if you want to try it more accurate. But without some kind of gel or hairspray, it isn’t easy to set. You could try aloe vera gel or boil you own from fenugreek seeds, but it stinks to high heaven and is super gooey. There are cone-free options though.
If you do all over pinned curls, do a dry set then spray it. You’ll thank yourself. I had struggled time and again with tailbone length hair and trying out damp sets. Even worse, I tried to use bobby pins on flat pinned curls. It was dent city with horrible, half-flat curls. That’s just a fair warning to all long-haired women, or those growing out hair.
Wow! Such a detailed and helpful post! I found this while searching what to do with my second day curls. Haha. Thank you!
I’d always wanted to find a way to avoid dents while using sponge curlers. I didn’t realize it was as simple as folding the bracket backwards and using a clip. Sheesh! I should have thought of that myself. I’m usually pretty clever that way. 😛
Very nice write-up. I certainly appreciate this website.
Keep it up!
Thank you so much for this tutorial! I set my hair for the first time last night and I couldn’t have done it without you!
I love this tutorial! Although my hair is so damn thick I couldn’t use only 11 curlers, and I didn’t know exactly where to put the others so it looked all crazy with rollers everywhere and no straight lines. I also can’t get how you do something (anything!) on the back of your own head! It’s like my hands don’t belong to my body when I can’t see them, brain just shuts down. Gonna go practise some more now, haha :p
Hi Tasha,
Thank you so much for your tutorials, you explain everything so well and in detail! I love all your tips and thanks to your blog I am getting better at doing my hair!
I would like to ask you for advice: I have bangs and center-parted hair, how could I finish my hair do if I want to keep my bangs? I like using barrets, but don’t like them in both sides. Thank you very much!
I’m so glad they’ve been helpful for you! I honestly haven’t had bangs in years (well one or two stints with them briefly, but not for any length of time). My main issue with them was setting my hair, like you said, I couldn’t quite figure out how to style it and look good… never looked as cute on me as it did in my head, unless it was a few days into a set and my hair was more in loose waves. Otherwise, it was kind of dippy looking on me. lol I used to use a Grip-Tuth brand comb to pull back both sides.
Thank you! Its true, the only way to style it is with the combs. Oh! I have bought the illamasqua brow shadow and mac brow set and I really like them! Please keep on posting your lovely tutorials and tips.
Awesome – having spent years attempting perfect victory rolls, this was so super speedy in comparison and what an amazing result, thank you!
hOur company provides safe health products. Look at our health contributing portal in case you want to look better. Our company offers herb-based healthcare products. Visit our health contributing website in case you want to look healthier. Our company offers herbal pharmacy. Visit our health contributing website in case you want to look healthier. Our company offers a wide variety of non prescription drugs. Take a look at our health portal in case you want to to improve your health with a help generic supplements. Our company provides supreme quality general health products. Take a look at our health contributing website in case you want to feel healthier. Our company provides a wide variety of non prescription products. Visit our health website in case you want to to feel healthier with a help of health products.
Our company provides a wide variety of non prescription products. Take a look at our health contributing site in case you want to look healthier. Our company provides health and related products. Look at our health contributing site in case you want to improve your health. Our company provides herbal supplements. Visit our health contributing portal in case you want to look better. Our company provides a wide variety of non prescription products. Visit our health website in case you want to look healthier with a help generic supplements. Our company provides a wide variety of healthcare products. Visit our health contributing portal in case you want to feel better.
Girl you are so freaking cute, i’m so glad i found your blog through this post!
I’m so happy I stumbled on your site! you’re so cool! Keep it up!
My curls gets very frizzy after doing a wet set and not well defined ringlets like yours. What should I do?