I have long coveted true vintage 1950s strapless sun tops. Bustier tops, bra tops, the whole shebang. While I don’t really have many reasons to wear them, I always think they seem like the perfect thing to really jazz up a skirt in the summer, or spring and fall with a bolero on top, or wear for a nicer evening outfit. Original ones are rare to find and typically very pricey, which explains why I own exactly zero. So I thought it was high time I try to sew one. There’s technically two stories to tell with this foray into strapless tops, but this post starts with just one: making the very first top.
I used Simplicity 8130, a reproduction of a 1950s pattern. Two thoughts on the pattern envelope, right off the bat. First, the styling. 1940s-inspired hair for an obviously 50s pattern, nude lipstick, an ill-fitting top (see how high the straps hike it up) and low-waisted white jeans? No.
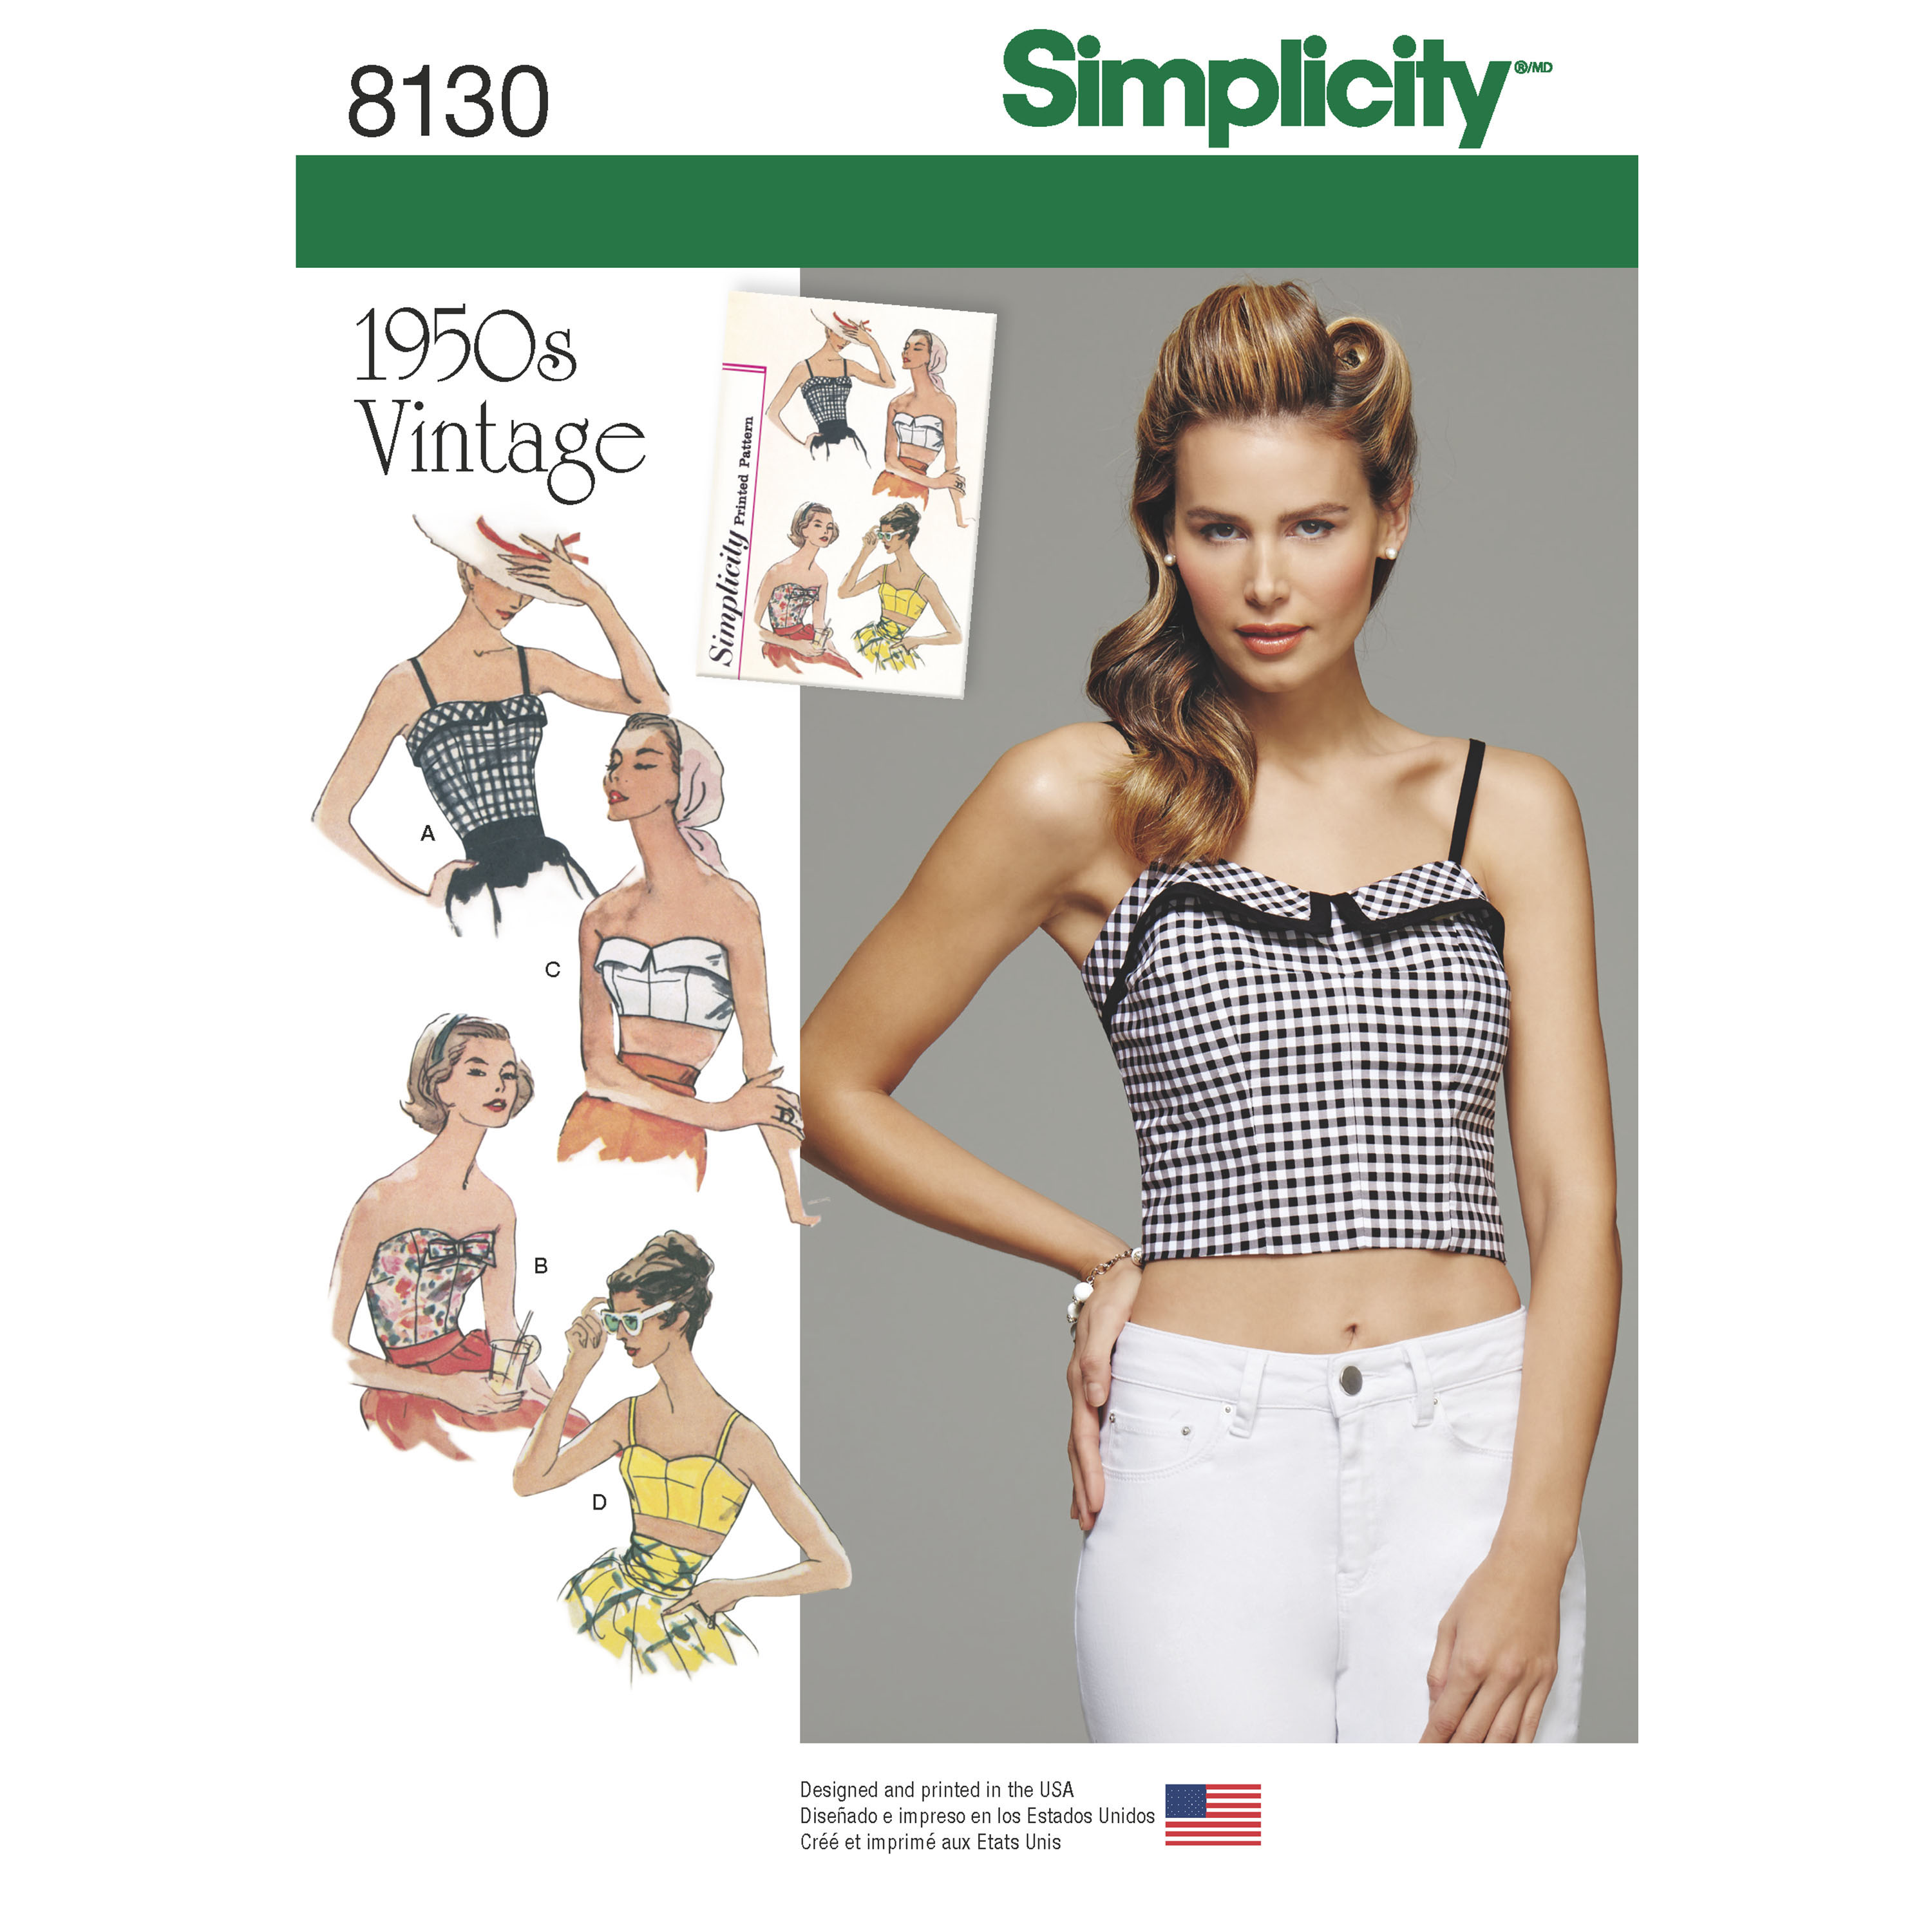 Source: Simplicity Patterns
Thank goodness they kept the original artwork, or I’d never in a million years have given this pattern a second glance! Which brings me to the second point: I think it’s sneaky of Simplicity to specifically omit the pattern number off the original envelope that they show inset on the new envelope. They have to know people still sew and seek out true vintage patterns, I mean truly what competition are they saving themselves from by omitting it? The small handful of people who’d actually be able to find the original? Stupid.
Coincidentally I found the original pattern on Vintage Pattern Wiki, so for anyone who wants to know, it was Simplicity 2532, from 1958. (Note that the straps on the original gingham version aren’t hiking up the bodice in their line drawing, unlike on the repro model. Granted it’s a drawing and not a human but still. It bugs me.)
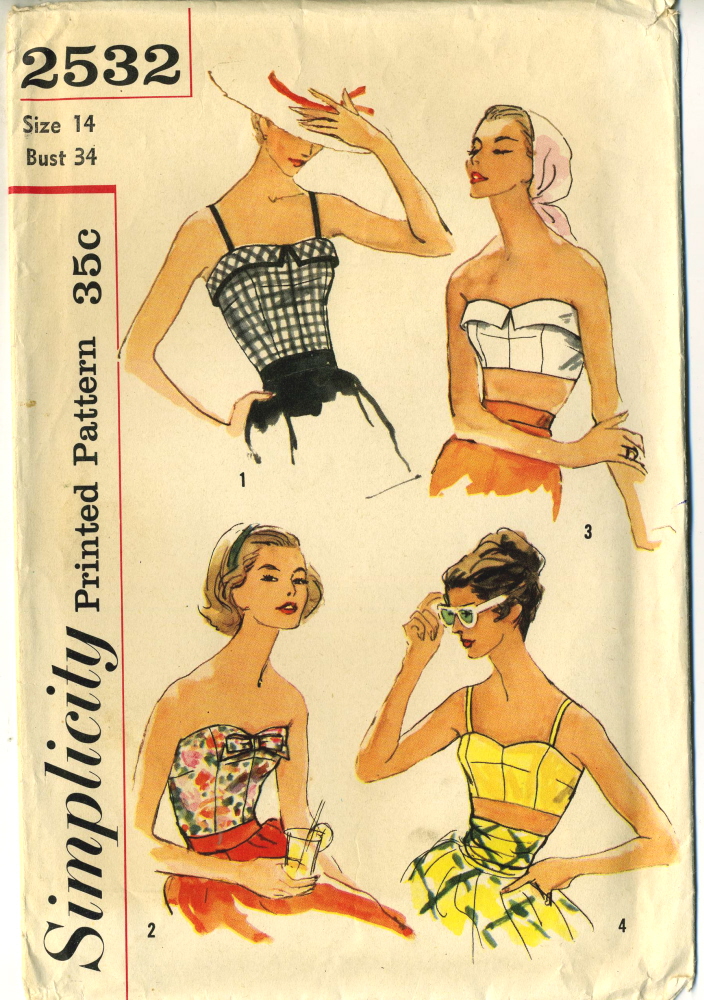 Source: Vintage Pattern Wiki
I’m happy to say I think my styling is a lot more in line with the original! 😉
I sewed View B and just omitted the bow.
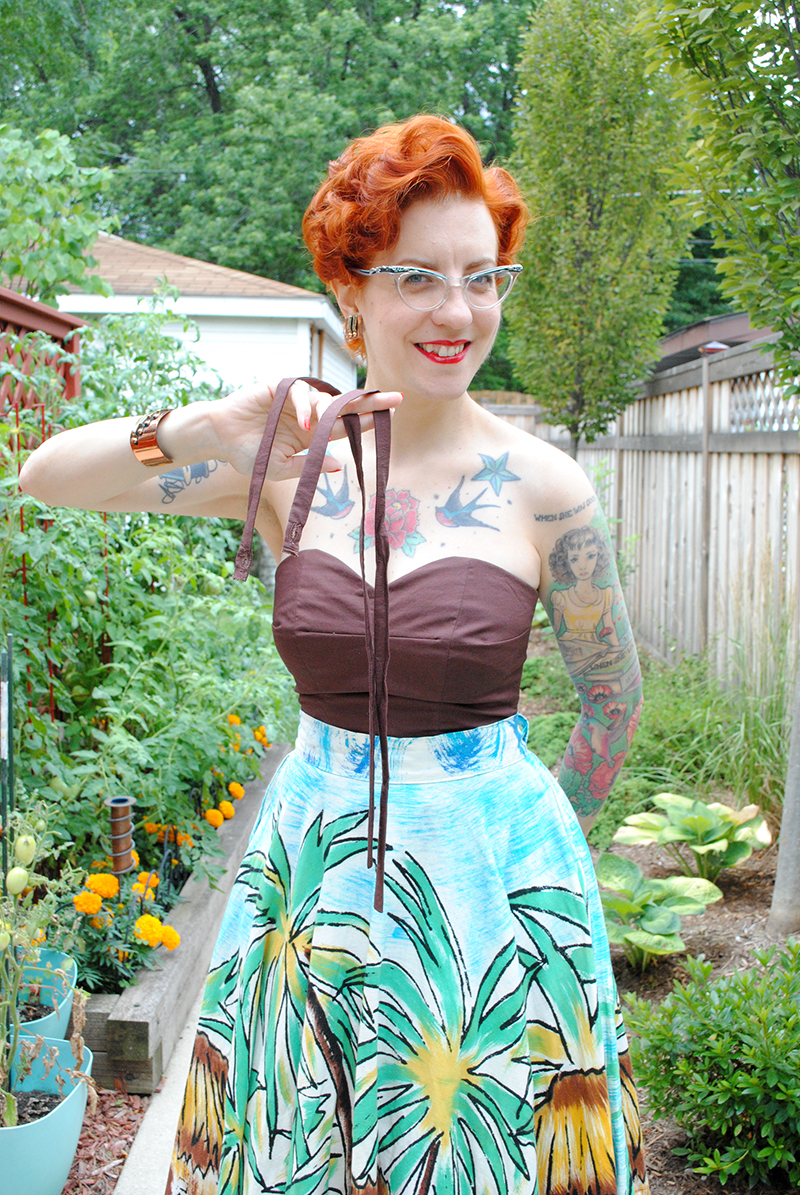
Though I added an extra detail: detachable halter straps in the center!
I put a small button inside the top of the neckline and made a buttonhole on the end of each strap. Now I can wear it two ways! And much like my last dress, I’m much more likely to wear it with straps, anyway. But options are great.
So let’s talk sizing. If you’ve ever sewn with a Big 4 pattern you probably know by now that if you read the size measurements on the back and go by that, you’ll be swimming in your garment. I always, ALWAYS size down.
In this case, I only started off going down one size, going by the listed finished garment measurements on the pattern pieces. It was a mistake. The muslin was huge and looked terrible! The finished bust measurement of my garment was definitely not what was listed on the pattern pieces. So after taking it in, taking it in, taking it in… I realized at that point I just needed a smaller size. I scrapped the first muslin and then cut out 2 sizes down from that. Simplicity thinks I should sew a 12 for this, and I sewed a 6. Yeaahhhhh okay. I mean sure, if I didn’t want it to be really fitted and always planned to wear shoulder straps I could have gone the next size up, but not for the look I was going for. If you want to wear it strapless you want to feel supported, and that’s not going to happen if you have positive ease. It’s just not.
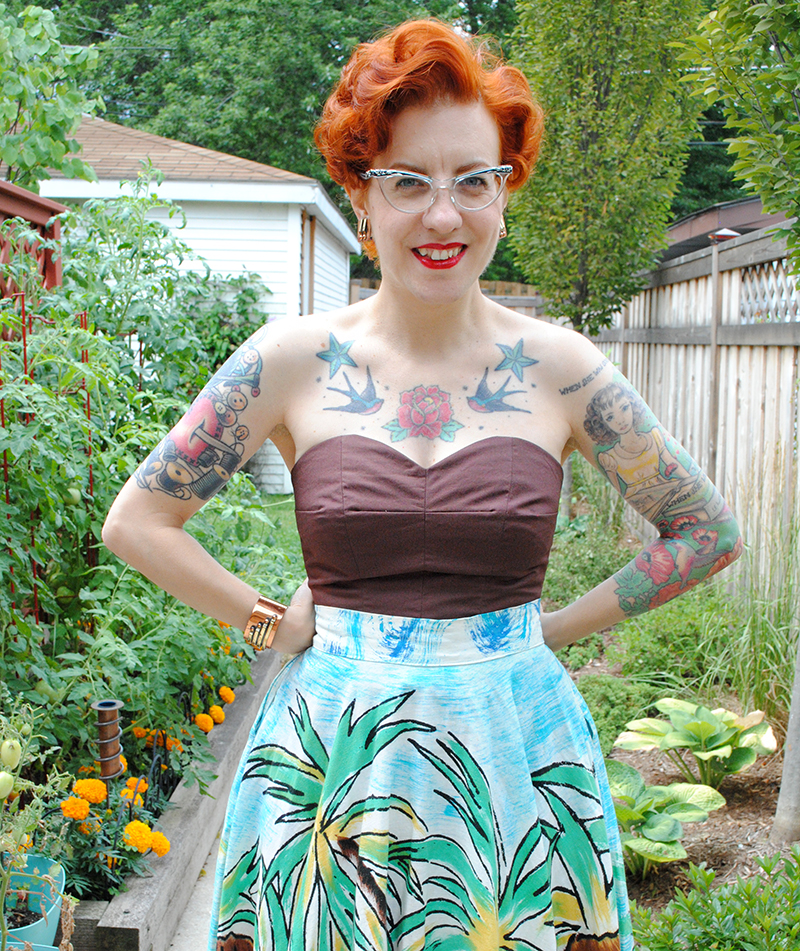
I have no idea what I was trying to illustrate in the photo below, but it serves to show that it’s a fitted garment. Any looser and this would not be staying up on me without straps and would probably look sloppy.
Size aside, I made a couple of other alterations. I’m short-waisted, and took 1″ off the waist. I could probably take an additional 1/4″ to 1/2″ after seeing the final garment and having a bit of excess fabric under the bust that I can hike down a bit. I also wanted this to tuck in, which was a stylistic change and not a fit change, obviously.
I started off lengthening the torso by carrying the pattern out from the side seams for my hips, and converting the back darts to a double ended dart accordingly. I decided the initial length was unnecessarily long so I then took it back up a bit since I really only want it to stay tucked in, I’d never wear it untucked. So in the end it’s a few inches below the smallest part of my waist. That’ll keep it tucked into skirts and pants fine. It probably only goes another inch or so below my thumb in the photo below.
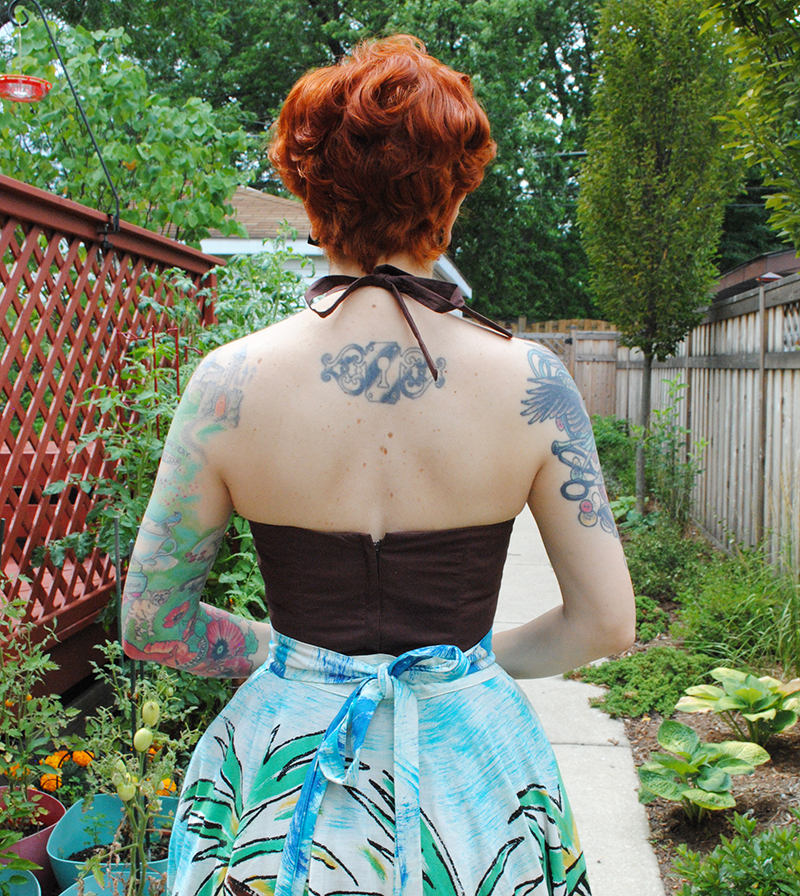
This pattern calls for buttons up the back, but I knew once I tried it on there was no way I was going to be able to get into it with buttons (or at least, by myself). I mean yeah you can close them in front and wiggle it to the back but this is fairly heavily boned making that a much more difficult prospect. So I went with a separating zipper. Those aren’t really as easy to find as one might think so I think it was billed as a jacket zipper and is a little bulkier. Which is annoying because the length wasn’t right and I couldn’t shorten from the bottom since it opens there, so I had to cut and sort of fold the excess out of the way which is totally fine with a normal zipper and I do it loads, but it’s a bit bulky with the type I had to use. Anyway, I did a lapped zipper so you can’t see much of it. There’s a little gap at the top where my zipper stops due to the bulk (and because I never use hook and eyes as I hate them and always forget about them anyway) but it doesn’t bother me. (If it did, I’d just do a centered zipper. Although I do like those too.)
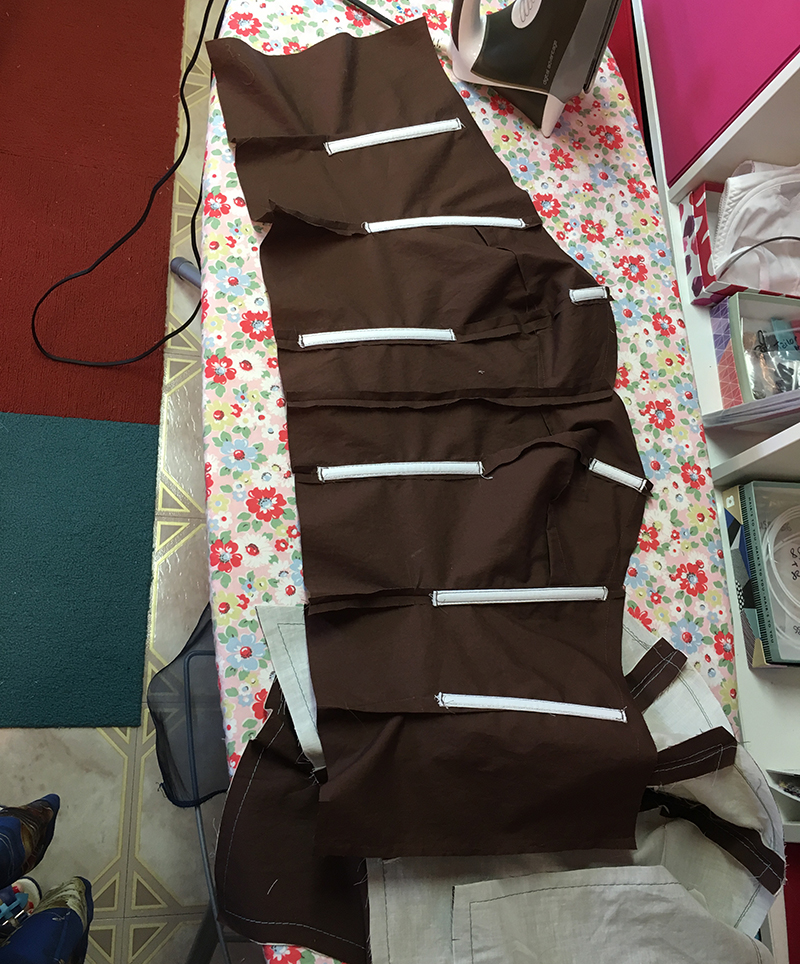
So, boning! This was something I thought about for awhile. The pattern calls for boning the princess seams at the very top and then below the bust, the side seams, and over the back darts. But the pattern stops at the natural waist. Since I lengthened the torso, I hemmed and hawed about how I wanted to handle the boning and had a bunch of discussions with people on Instagram. In the end, I did a combo job: I carried the princess seam boning down to the hem, but carried the side seam and back dart boning only down to about 1/2″ above the smallest part of my waist. That meant the boning wouldn’t dig into my hip, which it might have if I stopped right at my waist. That tip came from at least a couple of folks, one of whom learned it from a couture seamstress who worked in the 1950s.
The side boning I didn’t carry to the hem because of the steep waist-to-hip angle, and I thought it would either make it uncomfortable sitting or get kinked over time, since I was just using featherlite (aka plastic boning in casing), which I’d read can sometimes to do that. But I was working just from stash, so that’s what I had. Then the back dart boning I also didn’t carry to the hem, but for a different reason: to lengthen the torso, the dart had to be turned into a double-ended dart, and those don’t necessarily lay perfectly flat. I could have clipped into the dart to apply the boning over it in a straight line to the hem, but since I was already only taking the side boning down to just above my waist, I figured it was fine to do the same for the back dart. The front I went down to the hem figuring it might help the whole thing not want to roll up a bit in front.
Having worn this for several hours, I can say it seems like my plans worked out well! I’ll probably bone future versions in the exact same manner. And here’s what it looks like, with the boning applied to the lining, which is just the same fabric as the shell. Sorry I didn’t think to take better construction photos but a quickie iPhone snap is better than none at all!
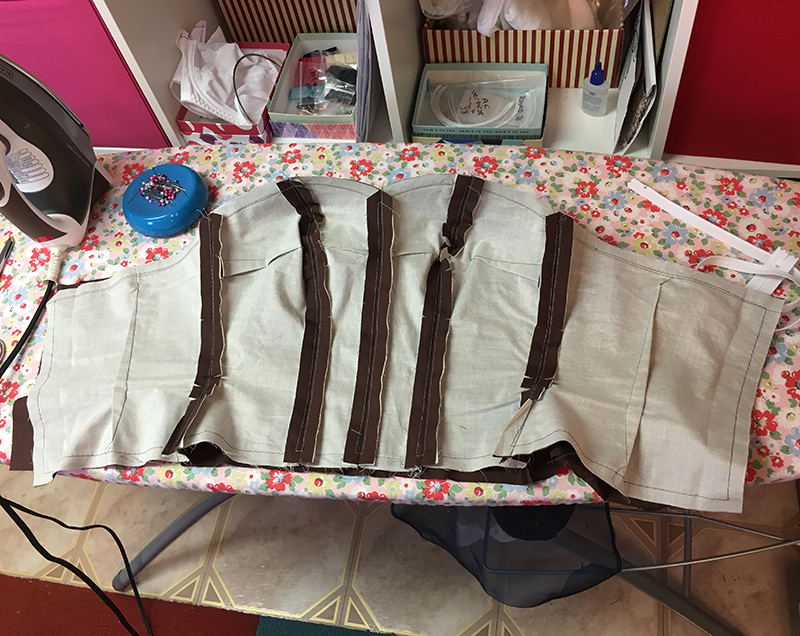
The fabric is Robert Kaufman Superluxe poplin, a lightweight and crisp fabric. I used it for the shell and the lining. The pattern calls for interfacing the entire shell (so basically, underlining the shell with interfacing), and while I loves me some professional fusible interfacing, I didn’t really want to interface the entire top with it. So I took a cue from Gertie and underlined the shell with muslin. Or at least, it looked like muslin… was lightweight and in my stash and already washed, so that’s what I used, ha ha. May have been lawn or something. Here it is before I trimmed the seam allowances.
I did worry the added layers (lining + underlining) would make the top fit tighter than my muslin, so I gave myself an extra 1/4″ at the center back seam on either side… which was possible because I’d cut the pieces for a button underlay but then as I mentioned, decided to do a zipper. And I left the seam allowances huge on the inside just in case it didn’t fit and I had to unpick the zipper. Thankfully that wasn’t the case, but it’s still possible in the future. (Yeah right, the odds of me altering something are slim to none. I do like to pretend I might though.)
In the future, I think the only alterations I’d do would be to take a bit more off the waist length, give myself a smidge more ease in the hips, and add that extra 1/4″ to the center back seam, replicating how I sewed it.
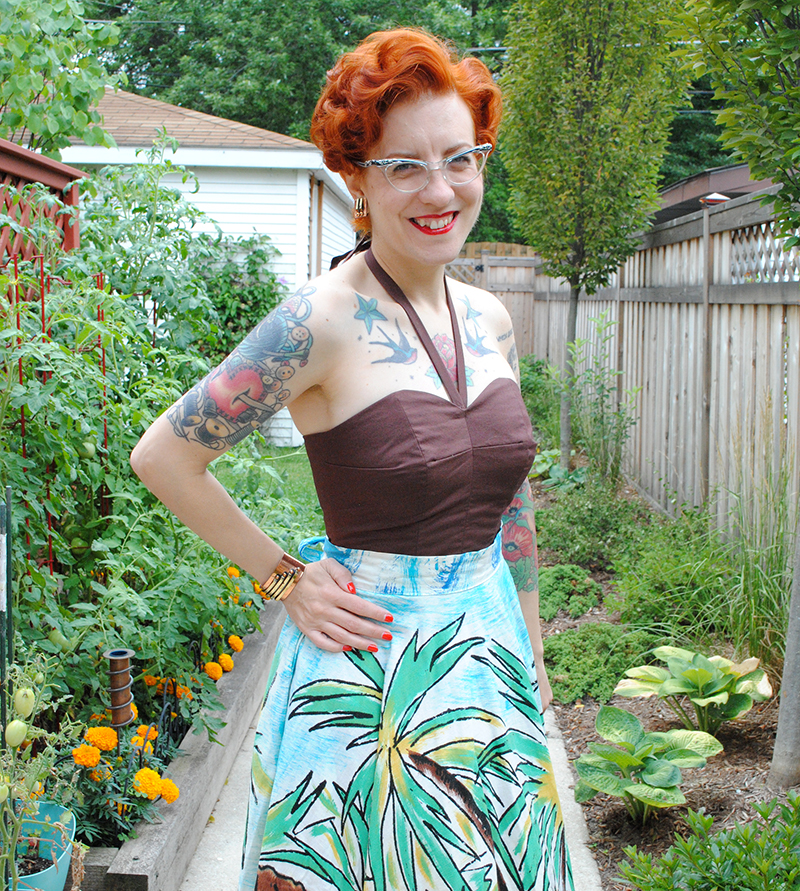
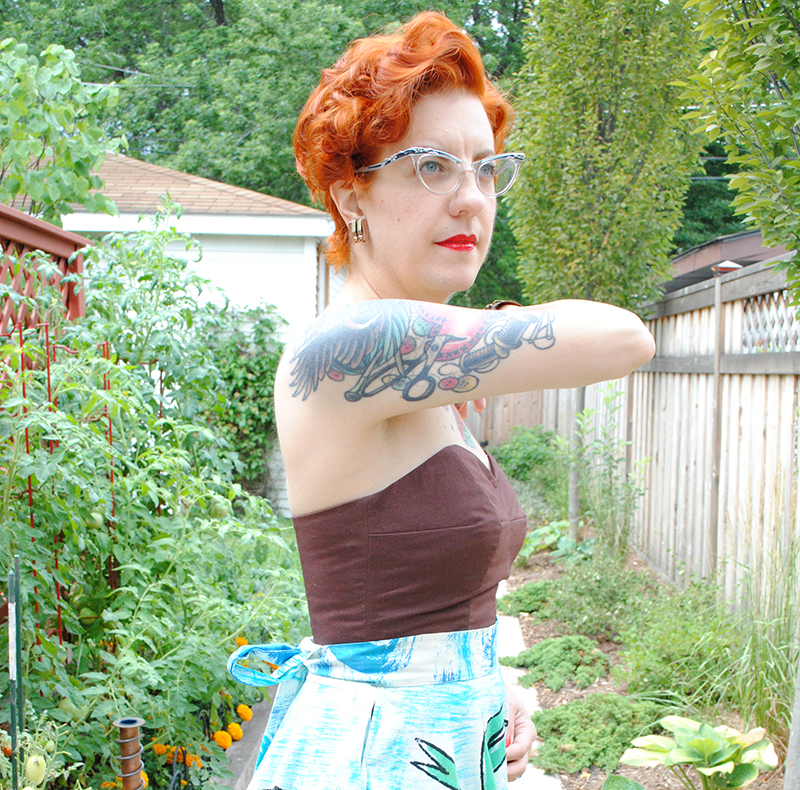
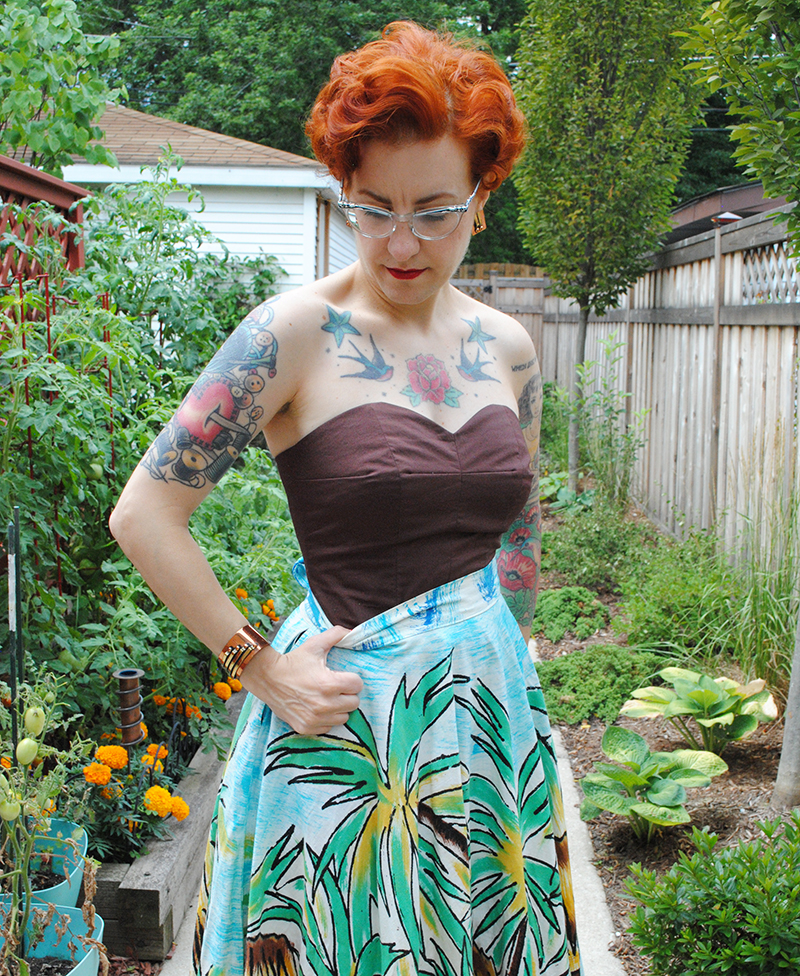
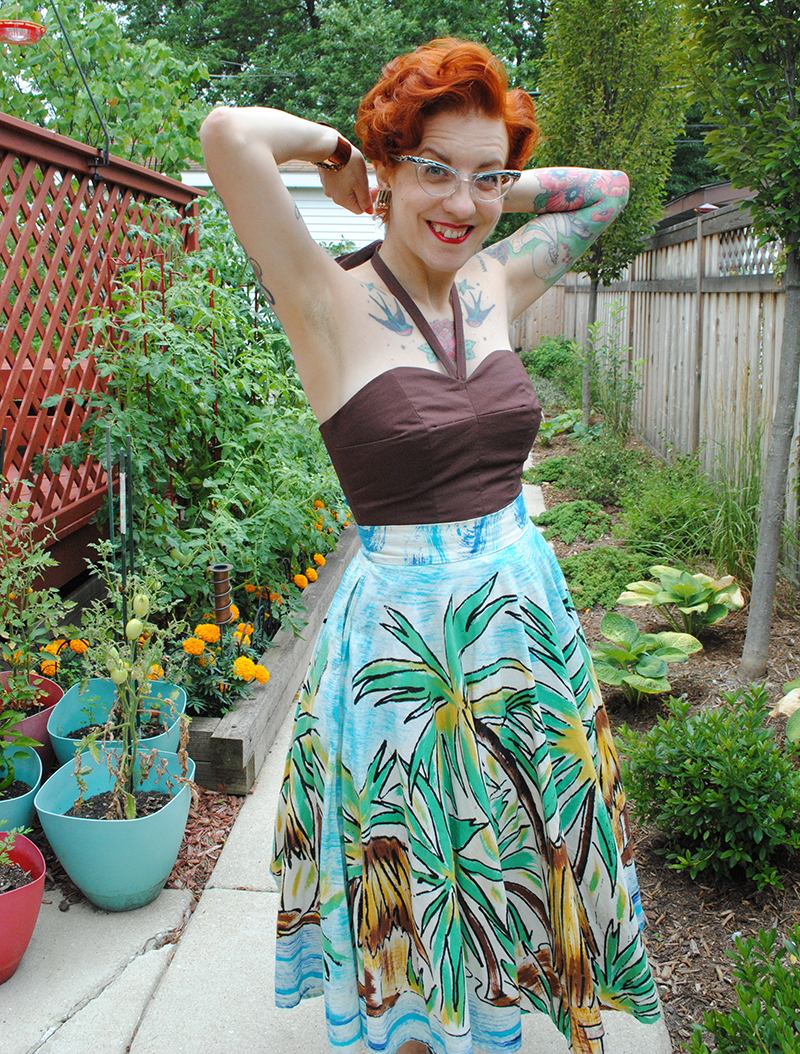
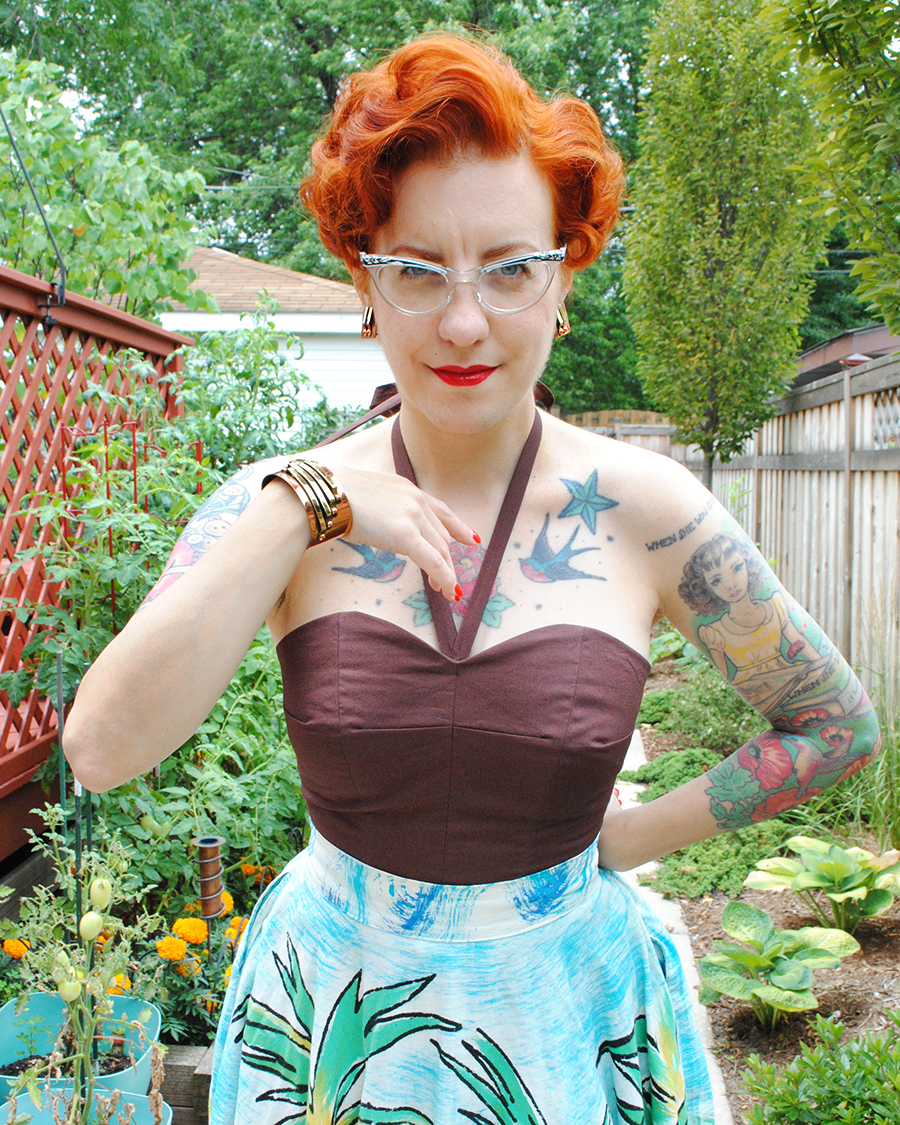
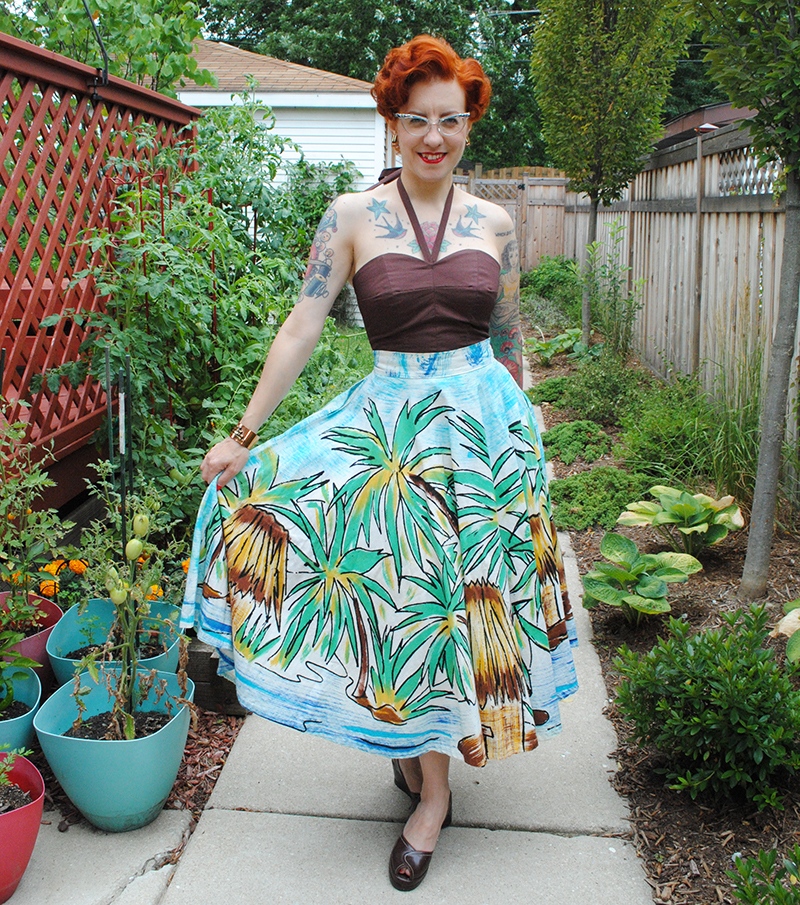
But really, I’m so happy with how it turned out. Brown isn’t my favorite color by any means and I like to accessorize with black far more. But I do have some great Remix brown wedges, and do love mid-century copper jewelry like the set I’m wearing in these photos, so it’ll get some wear for sure, like with this vintage hand-painted Mexican circle skirt.
If you’re still here, remember how I said there’s technically two parts to this story? You’ll have to wait for the second part, because I’ve written enough for one post. I’m very happy with this top, but had some ideas for potentially improving the overall ‘vintageness’ of it, or at the very least, giving this pattern a slightly different spin.
So the second part of the story will pick up there, sometime soon I hope. Some sewing to be done until then…


You’re going to laugh, but I was so happy to hear your short waisted! I’d lived my whole life not giving any thought to my body type, and only recently did I measure to see where I landed. I was disheartened to read that short waisted folks should avoid high waisted items, tucking things in, etc., a.k.a the sorts of vintage-y things I love to wear! I quickly decided to hell with it, that I’d keep wearing what I love, but I’ll admit I’m sometimes judgier now about my reflection in the mirror. Ridiculous! You always look smashing so I’ll take it as a sign to ignore all the stupid Pinterest posts now flooding my feed showing me all the things it thinks I should wear that I NEVER WOULD! Thanks for continuing to be a source of inspiration.
No I wouldn’t laugh at all! I’ve learned a lot about my own body shape and what works and doesn’t, in part from reading blogs of other people talking about their own fitting issues! I never had any idea I was short-waisted until a few years into sewing for myself. 🙂
Also yes– totally say to hell with what anyone setting irrelevant beauty standards says you should or shouldn’t wear! Wear what you want and love it!
In the last year I’ve suddenly wanted strappy and strapless tops, where for the previous decade I was all about covering my shoulders, mostly for the Australian sunburn factor. I think the change is partly inspired by sewists such as yourself and Gertie, but also from being very close to forty and saying To Hell With It! My decolletage is getting out there. Looking forward to part 2.
Here we’ve mostly had a super hot summer, so I’m sure that’s partially why I suddenly am into the idea of halters and strapless tops, but hey I turned 40 last year, so maybe there’s something to that getting your decolletage out there perspective, ha ha!! 😉
Another smash hit! The first time I sewed with a Vogue pattern, I followed my upper bust measurement and I think I could have fit two christmas hams in the bust area. I also find the repro patterns to be all kinds of wonky so a muslin is an absolute MUST. Not to mention that they all seem to miss the high end details that gives the final result that polished professional look. Switching out the fusible for muslin for instance! I did that with my Vogue halter gown as well.
This looks fabulous on you, fit and finish are fantastic. I wouldn’t worry about the brown, the color works with you and it lets the skirt shine. Your version is absurdly better looking than the one on the repo cover.
Thanks, Brandy! I could easily have fit a Christmas ham into the first muslin, and that was supposedly going by the finished measurement (on the pattern piece) that matched my full bust. Yak!! I thought it would take all sorts of alterations until it dawned on me… just sew a much smaller size. Ha! I’m really pleased it worked out in the end.
Though I guess not to be outdone… I just had my first experience of this happening with a true 1950s Butterick pattern in my size. A brand and size I’ve sewn many times in vintage… and that top came up probably 4″ too big!! I actually checked to make sure the pattern size in the envelope wasn’t accidentally mixed up! So while I typically do much better with true vintage sizing, that one was crazy!
How lovely! And what a perfect frame for your tattoos, if that’s not weird to say. It all looks made for each other. Thanks for all the nitty-gritty sewing details, I devour them.
Thank you! And glad you enjoy the nitty gritty, that’s some of my favorite stuff to read too!
Your top is amazing, and I loved reading this post – I’m all for the nitty gritty of construction! You did a brilliant job on this, and the fit is fantastic. I’m so with you on the sizing on the big 4 patterns. I’ve just started making a Vogue jacket, and am pretty much crossing my figures with the size I’ve picked! I shall look forward to your next post on this.
Thank you! Good luck with your Vogue jacket. Even knowing the side eye I generally give the modern Big 4 patterns, I was still surprised how much this one was off!
You have made the Sun top fit beautifully. I find it interesting that the boneing does not cover the whole of the front over the bust. I must try that as it tends to twist when its continuous.
Looking for ward to the next stage.
Thank you! Yes on this particular pattern you don’t bone over the entire princess seam. I tried boning the entire line in the muslin and there’s no technical reason why you can’t, but I found that it enhanced a rounder more modern shape than I wanted, whereas only boning the top and underbust (as the pattern indicates) allows my more vintage style strapless bra to give more of the shape.
Great looking top. I’m looking forward to part 2.
Once, many years ago I tried a strapless bra (so I could wear a spaghetti strap dress) and decided that they are not for me but I do admire the look of strapless or thin strap dresses and tops.
Zippers – I hope you don’t mind if I plug my favorite zipper source, wawak.com. They have separating zippers as short as 14 inches. Which still might be too long for that top, I don’t know, but they do have a huge variety of zippers.
Oh I buy from WAWAK plenty, that’s where I got the zipper I used and had to cut down. 🙂
That is a truly amazing top, really love it! You look so lovely wearing brown. 🙂
This turned out so great!
I love that you are nerdy and hardcore about getting the proper vintage shape. The cut and fit make such a difference! Also, we use the interlining in muslin trick all the time in theatre. Adds structure and makes costumes more durable, especially with more delicate fabrics.
I just recreated a strapless 1951 Balenciaga gown and used an actual 1951 bodice pattern, but it didn’t have the ‘Hollywood dart’ across the bust which helps with that nice shaping. Your boning pattern confirmed my gut instincts so mine is very similar. As a fellow short waisted lady the under bust lengths were comically short. I will definitely be blogging the process when I get a chance and including (as much as I can remember – last minute couture problems) lots of ‘nitty-gritty’ because I know it might be useful to other sewers (thanks for all of yours). Shared some pics on my instagram if you are curious : )
Hoping to make another (less involved) strapless top inspired by yours sometime using what I’ve learned. I suspect it might be a great way to use up smaller pieces of cool/vintage fabrics too!
I love it so much and great tips. I hacked Gertie’s L’amour dress in a DD with that 8130 pattern and made a perfectly fitting top on the first go! My IG is misswillowk, you can see it there. I just love your blog and everything you make and your house is to die for.
Thank you, that’s so nice of you to say! And your version looks awesome. Hopefully I’ll get a chance to photograph my more recent one but summer has faded so not looking likely this year. LOL
Although I agree they should have left the vintage pattern number on the picture, maybe they took it off so people wouldn’t get confused? I used to work at a big Joann’s and I can imagine the questions I’d get about the pattern numbers. People would bring in pictures of pattern envelopes with no numbers, or the numbers cut off or the sizing or even branding cut off, and tell me to find it- out of the thousands of patterns we’d have. Or “I don’t want to have to look through the books for a dress pattern can you just give me a dress pattern?” Or they’d ask why all the shirts weren’t in one number and all the pants in another number. Or why wasn’t it sorted by gender. Or ‘i think the pattern was.. twelve something? Two hundred something? It was either butterick.. or McCall’s? Is Simplicity the simple patterns? It was blue on the envelope can you give me this blue fabric on the envelope?”
Modern meets vintage! That’s what I think when I see these photos. I think I’ve found a new vintage blog. Excited to see what you have in the making!
Nancy