One of the reasons I try to never put down a sewing project is I know I’m liable to have changed my mind about something. Such was kind of the case with this coat right here.
Which… I made back in the fall. I know, perpetually catching up in-between new projects! But I digress.
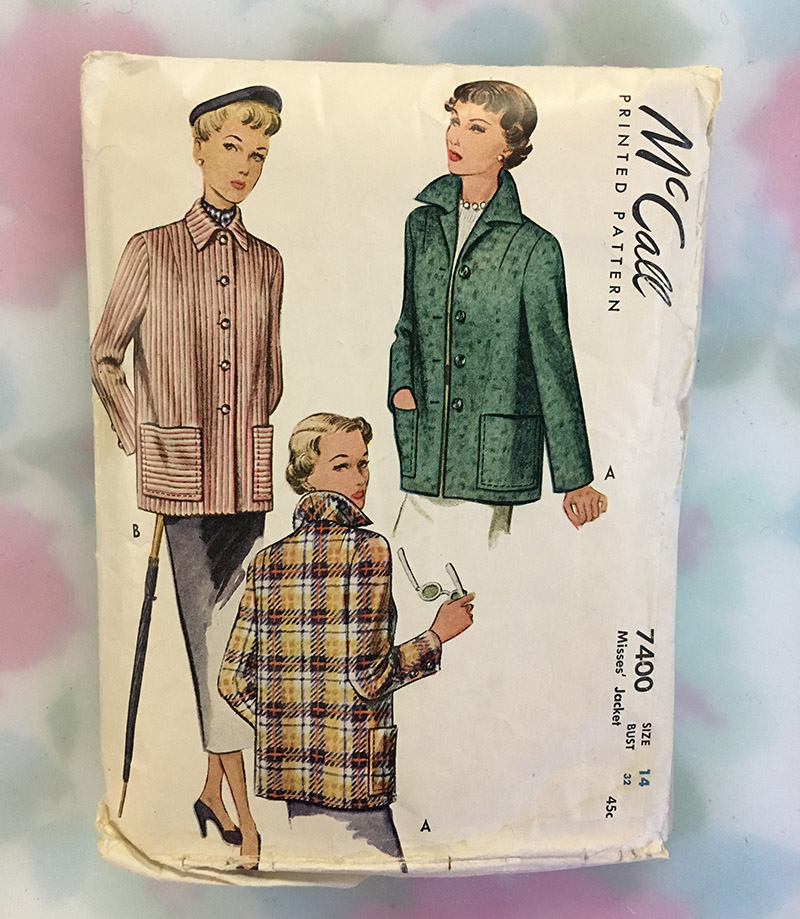
Initially, I wanted to make it in early fall. I looove vintage Pendleton 49er style jackets, and they are in heavy rotation in early fall and spring in my wardrobe (and sometimes inside the house in winter). I’m not really sure what compelled me to want to make one because… well geez, I have enough of that style of jacket! But my plan, for whatever reason, was to create a version myself, using McCall 7400 from 1948.
As it happened, I put the project down to focus on Rhinebeck projects (um yeah still have to share my insane Rhinebeck sweater), and I picked it back up in November, when the weather is too cold generally for 49ers. So by that point I was really cranky about getting this just finished and out of the way because I wasn’t as excited about it any longer.
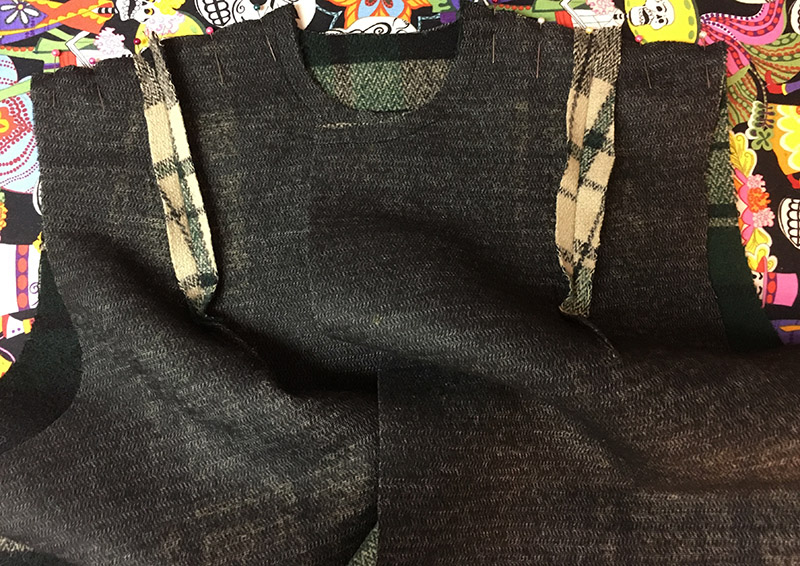
The good news was I’d forgotten the wool I had from Mood was thicker than I’d anticipated, so it was going to be a lot warmer than a Pendleton jacket anyway—those are thinner and unlined. This was a medium weight wool I’d say, which I interfaced fully as it was a bit of an open weave and I didn’t want the plaid getting all crazy and out of skew on me. Apparently this was the only photo I have that shows that the pieces were interfaced with fusible weft insertion interfacing (the darts are cut and pressed open to reduce bulk).
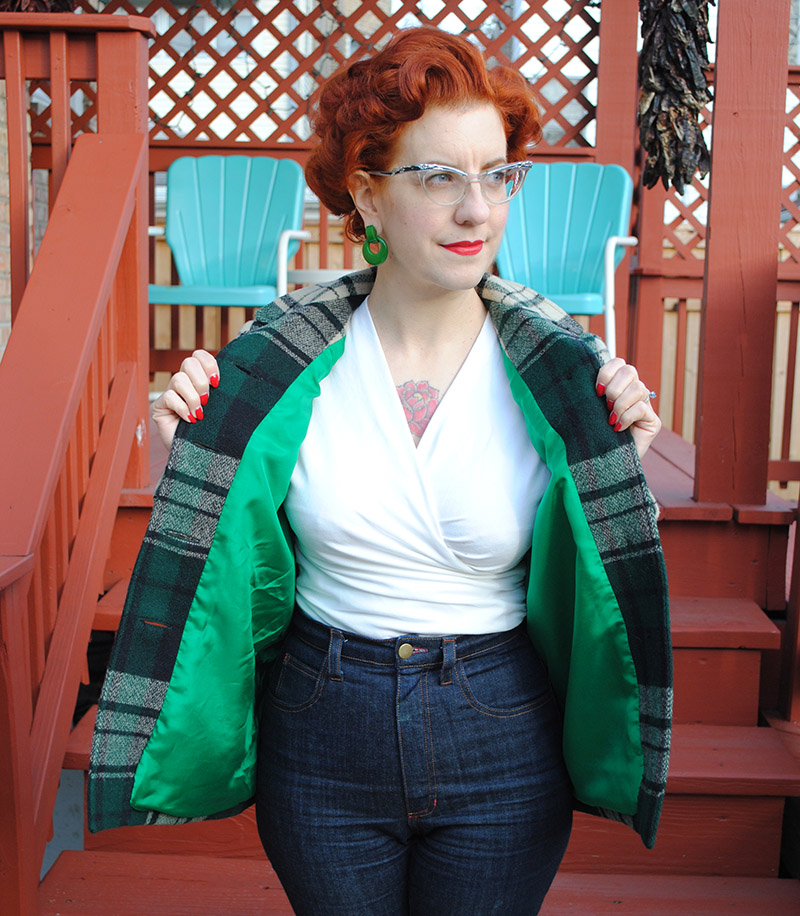
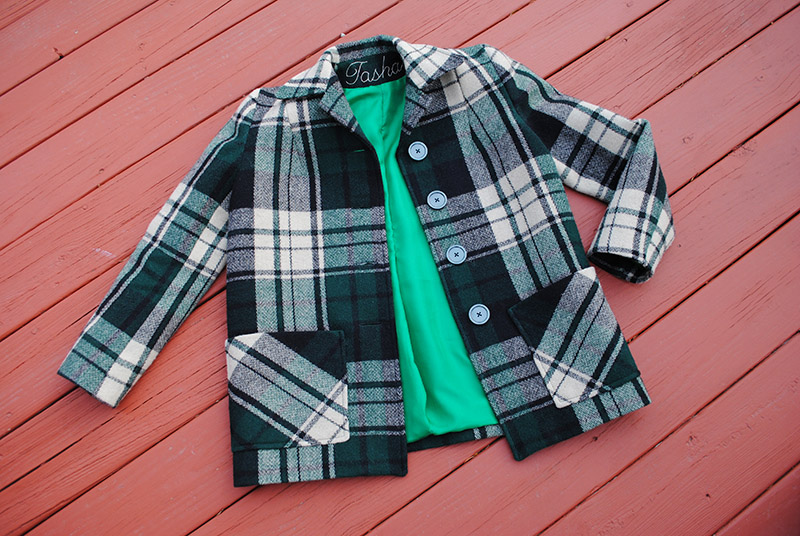
I also lined it, though unfortunately made a poor choice of China silk as I didn’t realize it’s so much thinner than silk charmeuse. Lesson learned. I suppose if it ever wears out I can replace it.
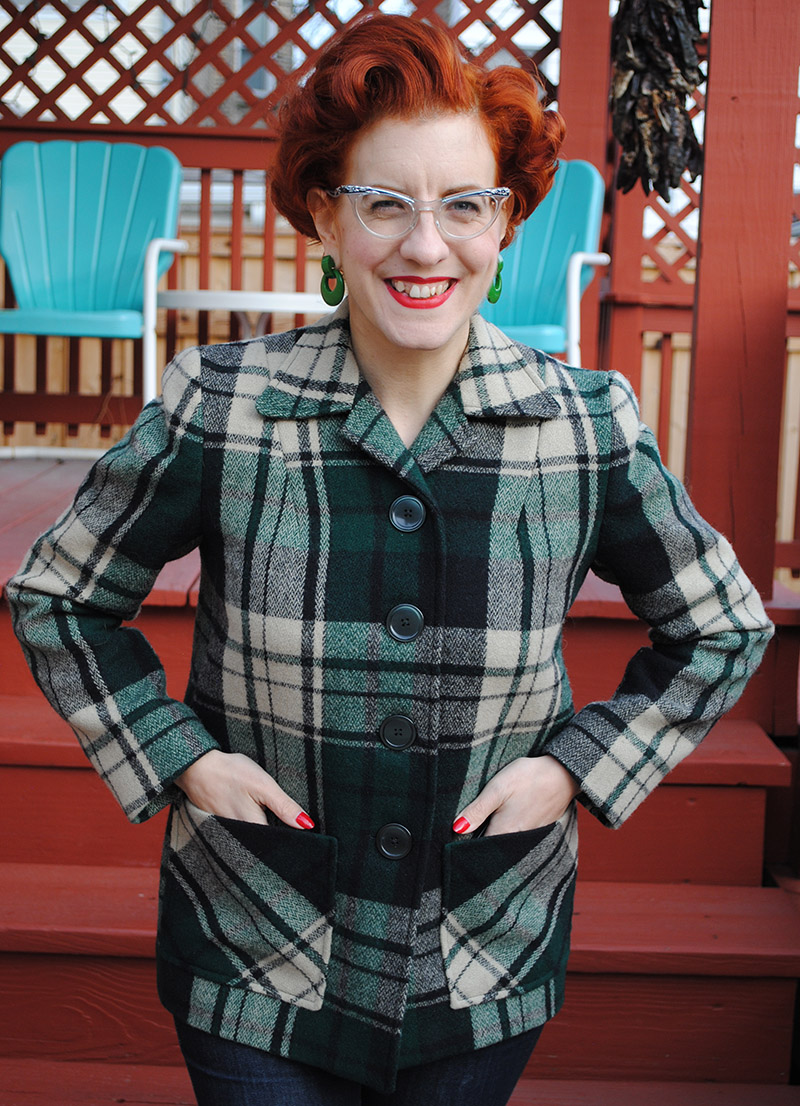
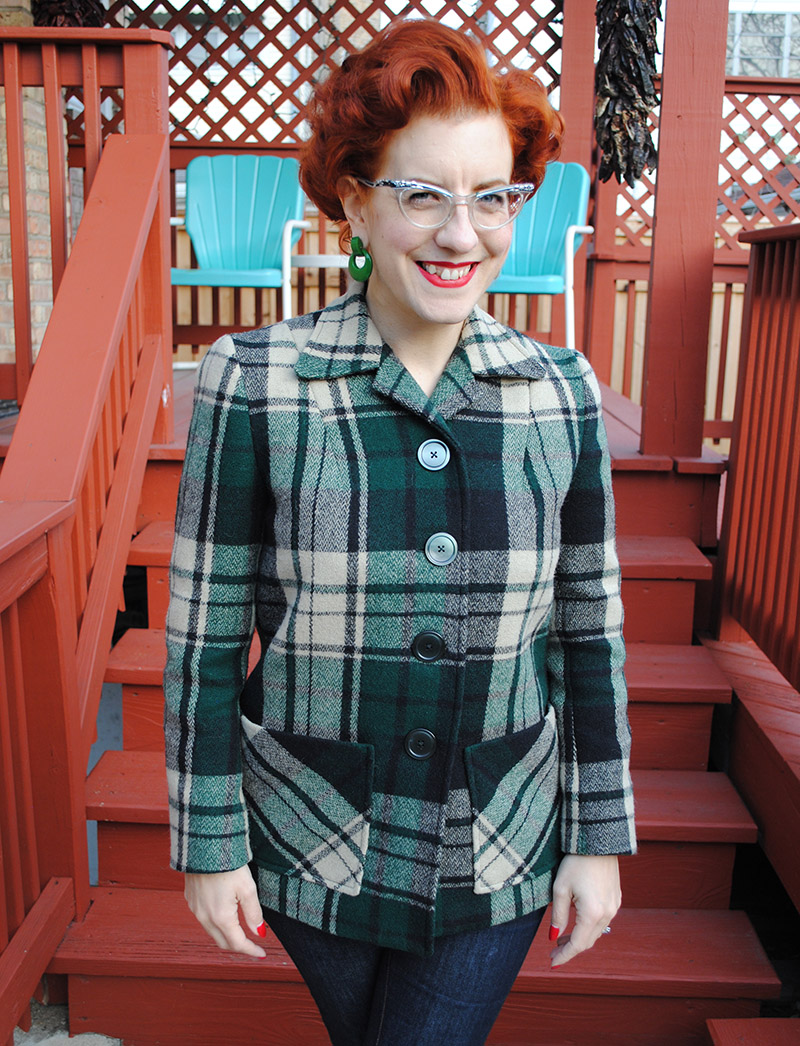
What I realized I ended up with in the end was actually a Pendleton 49er-inspired coat!
And drumroll please… that’s something I don’t have! It even fills a gap: I don’t have vintage or vintage style winter coats that look good with pants and casual shoes, and sometimes when I want to wear that I feel lost when I need to leave the house and put on a coat. While this coat isn’t suitable very long into winter at all, it should help me out a lot in early winter and late fall! In fact halfway through I was kicking myself for not sizing up and interlining it with lambswool, but you can’t win them all.
The pattern is from 1948 and while it did have a version with a lining, I am much happier with modern lining techniques that allow you to machine stitch the entire lining and facing unit, and then bag the lining. None of this no back neck facing and hand stitch the lining to the collar for me, thanks.
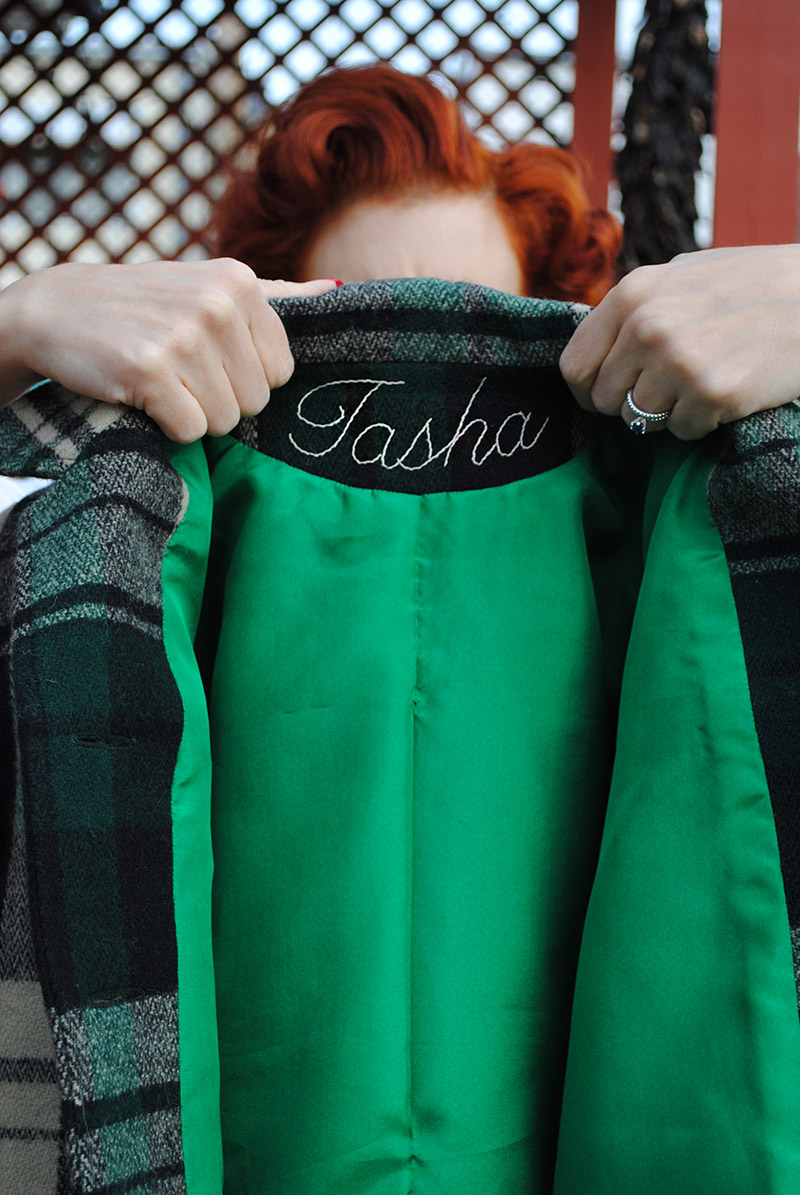
Could I do it? Yes. Do want to? No. And it’s not that I dislike hand sewing as I don’t mind it, I just prefer some methods. Besides, that means I’d miss the opportunity to do one of my favorite things in outwear: embroider inside the back neck facing! By now you know, this is one of the little trademarks I like to do. As of my short swing jacket, I realized I really like putting my name in. 🙂
That does mean I had to make my own lining pieces, and adjust the front pieces to work with bagging the lining, and then of course go rogue on the pattern instructions. For the lining, my favorite resource is Easy Guide to Sewing Linings as it walks through creating a lining pattern when there isn’t one. My favorite tailoring resources to help me through the rest are Tailoring: The Classic Guide to Sewing the Perfect Jacket and Jackets for Real People (I am not a fan of tissue fitting but the rest of the book is invaluable). I used fusible tailoring methods for this jacket but the first book covers traditional, custom and fusible, whereas the latter just covers fusible. To date I’ve always used fusible tailoring, just a personal preference.
Ah, bagging a lining. This is the point every time when you look at something and just think WTF even though you know it’s going to work.
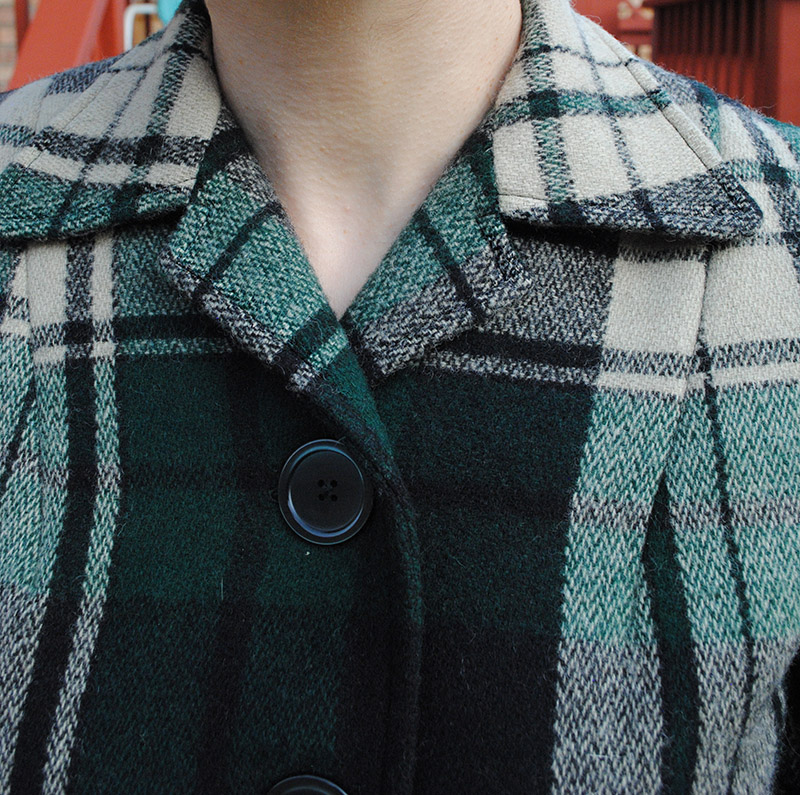
Now let’s talk plaid here for a minute. Holy cow, it was a formidable task working with a large scale, unbalanced plaid. Except for a couple of minor quibbles, I am super happy with the result! Collar (front and back), front pieces, sleeve to body, the whole shazam.
Phew. Yeah, that’s a lot of plaid. It look time plotting it out. Looots of time. But I look at this jacket and couldn’t be happier with how it turned out, and that is a great feeling!
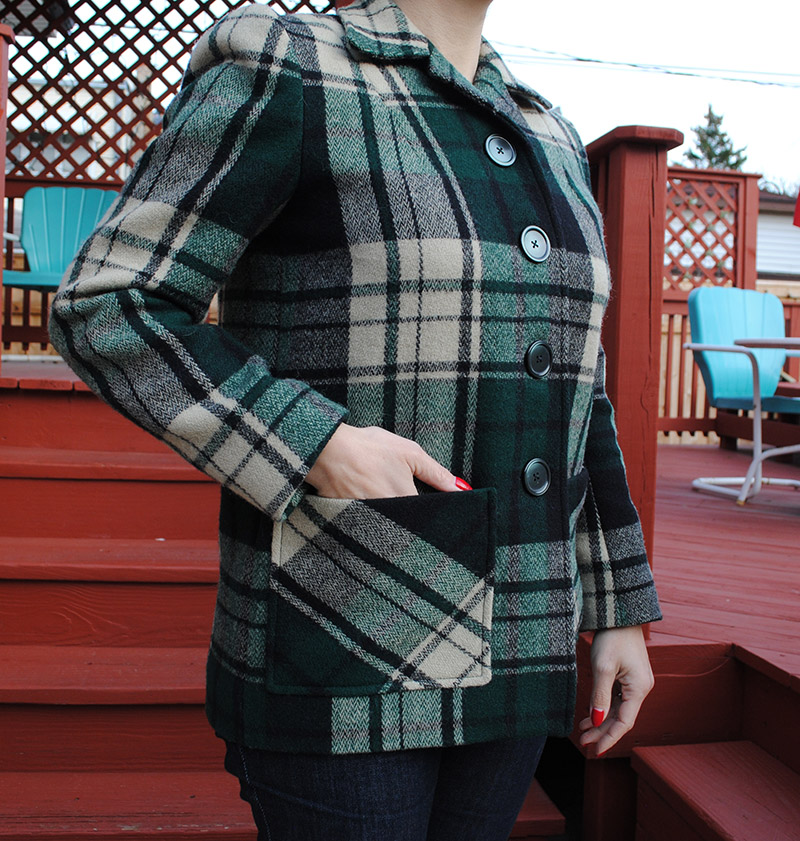
Oh hey, quick tip! Not related to plaid. See in the photo below how the buttons stop at the level of the top of the pocket, and the bottom of my jacket isn’t opening outward, but kind of hugging into my body? When I pressed this part, I pressed it over a ham so it would want to roll towards the body.
I debated about what to do for the patch pockets, and finally went with them on the bias. Something you probably wouldn’t have thought about if I didn’t tell you: see how they’re a perfect mirror? You can’t do that with unbalanced plaid. One of them is using the opposite side of the fabric. I stared at both sides for ages and finally decided they looked exactly the same, and so I flip flopped one!
The pattern called for topstitching the pocket I think 1/4″ in from the edge or something like that, but I didn’t want there to be any chance the bright green lining would peek out. So I took the time to invisibly hand sew the pocket to the body, and then topstitch. Now it lays perfectly flat, there’s no peek, and it’s probably more secure, anyway.
I also topstitched the entire coat around the front and lapels, which is something I’d never done before for a coat or jacket. It looks so great for this sporty style of coat!
I was lucky enough to find the absolute perfect buttons on Etsy (literally think I trawled through vintage green buttons endlessly for awhile). They look exactly like the type on some of my vintage Pendleton jackets, and they’re a perfectly matching deep, pearly green. So hard to get an accurate picture but trust me, they’re perfect.
And that’s the story of a jacket that I didn’t need that turned into a coat that I did. But before we leave here today—here’s something hilarious. I had part of this post composed a couple of months ago, and that included the following sentence:
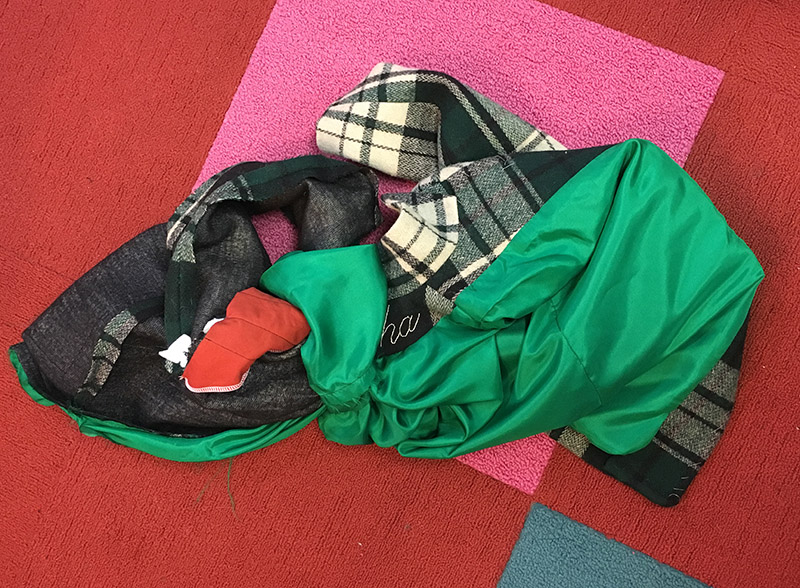
And now I think I need to go knit a big comfy warm red scarf. I’ve been wanting one for ages, and wouldn’t it just look lovely with that hunter green?!
OMG. I ACTUALLY DID THAT. I LITERALLY JUST DID THAT!! I can’t wait to wear my new scarf with this coat when it warms up!
The fabric in this post was provided by Mood Fabrics in exchange for my participation in the Mood Sewing Network.





Wow – that’s a really cute jacket. Great job matching the plaid. It’s perfect.
Thank you! I’m really happy with how the plaid looks!
This is such a cute jacket! I’ve always wanted to make a pendleton. You’ve done a great job.
Thanks, Fiona! Still not sure why I was inspired to make a Pendleton when I have several but at least I now have one that’s warmer! 😀
Beautifully done, Tasha! Masterful plaid-matching. Shoes are awesome.
Thank you! My shoes are from Rocket Originals, I love them for casual outfits like this!
Epic project. First, the plaid matching is outstanding. The lining is great. One always has to make professional lining and facing pieces. In my experience commercially made garments of that vintage are made with the techniques you used. It’s just the classic home sewing pattern sheets that are lacking. I never follow them. I love the cover of the tailoring book you linked. It shows a collar marked for turn of the cloth–an essential concept. Another amazing resource is the series of Singer tailoring books–if they’re still available.
Thank you! It did feel like an epic project, especially when I was cutting out all that plaid, ha ha. Agree on the collar turn of cloth importance, I’ve never not had to trim a bit off!
https://www.amazon.com/Tailoring-Singer-Sewing-Reference-Library/dp/0865732418/ref=sr_1_1?ie=UTF8&qid=1517015906&sr=8-1&keywords=singer+tailoring
Here’s a link to the Singer Tailoring book. It’s 30 years old but it’s the best. I learned almost everything from this book. I also learned some really good tips about lapel and collar sewing for suits from some really old issues of Threads magazine.
For some reason I don’t have this one, I think maybe I’d passed it by as it focused on more traditional tailoring methods (pad stitching, etc). But for a few bucks, always good to have a used copy in my arsenal and learn something new.
You have to remember that I am so vintage I bought that book when it was new!
I love your coat! I was especially interested in this blog post as I’m about to finish making a plaid wool jacket for myself. Your shoes match brilliantly too.
Thank you! Yay for sewing plaid jackets. 🙂
I absolutely hate topstitching I never get it right hahaha… I should indeed handsew it first before the topstitching. I should really just be more patient. Thanks for being my sewing buddy I absolutely love this jacket and really tempted to make a similar one in the future 🙂 I really love the idea of embroidering your name too!!
I’ve gotten a lot better at topstitching over the years, mine used to be pretty dodgy! It’s of course best when I can use an edgestitch foot but for something this far in I just have to eyeball it with the edge of the presser foot. More nerve wracking for sure! 😀 If you do ever entertain a jacket like this you better let me know, I’ll have lots of tips for you! 😉
The jacket is gorgeous. It is a very flattering style. I love your fabric choice and the embroidered name is a great touch. Pendleton-style plaid jackets are incredibly practical.
Thank you! Yeah, I find I wear my Pendleton style jackets frequently. If I’m wearing an outfit that doesn’t involve a skirt or dress odds are good I’m wearing one. So I can’t wait until I have more chances to wear this other than the random odd warm winter day! 🙂
gaaaaaaaaaaah! the perfection!!!!!
Thank you!! 😀
This is darling. Love green and plaids, and your embroidery in your coats is always the perfect touch. I know all the convoluted work that goes into bagging a lining (and replacing one), BUT if you line it with flannel backed satin, you might get a few more weeks of wear out of it!
I definitely don’t plan on taking this lining out any time soon. LOL But I do have some flannel backed satin and I don’t *think* it would be too heavy to fit in this, although it’s a fairly slim fit. Something to consider if the lining does ever wear out!
I need one like this in my wardrobe! It’s great ??
Thanks! I’m happy to have it in my wardrobe now. 🙂
Whoa, that’s some impressive plaid-matching! Perfect topstitching as well – love it.
Thank you!! It was well worth the effort to take the plaid matching reallly slowly, ha ha!
This is amazing!!! I enjoyed reading this post so much – I got to learn so much about the entire process of your sewing! It took me a second to understand the difference between a coat and a jacket. Living in Singapore where summer is eternal means any outerwear goes under the same category and have no differentiating qualities… hah.
Thank you! And don’t worry, I mean it’s a mostly subjective difference anyway! You could still call this a jacket! I just was thinking of it as a lightweight coat but either really works. 🙂
What a wonderful coat! Your attention to adding details is just so good.
Thanks, Nicole! I appreciate it as I (usually) try hard to get all the little things just the way I want them. 🙂
I love that you put your name in it! Also, good choice with putting a lining in this! I hate how all of my vintage 49’ers (or knock-offs) don’t have one. I also adore the color choice!
xoxo
-Janey
Wow! More sewing projects please, this one looks amazing.
Excited to see what you’ll do next.