Want a bright and floral dress that screams “Bring on spring!” at the top of its lungs? Well I’ve got one for you! I’m back with way more about the dress I sewed from Gertie’s Ultimate Dress Book. (And psst, two days left for the giveaway.)
As I explained in my review, the bodice of this dress is from the book. It’s been so much fun reading everyone’s excitement in the entry comments, and suffice it to say the majority of you really like the mix and match nature of the book, like I do. That’s kind of what this dress ended up! The bodice is from the book, and the skirt was freestyle, as I’ll explain. I froze my buns off on a cold and rainy day to take these photos on the covered part of our deck where it actually looks like it could have been warm out. You’re welcome. 😉
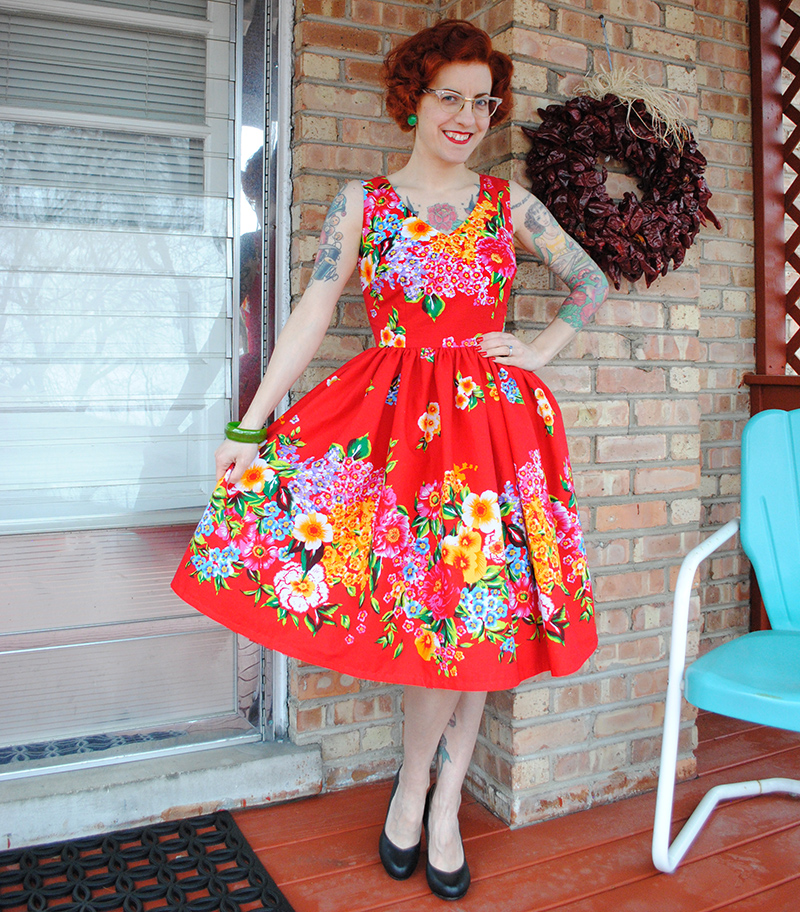
I wanted to sew something out of the book when I reviewed it, but it took so long to decide and I kept dragging my feet. Yes, theoretically I’m supposed to be focusing my sewing efforts on cool-weather clothing, but if I’m completely honest with you it’s been a particularly mild winter which for some reason has had me more stir crazy for spring than usual, so I’ve been all over warmer weather items lately. (Which was probably predictable the second I “committed” to doing the exact opposite in my sewing! Ah well.)
But anyway, I’m so happy with this dress, even if it was last minutey. Sometimes I need a bit of pressure (even if it’s totally self-generated) to put everything together the way I want. And it definitely all came together for this project.
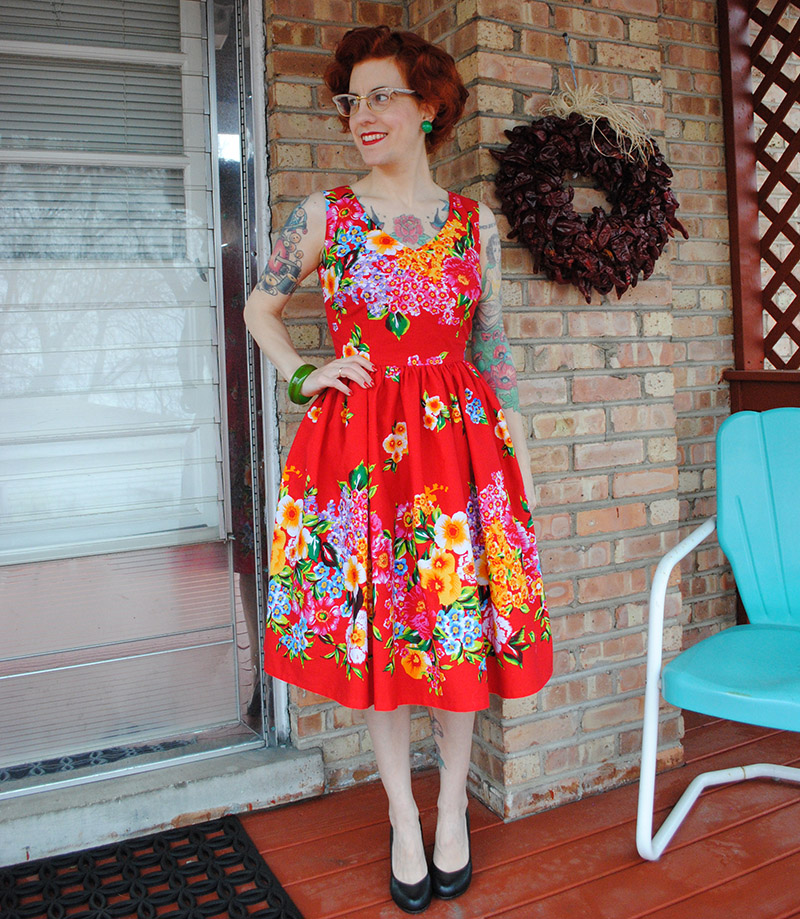
The fabric is a beautiful lightweight cotton from Hearts and Found on Etsy (you can find it here). It’s somewhere between a lawn and a quilting cotton, about exactly the same weight as Japanese Lecien cottons if you’ve sewn with them, even though those are described as quilting weight, I think.
It’s so vibrantly red it was difficult to even photograph! It’s absolutely stunning in person. Red really is my favorite color but I wear it little, because I’m freakin’ picky about my reds. But this one, it’s brilliant!
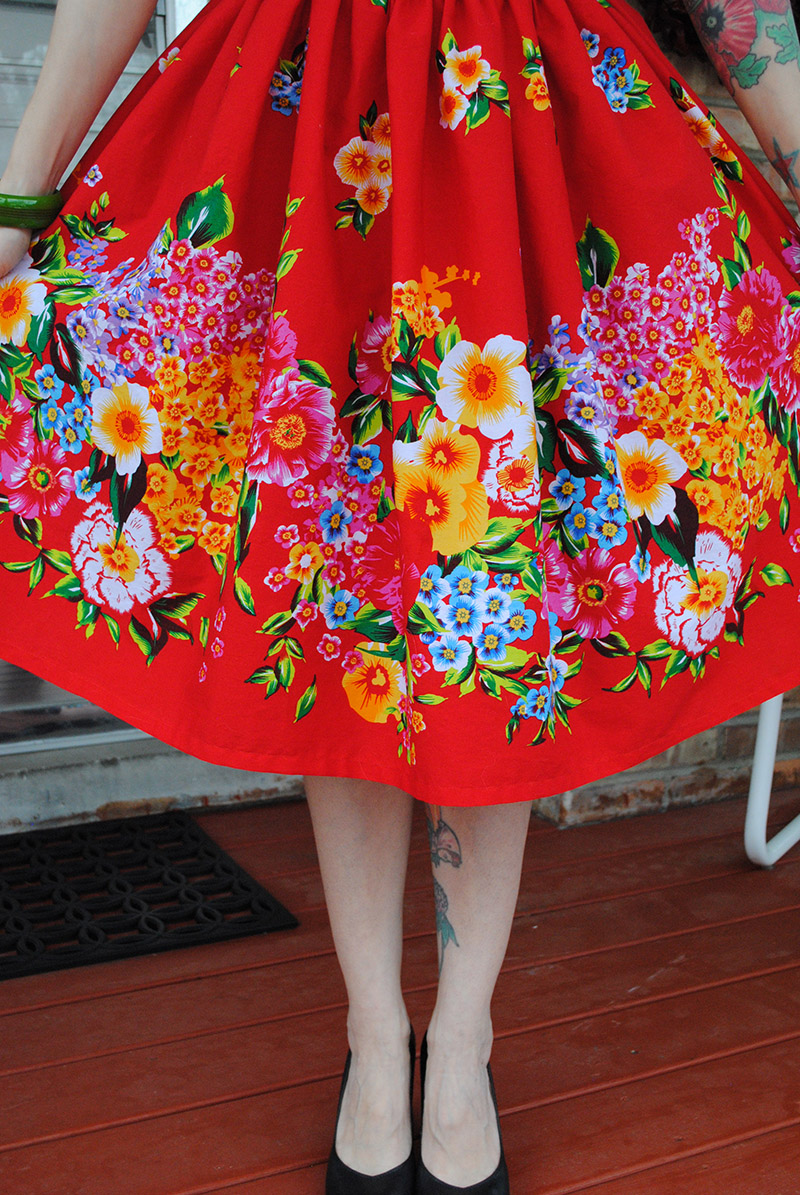
Because of the beautiful and large-scale border print, I wanted a pretty simple backdrop for it, because it’s all about that giant flower border, isn’t it!
I selected the v-neck bodice from the book, and went for sleeveless. Border prints like this typically run with the borders along the selvages (although not always, as I found out when having to place an order for something twice, doh)… that means in order to use them with the print running horizontally across some area of your body, you need to cut the fabric cross grain, opposite how you normally would. And that’s what I did for this project.
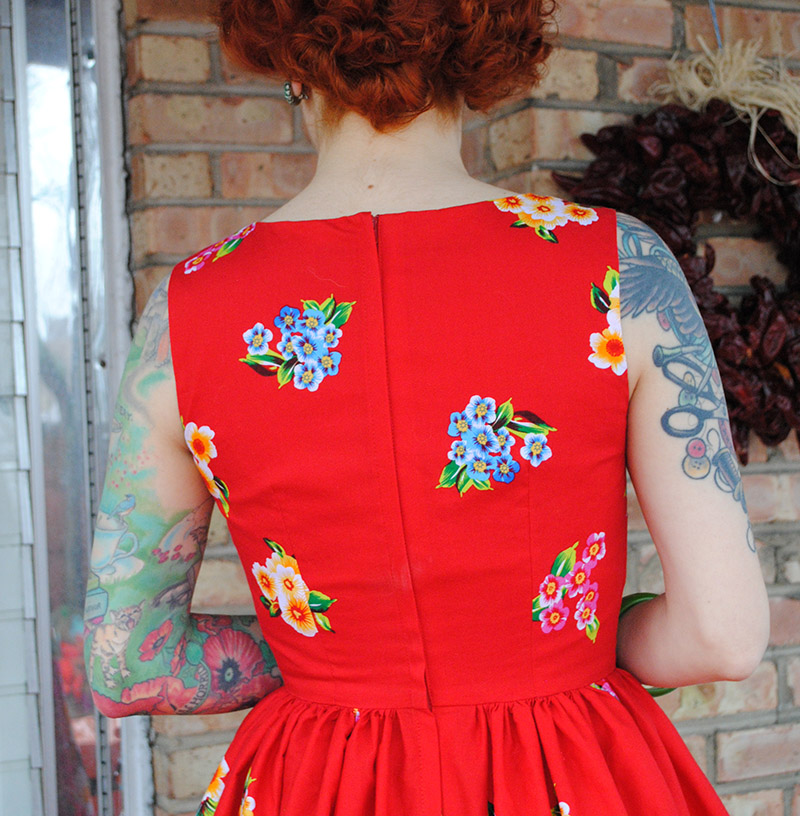
Initially I thought about placing the smaller flowers on the bodice front and using bias facing on the outside of the neck with the border print (which is shown in the book with a plaid and is really cute), but decided it wasn’t worth it since the border didn’t repeat in a way I could mirror on either side of the neckline. So instead I placed the larger print on the upper half of the front, and the smaller print on the back. I really like how that turned out and it’s fun that it’s different front to back!
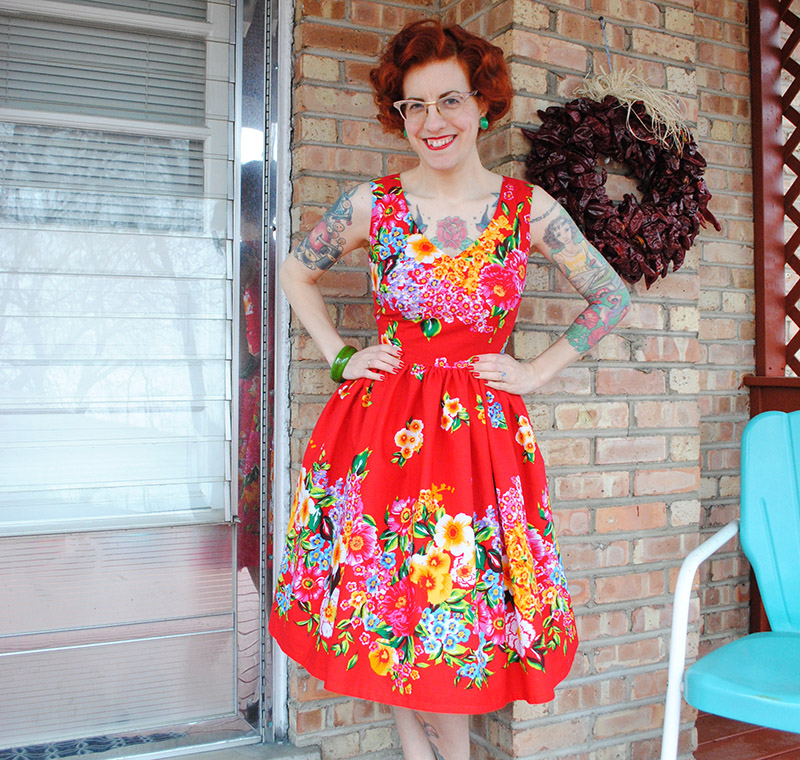
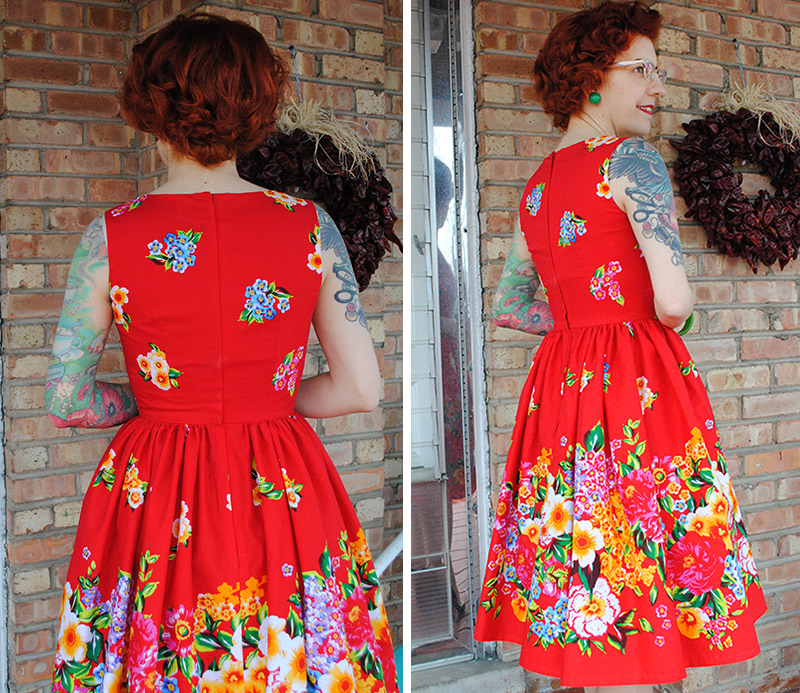
The border print also meant getting creative with the skirt, since I wanted to incorporate as much of the fabric as I could. I thought about using the full pleated skirt in the book, but in the end I wanted, well, more skirt. So I cut a gigantic rectangle 100″ wide, and gathered it into the waistband. That means there’s only a center back seam on the skirt!
Even though the fabric is lighter than a typical quilting cotton, I wanted a bit more stability in the waist because that’s a lot of fabric, so I sewed a length of rayon seam binding just within the seam allowance of the skirt seam to basically act as a stay. And I lined the bodice with red cotton lawn instead of using facings, just for personal preference. The issue with staying the waist is that it has absolutely NO give, and especially cutting the bodice on the cross grain means this waistline is not meant for eating a large meal. 😉 I’ll likely give myself a 1/2″ more ease next time at the waist, even cutting normally with the grain.
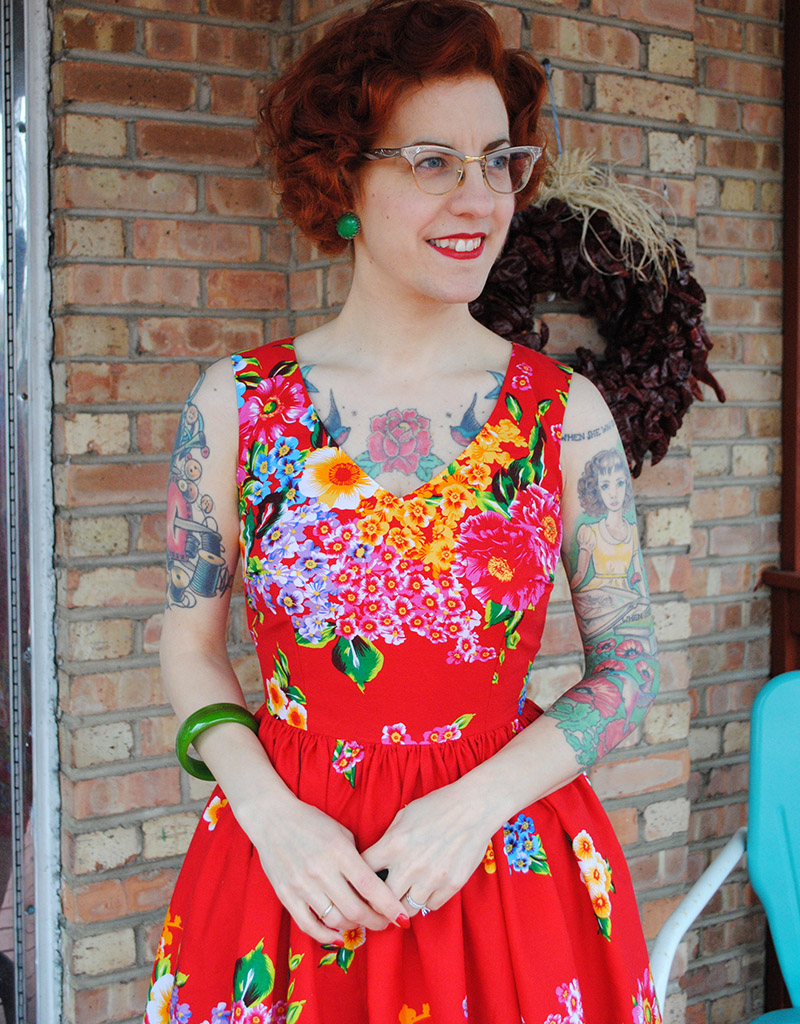
When I traced off the v-neck bodice, I compared it to a couple of other bodice pattern pieces I had lying around recently, and I was a bit suspicious at first. The bust darts are placed at a different angle and big, which made figuring out where they were going to fall difficult. I typically have to lower bust darts anywhere from 1″ to 1.5″ (yeah, no kidding!), but I decided not to lower anything on the muslin. As it turned out, other than the angle giving me a bit of grief in pressing them (I can’t really figure out how to curve my stitching line at the end—see an explanation on that here—because the dart is more of a sharp angle, if that makes sense), they hit in a pretty nice spot out of the envelope, which was like a breath of fresh air to me.
And the only fitting alteration I felt I wanted to make after trying on the muslin was to fix a bit of gaping at the upper back of the armhole. I hemmed and hawed because typically you’re supposed to rotate this out to a dart, but you know what I did? I slid the back bodice up a smidge on the muslin on the armhole side of the shoulder seam until it was smooth, and cut the resulting 3/8″ wedge off, tapering to nothing about halfway across the shoulder. That’s it. Worked great on the final dress. Huzzah! Look at that smooth armhole!
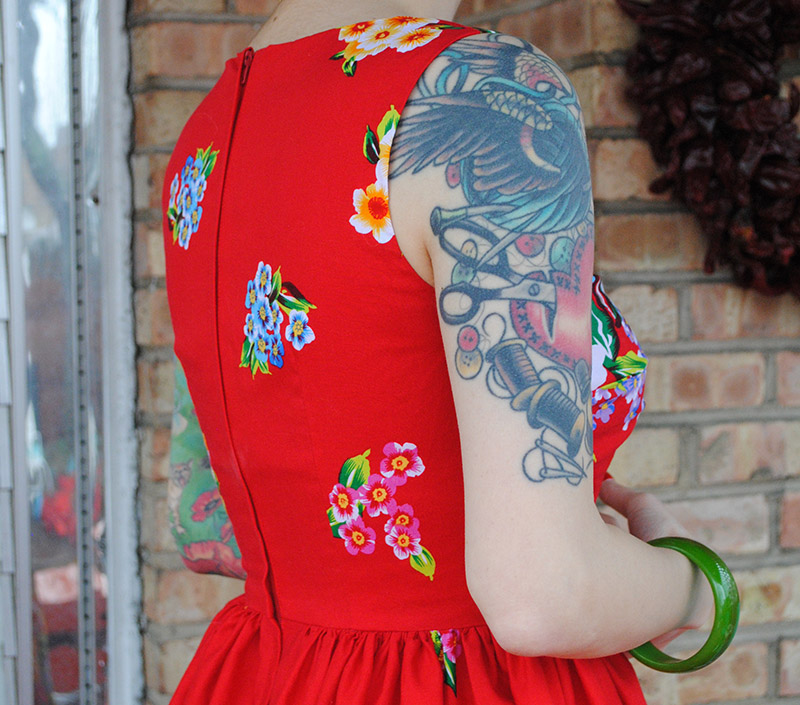
Man, I really like that armhole. (Sewing leads to funny sentences like that, doesn’t it.) I’m learning higher armholes are better on me, and this one is pretty high with a lot of coverage. I might consider just shaving a tiny bit off the armscye on the front next time since I noticed there’s a bit of wrinkling in some photos, but it’s so lovely and gape-free all the way around now that I’m hesitant to even tinker.
Other than the tiny shoulder alteration for gaping, I raised the v-neck at the center front point about 1″ total in the end for modesty, and shortened the bodice 1/2″ because I have a short torso and that’s a typical change for me. And that’s the extent of my alterations to this bodice.
I do notice a bit of kind of diagonal excess fabric making lines from the apex of my bust down to the side seam and I’m not sure what that’s about, or if it’s due to the fact that I cut the bodice on the cross grain or if the fabric was also a bit off grain to boot or what. I actually feel like I’ve seen this before on me on other dresses, but not sure what the culprit would be. It’s definitely not strain lines from the fabric being too tight, that much I know. But I’m certainly not losing sleep over it.
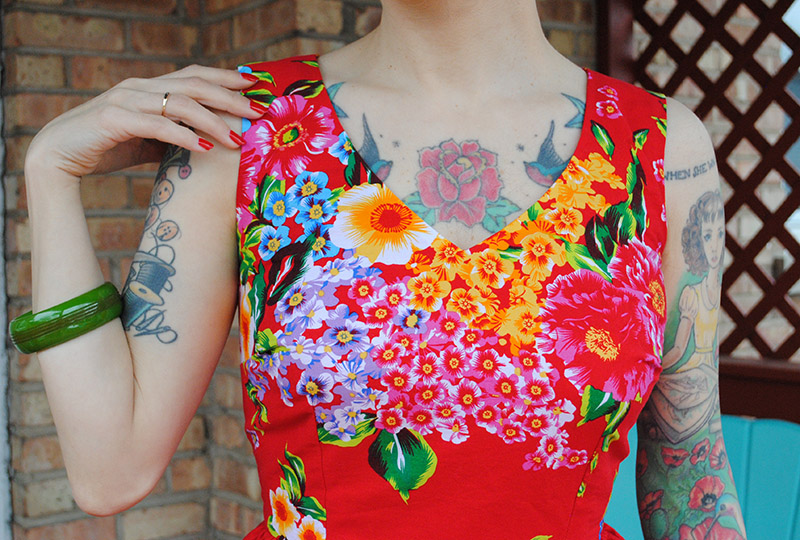
I’m really pleased with how nicely the upper back of this bodice came out too, and it gives me high hopes for using the other bodices in the book, too. The last time I sewed an Emery, when going back to the “original” pattern, I was surprised that I had some gaping at the front and back and the shoulders seemed too wide, which was all a tiny bit perplexing to me given the amount of times I’ve sewn tinkered versions of that bodice (though many of those were with cut-on sleeves which changes things a lot).
This bodice however has good shoulder placement on me, hugs my back well, and I didn’t need to do any kind of narrow shoulder adjustment.
I was already planning to do this, but I followed the tip in the book to stabilize the neckline. V necks by nature are on the bias, and even turning the pattern pieces 90° so they’re on the cross grain like I did, that’s still on the bias. You don’t want that to stretch over time! I’d already done this on a project I temporarily halted to sew up this dress, so I followed suit for this one: stay stitching the neckline, using lightweight fusible stay tape along the neckline (because the fabric was a bit lightweight too), and then using stay tape right in the seam line. I don’t have any 1/4″ twill tape (only a bit wider), so I used that stuff from Dritz that you can buy anywhere (here it is on their site). The nice thing is that it’s see-through, so if you’ve marked your seam line on the neckline ahead of time, you can still see it through the stay tape and if you weren’t precise enough pinning, you can maneuver it a tad as you sew. I also eased it in just slightly, so that the bodice wants to hug my body instead of gape out. Then after that’s all sewn, I notched the neckline and then under stitched it and pressed.
The neckline all goes realllllly slowly this way (annoyingly slow), but the end result is so worth it: a nice and flat V!
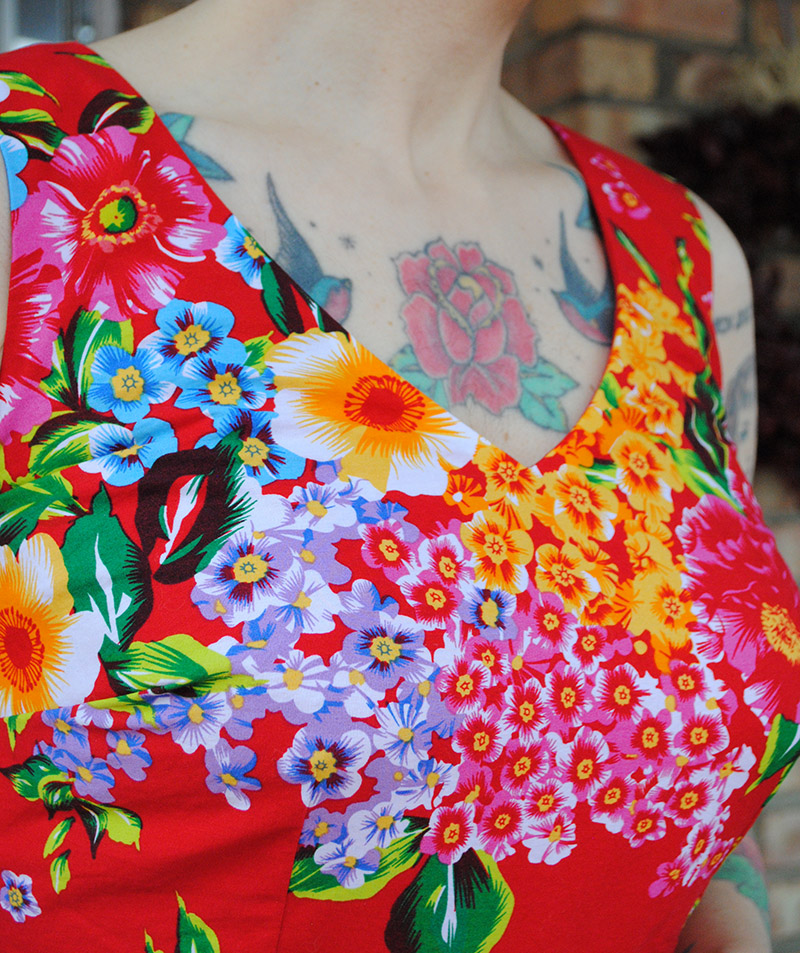
Stays put, even when leaning over! 😉
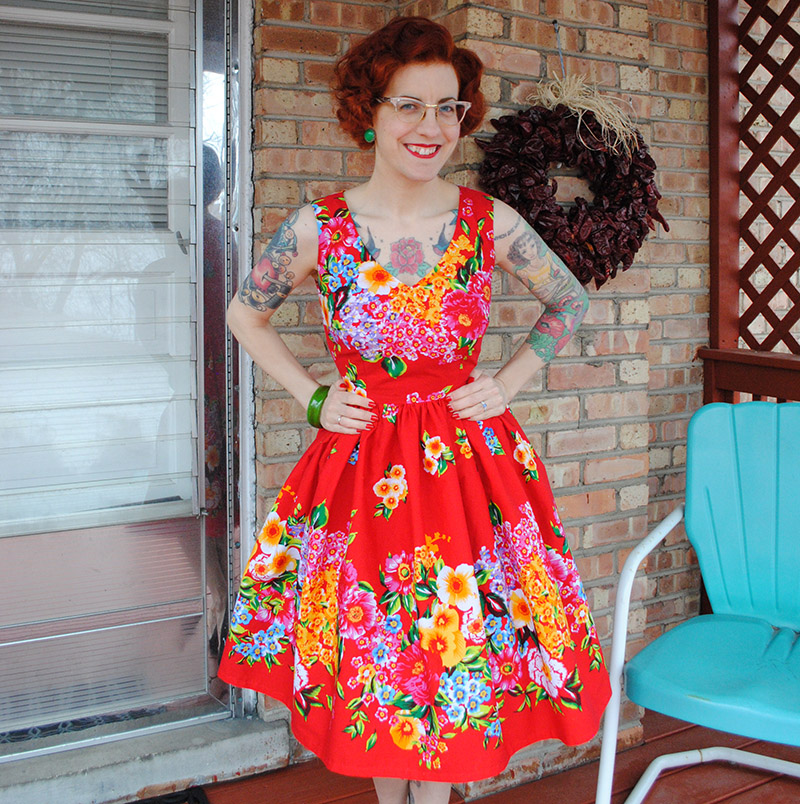
So obviously, I love this dress, and I’m pretty damn happy with the v-neck bodice from the book. I definitely will use it for more dresses in the future. I’m also really excited to try the strapless boned bodice in the book when it starts warming up. I think it would be great with straps or a halter neck for a sundress. And being so pleased with the general fit of one of the bodices in the book, it gives me high hopes that the others will work well for me, too.
Anyway, I’ll hopefully soon have two more dresses to show you, one I nearly finished a few weeks ago until I broke the (22″ long, hand picked, pattern matched at the seam) zipper the second I put it on a hanger and had to re-install it (!!!!!), and another I need to finish up. But then, I think it’s going to be time to sew some pedal pushers or cigarette pants or stripey tees for spring, don’t you??
(p.s. don’t forget the giveaway for one copy of Gertie’s Ultimate Dress Book and a small Fabric Traditions fabric bundle ends Friday!)
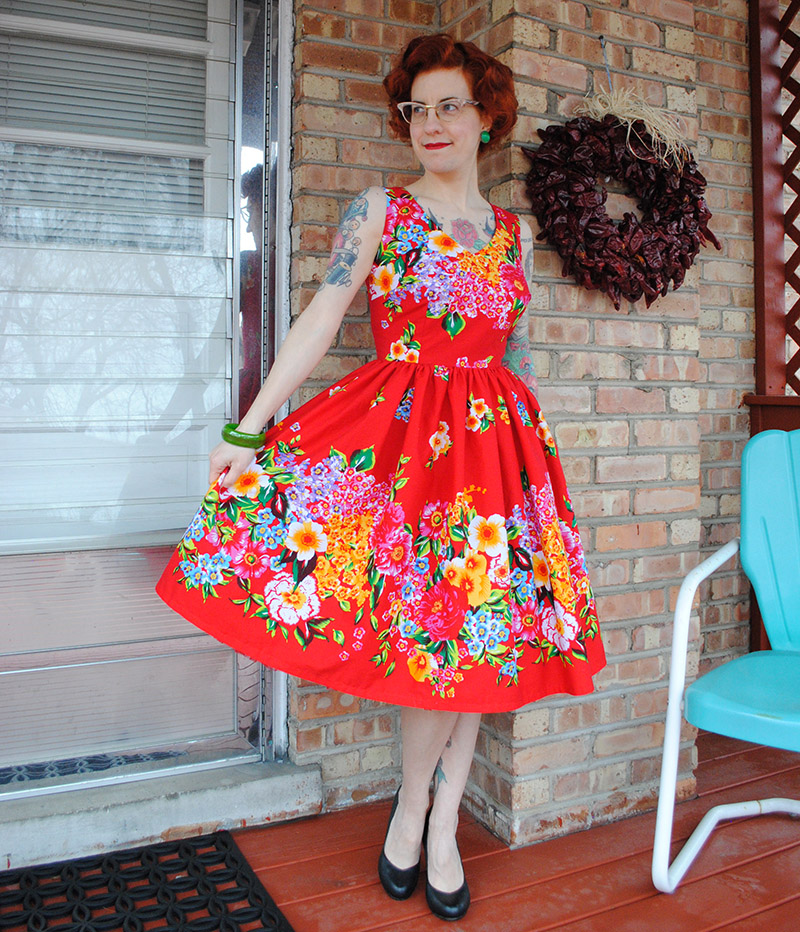
outfit details
dress – made by me
shoes – Remix
Bakelite bangle – misc.
vintage earrings – misc.

The dress looks lovely on you. I like how you used the border print. I picked up Gerties book last week. I’m hoping to make a dress soon!
Thanks, Mary! I love border prints but have a hard time finding them, so I’m thrilled with the way this one turned out!
What a riot of colour! Of course, you look amazing in it, and that’s cool how you’ve positioned the flowers on the bodice so they frame the neckline.
I definitely wouldn’t fret about the side bust wrinkle either, but since you mentioned it – in the close up shot I can see it does lie parallel to the side bust dart so maybe you could have lowered that a bit like you said you normally do. Also, I prefer to sew my side bust darts straight (unlike that tutorial) and only taper the very end, otherwise I have some excess fabric there a bit like you’ve got. I reckon those two things combined would sort out pesky wrinkle!
Looking forward to your next makes – and oh no! about that hand picked zip!
Thanks, Sherry! I should have clarified but what you mentioned that you do about tapering the very end is what I typically do, too– not the entire thing (although I’ve seen that recommended). I think I’ve also gotten that wrinkling on other dresses where the bust dart is definitely 100% low enough, so it’s a bit of a stumper, like it’s just a little bit too much fabric but I don’t know where to make it go away. lol!
So beautiful! That fabric is to die for and your dress just suits you so well!!
Thanks, Tanya! I love that fabric so much!!
Amazing dress! It looks amazing on you and that border print is just to die for.
Thanks, Nathalie! 🙂
Love how you did the pattern placement – such vibrant colours. Looks rad with your hair/accessories/ink ;o) This is one of my favourite bodices/necklines in the book, so thanks for the review!
Thanks, I’m glad it was helpful! 🙂
HOLLY MOLLY!!! I love it and it on you!! I am the same about reds, love them but supper picky with the shade
I know, right?? It’s so hard to find reds just the way I like them, but this is one of them! 😀
In absolute awe. You really knocked it out of the park on this one!
I really admire the use of the border print on the back and how you kept the back bodice with the small amount of fabric. I’m probably going to steal that idea. Okay. I am lol.
Everything about this is perfect!
Thanks, Tasha! Totally steal it!!! 😀
So appreciate your commentary on the bodice. Also the dress looks awesome on you. Thank you for sharing!
Thanks, Marion! You’re very welcome. 🙂
What a gorgeous dress! The fit and print placement are absolutely stunning.
Thanks, Hélène! 🙂
A thousand, nay, a million “wows!” This dress is a vibrant, awesome symphony of colour and classic beauty, and it looks positively sensational on you!
♥ Jessica
Thanks, Jessica, it really is a cacophony of color–in a good way! 😉
Amazing!!! I love this dress and the print. You’ve got me wanting to drive right into Gertie’s book and make something.
Thanks, Akram!!
This fabric is incredible and the silhouette is so flattering! I have a small bust and always have difficulties sewing v-necks, because they end up gaping. Do you have any tips for me? Thank you very much!
Thanks! I think if you approach stabilizing the neckline in a similar way to what I said I did, to be sure to ease the stay tape in slightly so that the neckline wants to hug your body, it may help. But I don’t sew a lot of V necks nor have a small bust so I can’t say for certain. 🙂
Wow!! Amazing dress, amazing job! Killer dress.
SEW, SEW, SEW SOOO GORGEOUS! Thank you for sharing! How much fabric did you use for the bodice?
I was sewing a lot for my girls when they were in elementary school. I wish I hadn’t stopped. I mostly knit now.
I know I am late, however I have just discovered your blog. you look amazing in that dress. where is that beautiful fabric from?