
Wee heeeee, my Cascade duffle coat is complete! And this is a big post, because hello, I sewed a coat and it took me from January to March, so there’s a lot to share!
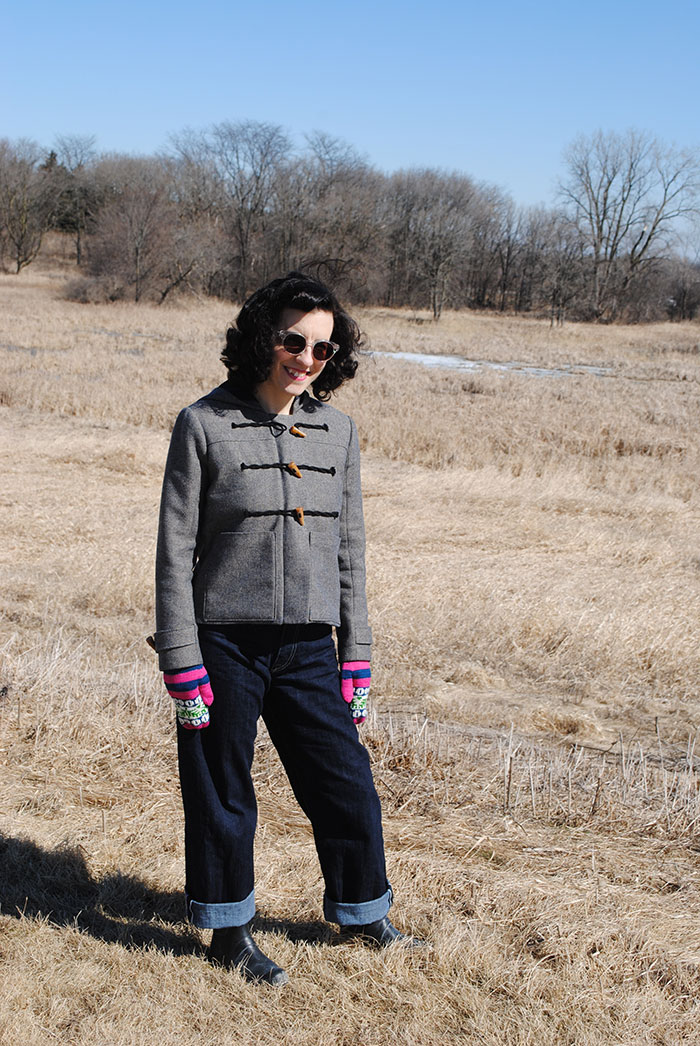
Right off the bat let me apologize these aren’t the greatest photos… it was as bright as could be the day we went up to northern Illinois to walk around and take pictures, and honestly it was such a beautiful day (omg spring came for the weekend!!!!!) I couldn’t have cared less that it was far from ideal for photos. I was too busy enjoying the fact that it turned to the perfect temperature to wear this coat as soon as I finished it!
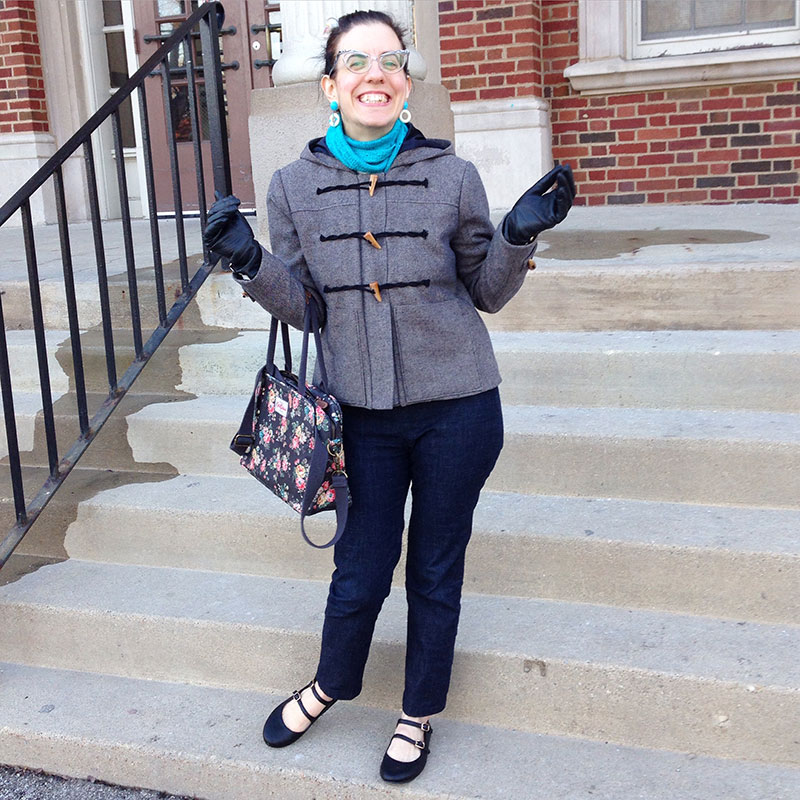
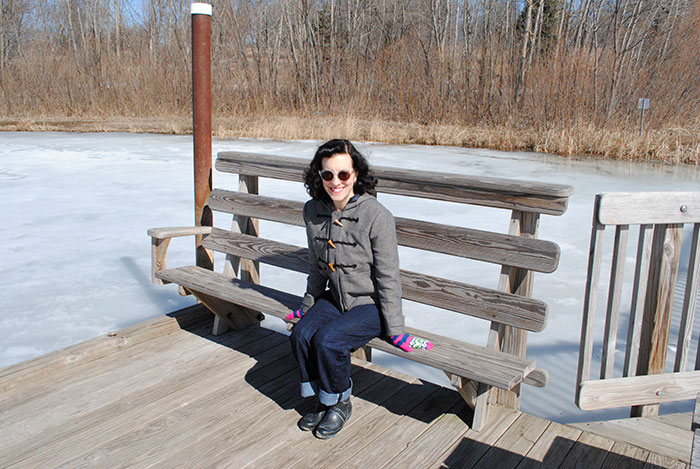
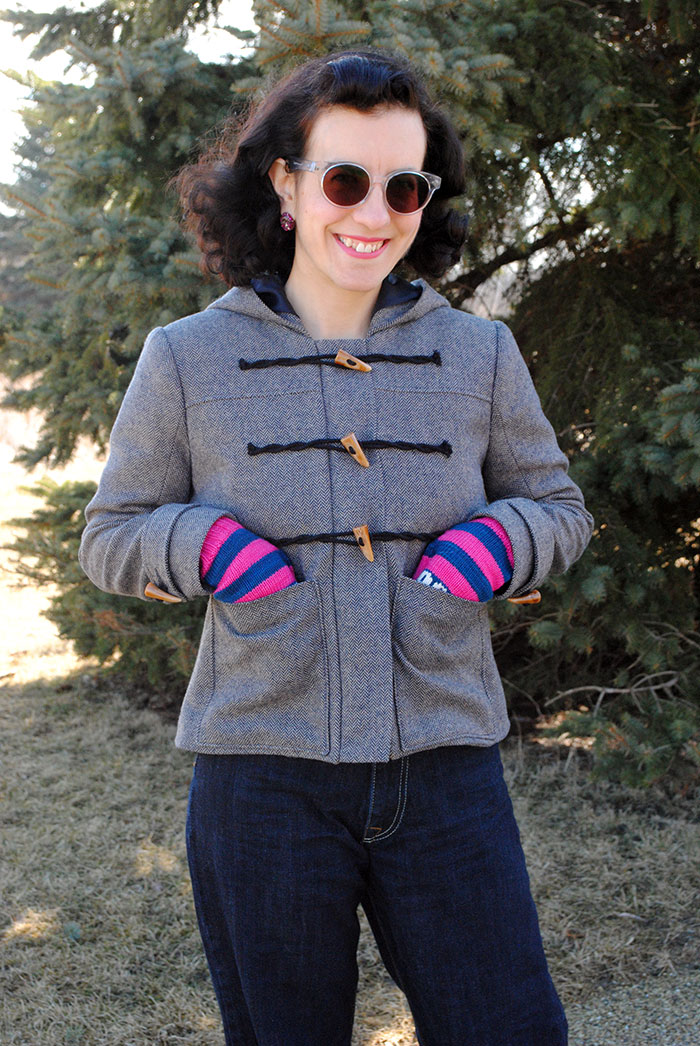
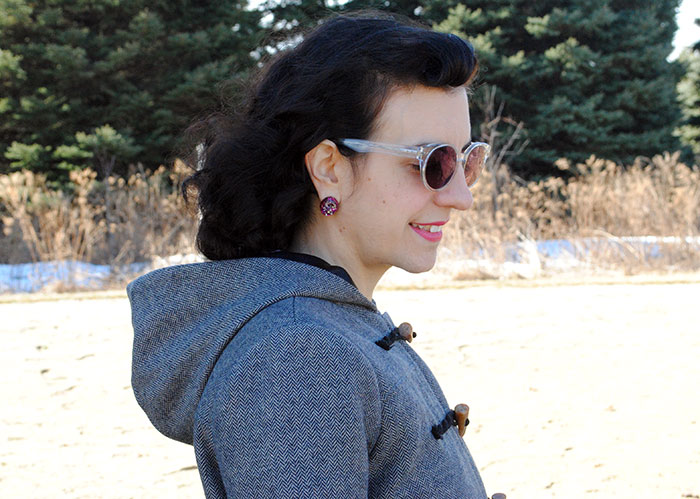
But wait, can you tell I’m excited? Here’s my ridiculous almost-eyes-shut grin the day I finished it up and wore it out the first time.
Anyway, yes! Happy tweed duffle coat is done! Having jumped on the bandwagon for this coat as soon as Jen released the pattern in January, I obviously spent a really long time on this, staying a step or two behind the sew-along the entire time, but only finishing a week after it was done! There was lot of researching, figuring out toggles, and working on it in spurts. I really took my time.
Here’s a little background on the major supplies I used:
- Tweed herringbone wool coating from my stash. It was actually my backup fabric for my Sew for Victory jacket a couple of years ago, I think I bought it from Denver Fabrics. Nice stuff but really drapey and needed a lot of support to keep it looking good. It was lovely to press! I pre-shrank it by throwing it in with a couple of damp towels into the dryer.
- Silk charmeuse lining from Mood Fabrics. I know people love this but I hated working with it and think I actually like the feel of rayon bemberg better for all the trouble… the silk is lovely but just catches on winter hands something awful! But the extra thickness over rayon is nice. I pre-shrank it by pressing and steaming it as best I could, since I read that washing/drying works but takes away the sheen.
- Reject cotton flannel for interlining the body… reject since I ordered it for the hood lining/zipper band for my future dijon version of this coat and it was crummy looking. (I’ve since ordered some much nicer flannel for that.) I pre-washed and dried it twice just in case, since it’s cotton.
- Riri separating zipper from Pacific Trimming (they’ll pre-cut them for you). I mean let’s be honest, it was a $14 freaking zipper and cost more than a yard of my coating cost me (the fabric was about $11/yard). It was a splurge but for such a nice project, I really wanted to use something special. So it was well worth it, as I love the way it looks and works in the end.
- Faux horn resin toggles from a seller on Etsy.
- Light fusible interfacing from Fashion Sewing Supply. With all the fusing I had to do, I had to clean my iron twice even with using a press cloth. And um, and toss my press cloth. Nothing like accidentally shedding wool and glue on your silk charmeuse, ha ha!
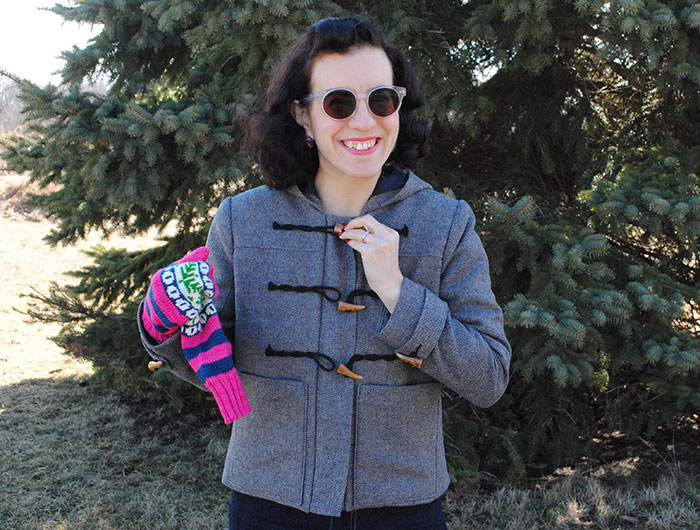
 (oops I forgot to close the top toggle in a few of these photos, ha ha)
After doing a muslin in a size 2, I went up to a 4 for the real thing because I was worried that once I interlined the body, it would be too small. I was on the fence for a few days if I should have stuck with the 2, but after wearing it a few times I think the 4 is perfect. Although I might be tempted to go with a 2 for my lighter weight dijon wool… we shall see. (Unfortunately if so, I’d also have to purchase the pattern again since I didn’t trace all the 52,000 pattern pieces. Because there were 52,000 pieces.)
I honestly made very few changes to the pattern itself—it didn’t need it! I just shortened the sleeves and sleeve lining by 5/8″. Although even with the lining pleat, I think the sleeve lining is too long and it wants to poke out. If this bothers me over time I’ll open back up the sleeve and hem the lining a bit shorter. I always have a problem with sleeves being too long on RTW coats and ironically, I’ve noticed my sweaters poking out of the bottom of these sleeves, so perhaps I should have left the original length after all! But without a long sweater under it, I really like where the length hits so I don’t really care.
The only big construction changes I made were to interface the sleeves and interline the bodice. I waffled about interfacing the sleeves for AGES but finally decided my tweed was shifty enough, I would hate to have the sleeves get all baggy or not look crisp in comparison to the body. Plus I often carry a purse on the crook of my arm and figured that might exacerbate that problem. So I interfaced both the upper and lower sleeve pieces, cutting away the seam allowance at the sleeve cap before fusing, so it wouldn’t affect wool’s nice ability be set in a sleeve without making you want to lose your mind. And in the end I’m really glad I interfaced the sleeves! They’re not stiff at all but have just the right amount of body.
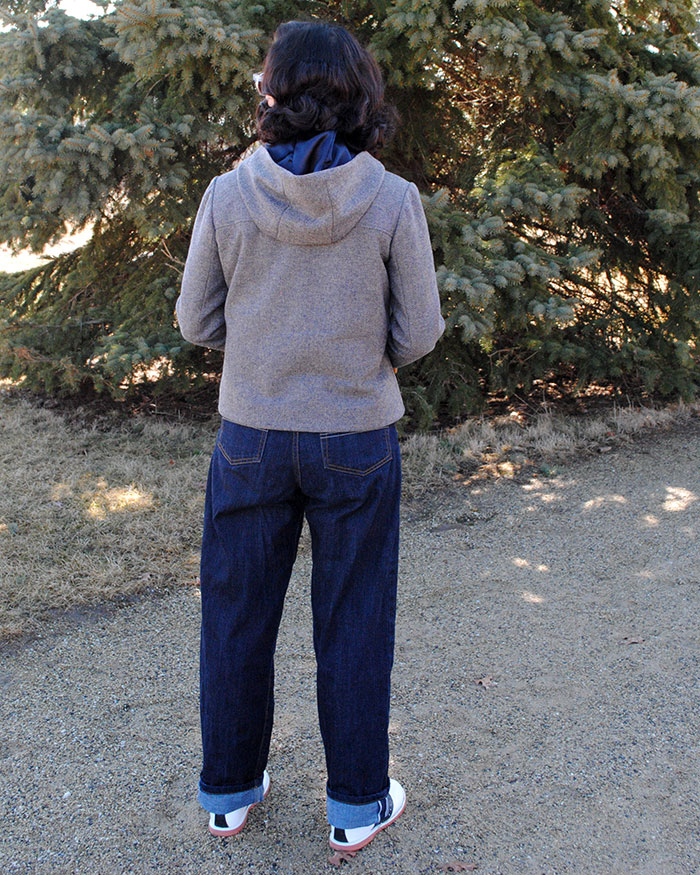
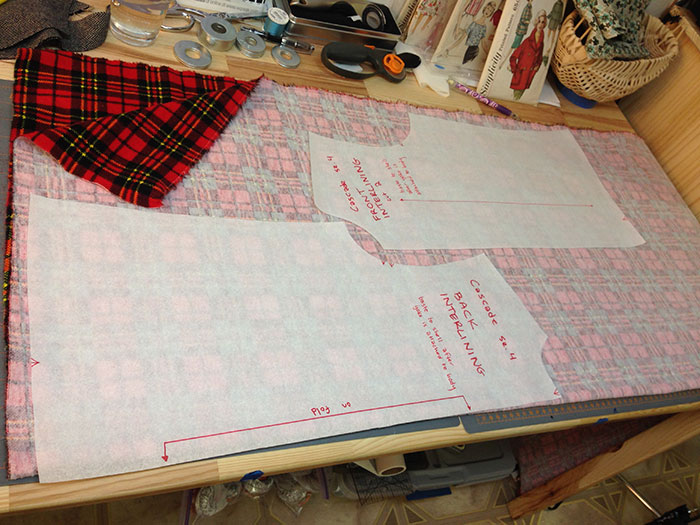
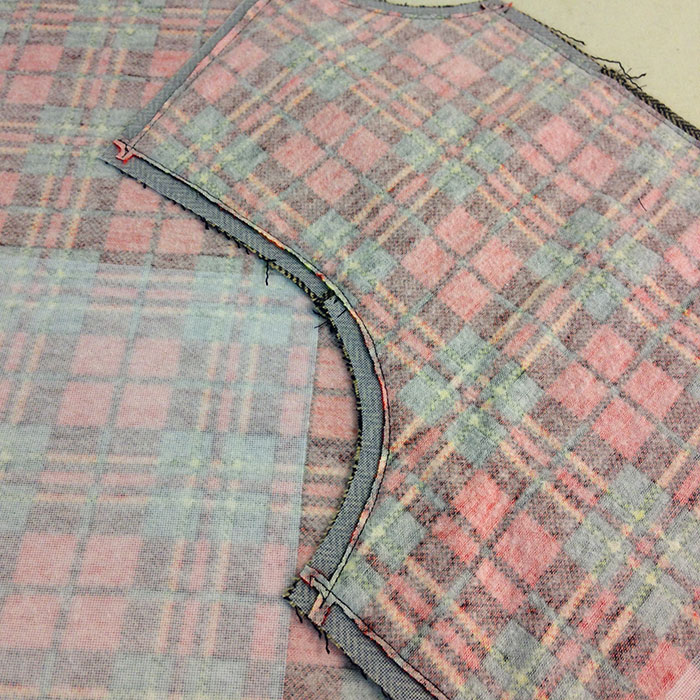
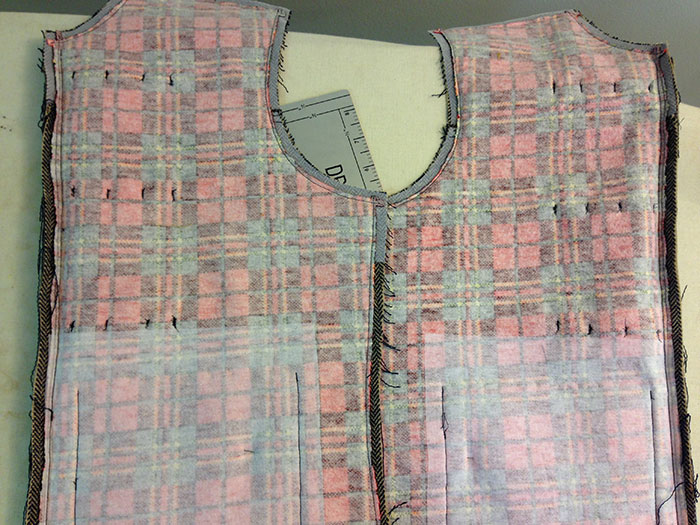
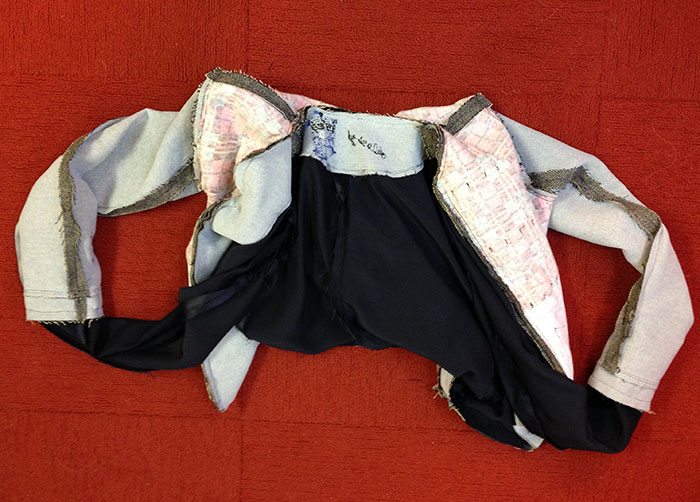
I interlined the bodice front and back with cotton flannel, for a bit of extra warmth and also body. I did not want this coat looking floppy. I took a tip I saw Jen give on Instagram to someone: I traced off each of the front and back pieces with the yoke seam overlapped and cut the interlining as one piece for each, to keep some of the bulk out (i.e. so you don’t have the yoke seam in both the fashion fabric and interlining). You can see what those pattern pieces look like laid out on my flannel:
I basted it to the assembled front and back pieces (i.e. after the yoke seams were sewn) just within the seam allowance, then painstakingly trimmed away the excess so it wouldn’t make more bulk in the seams. Worked like a charm although it was a bit of a rag to do, especially trying to keep wrinkles out of the wide back piece! The bodice pieces were handled a lot due to attaching the toggles and patch pockets, so basting with the sewing machine instead of by hand was the better was to go.
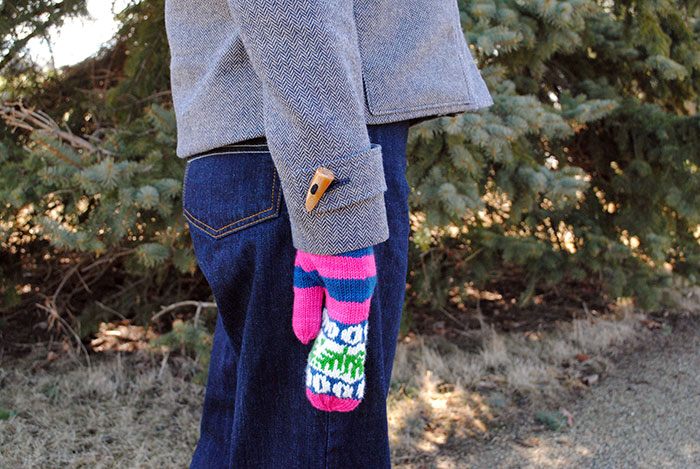
Oh, I should mention that you interface the patch pockets on the wrong side of the coat, but I didn’t think of it until I’d interlined the front, so I just interfaced the interlining (that’s what you see on the piece on the left above). No harm, no foul, I figured, since the pockets got sewn through both layers together anyway. Love the pockets, though on the hip-length coat they aren’t very practical for putting your hands in as you can see below. But they add a lot to the look of the coat! By the way I basted them shut until the coat was finished, a tip from tailoring. Helps keep them from getting stretched out before it’s done.
I also decided to use stay tape across the shoulder seams. In most tailored coats or jackets you’d have a back stay which supports the back as well as stabilizing the shoulders and neck, so you don’t need to further stabilize the shoulder seams. But this pattern doesn’t have one since it’s not really a tailored jacket. I almost added one anyway but decided I had enough going on with the interlining, especially since the back yoke is already interfaced. But I did decide at the last minute to add tailor’s tape in the shoulder seams just in case.
And so the only other addition was a tailoring trick to add sleeve heads at the top of the sleeve caps to help fill them out a bit better, so they cave in less. It really make a big difference since I wasn’t using a super thick wool fabric. These were bias strips of cotton flannel cut to about 10″ and hand sewn just inside the seam line. You use a lofty fabric or lambswool and I had the flannel out already so that’s what I used. I pre-steamed them a bit to curve to the shape of the sleeve cap. (The fact that you see one on the RS and one on the WS of the fabric is irrelevant, since you don’t see them so I didn’t pay attention to that.)
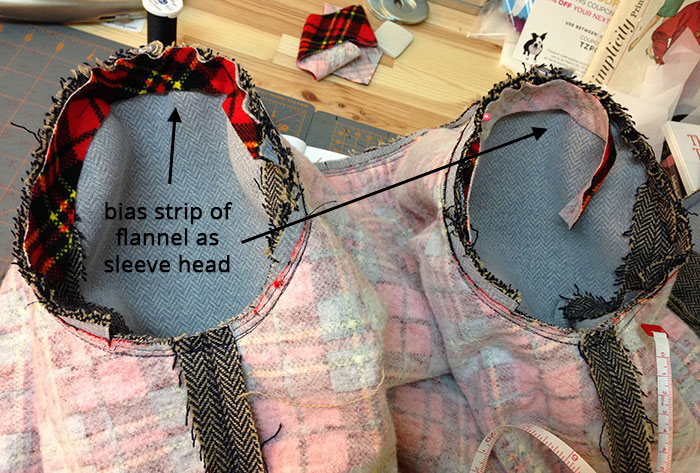
Then you just push the seam allowance along with the sleeve head into the sleeve. It was just a little helpful touch.
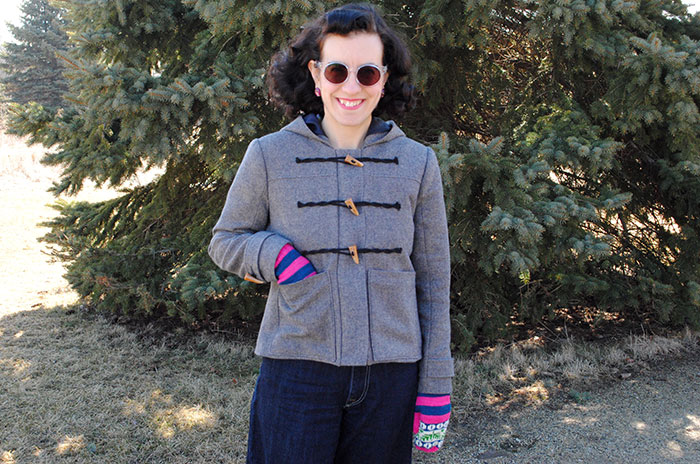
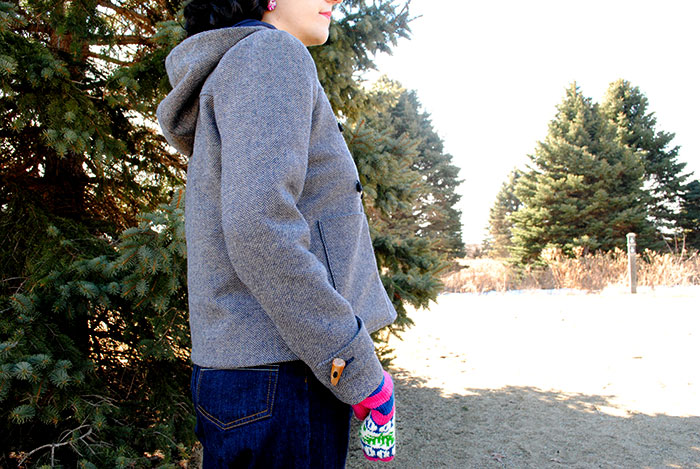
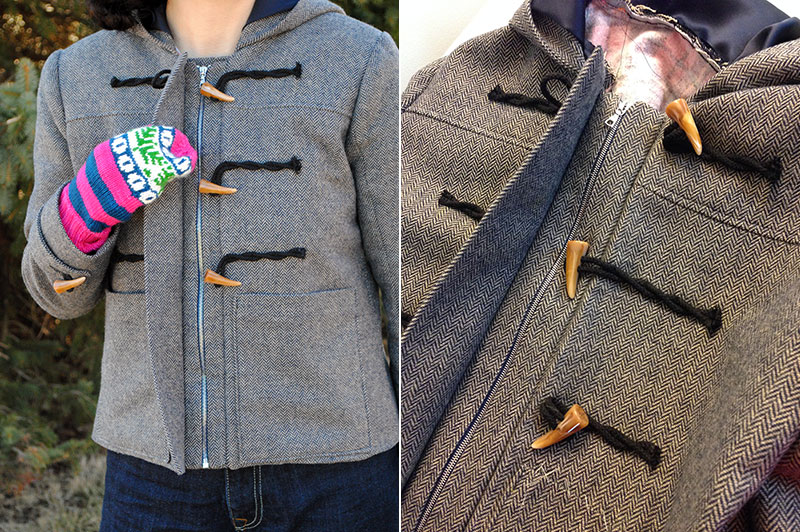
I made two design changes. The first was adding sleeve bands at the bottom. I just love how those look on duffle coats and I wanted them on mine, too. I mean, look how cute they are since I used the same toggles on them as the front!
I grabbed the pattern piece from a vintage coat pattern in my stash, and after the muslin ended up shortening them by about 1″ so they didn’t wrap too far behind my arm. They’re basically just attached in the seam on the inside of the sleeve, and wrap to the outside. (By the way this is a really good photo to see what the herringbone tweed looks like… it’s navy and cream.)
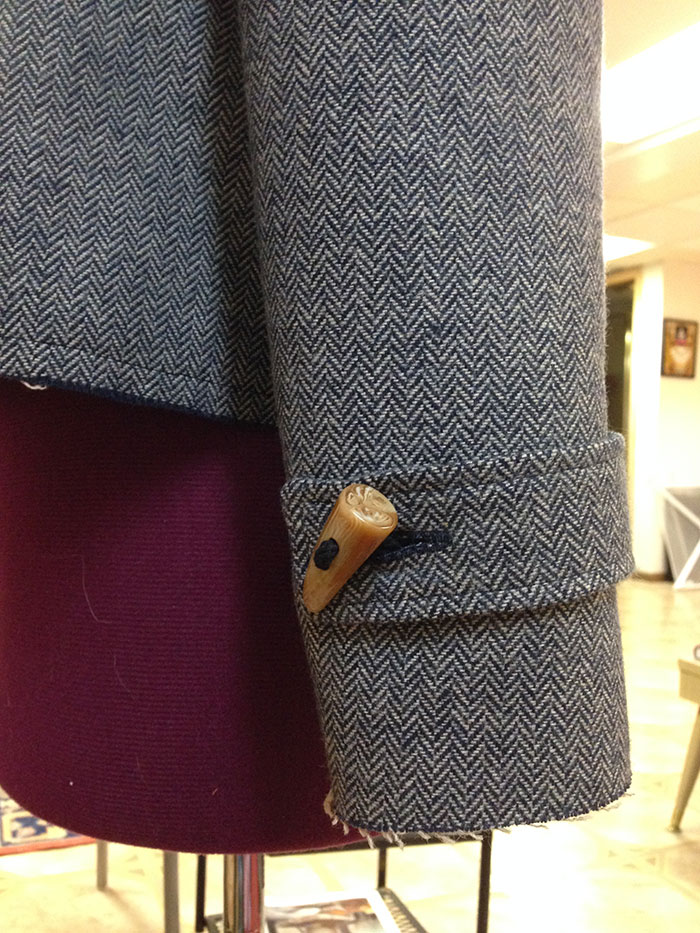
Getting the toggle to stay put was a bit of a feat, so there’s some secret hidden stitches to keep that all neat and tidy. I’m so glad I added the bands because it gives it a little something extra!
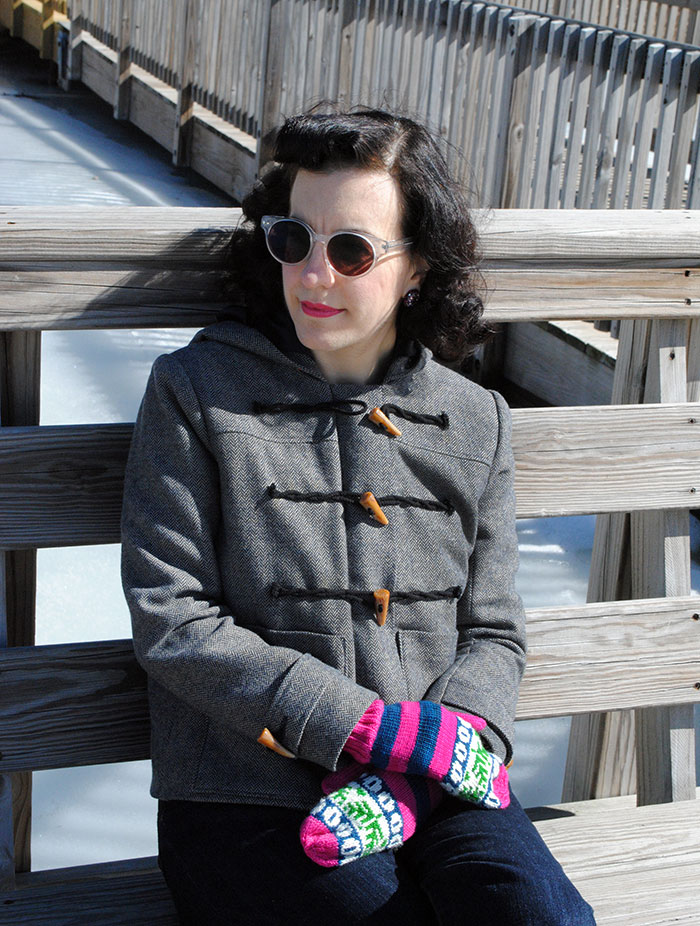
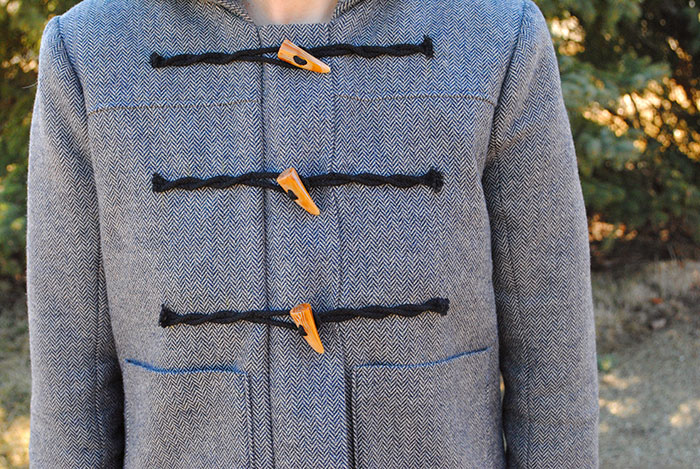
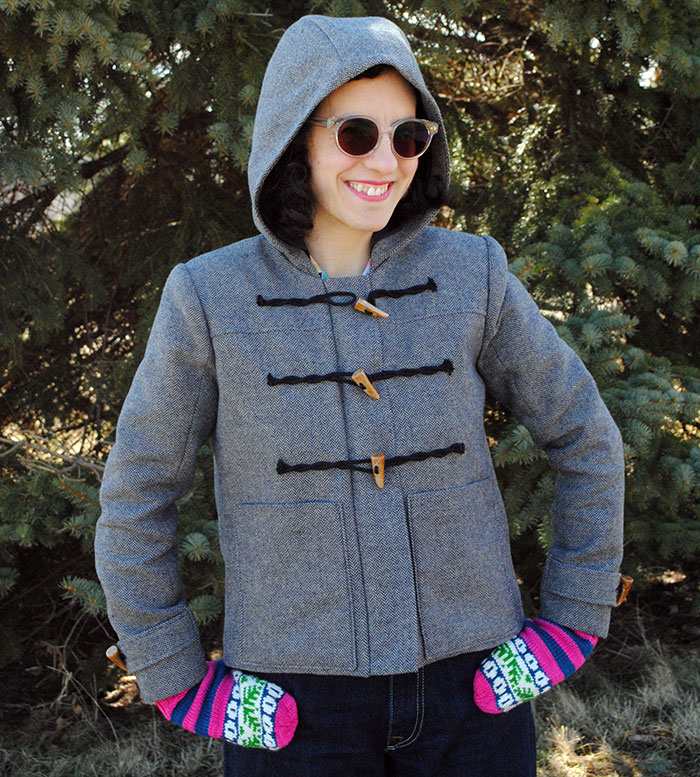
The second alteration I made, as you followed previously, was adding cord toggle closures instead of the leather patch type ones. I went with 4mm black cotton cord, twisting it and centering faux horn toggles at center front. Hours of work you guys, HOURS. Who knew?!!
I did little twists in the cord like I’ve seen on many duffle coats (you can see some examples on my duffle coat inspiration Pinterest board). Each cord was stitched down in 4 places, but I first basted them all on to make sure everything was perfect before taking a final pass to permanently sew them on. The arrows below show where they were attached to the bodice, basically at the flat points between the twists:
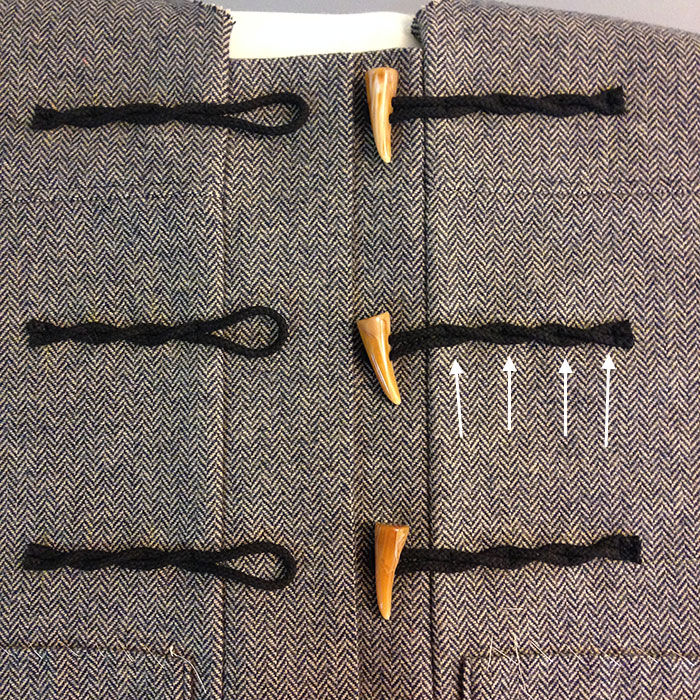
In the end it took 48 lines of stitching (6 cords x 4 sewn points, basting and final stitching) to sew those things on…. that makes my head hurt even now. Look at all of those small black lines and consider I had to do that twice (basting and final stitching). Yeaaack!
I anchored them really well and used some discreetly-placed Fray Check because if they start to come loose ever I’ll lose my mind. But honestly in the end it was totally worth it, because I love how they look!
Oh… did I mention I did some secret embroidery on the inside back neck facing? I did that on my Sew for Victory jacket a couple of years ago and couldn’t resist doing it again. If you’re not a Doctor Who fan you totally won’t get this joke, so let me fill you in: the TARDIS (the time machine I’ve embroidered), is bigger on the inside. Just like a coat lining (which is actually a little bigger than the shell). Get it?? 😉
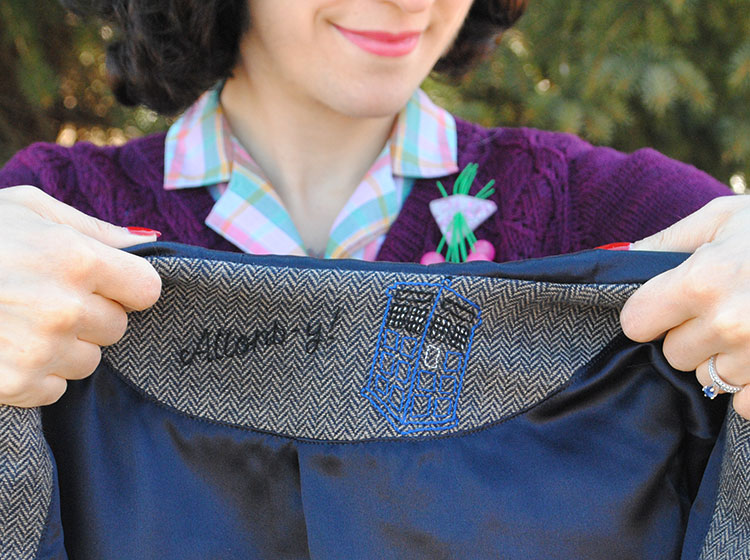
And “Allons-y!” is French for “let’s go!” and was the catch phrases of one of the incarnations of the Doctor (David Tennant). So yeah… total geekery meets sewing. The embroidery is subtle on the tweed, but it had to be the actual color of the TARDIS. I’m actually thinking I’ll do a short post soon about embroidering this because it’s a fun embellishment and I like this little personalized touch, so watch this space for more!
Here’s a look at the lining, all that navy silk charmeuse. There really is something about a full lining in a project that just makes you feel like a complete rock star! (Even when you’re trying to hold your coat open on a windy day.)
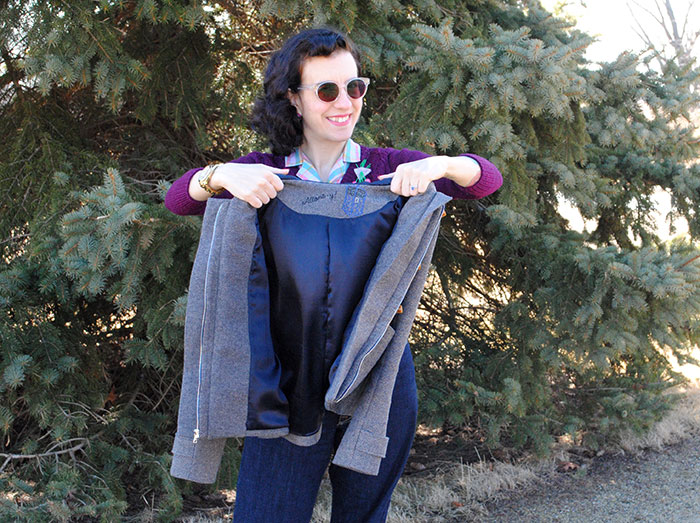
This was my first time bagging a lining! Jen’s instructions in the pattern were great, very easy to follow along. And it’s maybe one of the most bizarre sewing things you’ll ever do, so you definitely want your hands held the first time. But it actually works, crazy as it looks!
So… I’m gonna say something that’s probably pretty obvious at this point, but this pattern is not for the faint of heart. Yes, I think anyone could tackle it with time and patience! And it’s really a fantastic coat pattern. (Did you see Heather Lou’s gorgeous gray version yesterday?) So if you’re at all on the fence, I’d encourage you to jump in and try it out! Just stay organized, go slow, and be patient. It’s totally worth it.
I think I had it figured out that I had 18 pattern pieces, 7 lining pieces, and then my additional 2 interlining pieces that I added. It helps to make a list of what pieces you’re using (View A or B and hood or collar), and what’s interfaced and what isn’t. It was a lot to keep track of but it made me not want to gouge out my eyeballs when sewing!
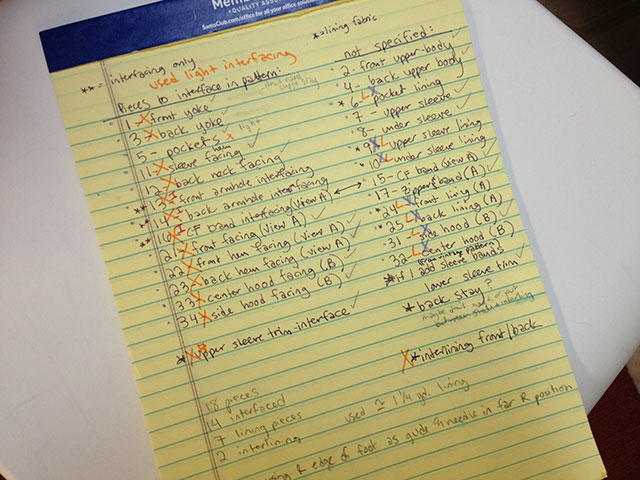
There are also some areas that require some serious precision. Super precision is not my sewing forte. So here were the issues I encountered:
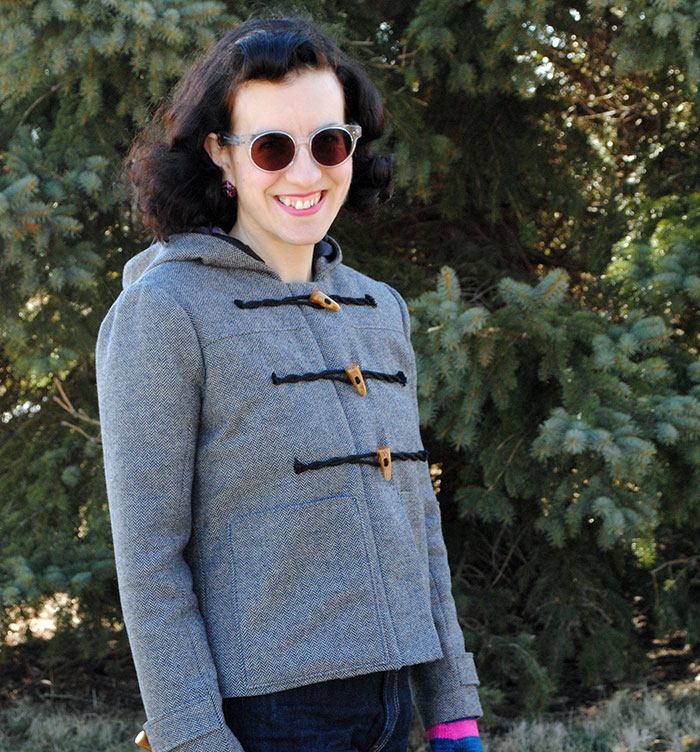
It was impossible for me to get the lower edge of my coat facing to match up the lower edge of the center front bands, no matter what I did, so there’s a tiny hump there. (You sew the CF bands to the bodice fronts, and then towards the end you sew the facing right along that lower edge.) That’s the literal only thing that makes me feel a bit “harumph” about my accomplishments on this coat, but the tweed is so busy I’ll probably never think of it again! For my future dijon version, I’ll have to re-think if there’s a way I can work around this to make it look better. It’s a perplexing intersection and I really hate perplexing intersections in sewing. 😛 You can kind of juuuuust see the hump in the photo below, at the bottom of the center front band where it meets the jacket. I know, I know, you can probably barely see it, but still.
The zipper bands were kind of a nightmare, I must admit. The zipper band pieces are only slightly shorter than the center front bands (about 3/8″ I think) for the hip-length View A (no concerns at all for View B as it’s the same pattern piece, and thus far shorter than the CF bands). So with turn of cloth with wool and shifty tweed, my zipper bands ended up longer than my CF bands. Not by much, but enough that they were going to hang out the top and bottom and look stupid. After opening up the bands I sewed as close as humanly possible to the zipper stops (so a good bit more than the 1/2″ seam allowance) and hoped that it would make them just short enough to hide behind the CF bands. Thankfully, this worked! But I think if I were purchasing new supplies, I’d either lengthen the entire coat and CF bands by 1/2″ or I’d buy a slightly shorter zipper and make the bands a hair shorter too. I made it work, but it was almost a no-go since I popped for a fancy pre-cut Riri zipper. Oh, I’d also probably interface the zipper bands if I were doing it again, too. They were one of the few non-interfaced pieces in the pattern, and it would probably have saved me some headaches if I had interfaced them (and would have made my bands a bit less wobbly when unzipped, too).
In the end though, after deciding not to add the zipper bands and then at the last minute changing my mind and getting it to work after all, I’m thrilled to have the zipper on this coat!
And last for my teeny problem areas, next time, I’d sew the hood (or collar) on with a 3/8″ seam allowance when attaching it to the shell. Because you attach it with the normal 1/2″ seam allowance and then stitch over the same seam line when you connect the lining. After all was said and done I realized my stitches showed in a few spots… thankfully my lining is navy blue so it’s not very noticeable. But stitching on exactly the same seam line through that many layers of fabric just was really difficult to get perfect. (And obviously, I didn’t.) Annoyingly I anticipated this issue ahead of time and figured it would be okay. It wasn’t. I also anticipated this issue for the CF bands, and did sew just within the seam allowance when attaching them to the fronts, so that when I attached the lining/facing unit to everything the stitching didn’t peek out.
But really… I’m only pointing out these problem areas as a way to help out others who may have questions. I freaking LOVE this pattern and this coat and there will be at least one more in my future. The dijon one I planned first, and I wouldn’t be surprised if some day I decide to make the longer and more traditional looking View B, too. (I’m picturing it in a blue boiled wool like Jane’s beautiful vintage wool coat!)

I am just so glad to have this project finished. When I spend so, so, so long on a sewing project (which rarely happens), it takes me awhile to really get excited about the finished product. I think because I was staring at the same damn pieces of this since January, once I finished it was like an overwhelming “FINALLY now I can sew something easy again!” and “I’m sick of looking at this!” instead of “OMG I have an amazing new jacket to wear!!!”
So for a couple of days I was honestly just sick of looking at the thing.
But I soon forget staring at tweed for nearly two months and am now genuinely pumped about my awesome new duffle coat!!
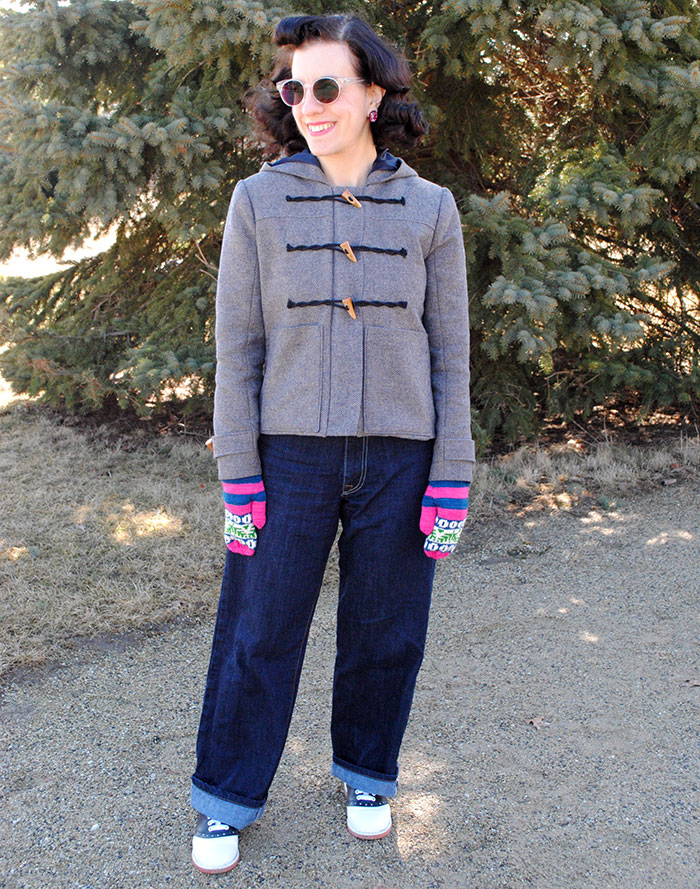
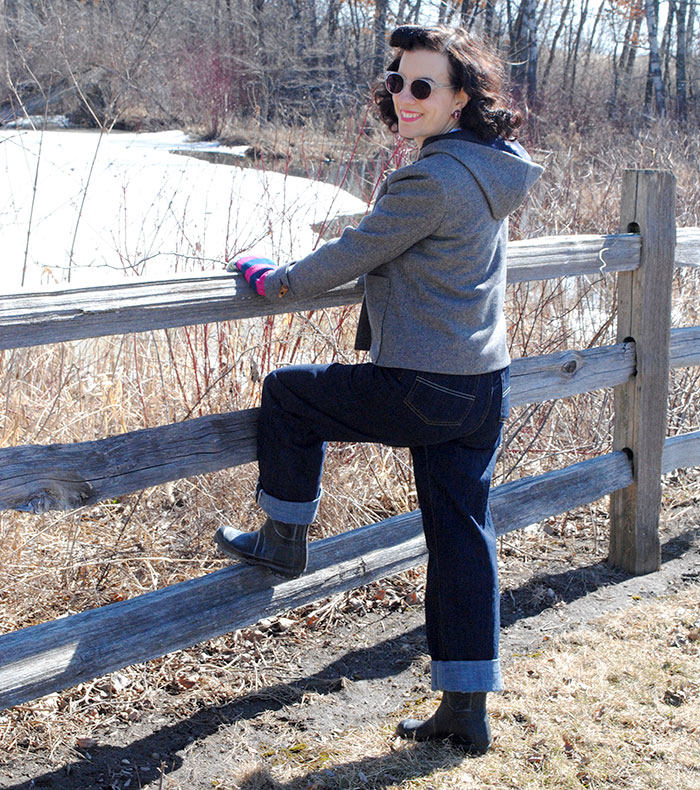
outfit details
duffle coat – made by me
jeans – Freddies of Pinewoods
mittens – made by me (from my new pattern)
earrings – Desperate Beatnik
saddle shoes – Muffys
wellies – Hunter
Tasha! It’s beautiful. I really love the addition of the sleeve band. My eye went straight to them. And, the embroidery on the inside is divine! You hard work paid-off. This coat is spectacular!
Wow, great work and fabulous design choices. I’m totally inspired to try this pattern! It looks really well thought out and very nicely drafted. I look forward to seeing your next version ;-). The TARDIS embroidery is fabulous too.
OH BOY OH BOY
Ok, the FIRST thing I noticed: the beautiful toggles… no wonder you spent so long on them, they are absolutely perfect and so styling! Great job all round, and you are soooooooooooo amazing with all those pattern pieces.
This is very inspiring and looks really fab. As a Doctor Who fan the embroidery was pure genius!
LOOOOVVVVVE THISSSSSS! (<Oprah voice) Seriously, it's tops. I know those toggles were a bitch but totally worth the effort. I'm surprisingly down with absence of a toggle cover. As forthat little bump, I had it too. I honestly don't know how you could NOT have it – you are trying to cram all that fabric together along one seam, I'm just not sure how it could meet up perfectly, period, so don't beat yourself up about it!
You are amazing Tasha!! I can barely sew on a button and here you are making such a lovely coat!
I just started following your blog recently and love it. Great job on the coat! I’m glad you were honest about how much work it is. I don’t think I am up for a project like that yet. But I am in awe about your accomplishment. Also, I love your jeans! Did you make those too? If so, may I ask what pattern?
Hi! I’ve been a lurker for quite some time, but I just had to comment on this gorgeous coat. I’m a relatively novice sewer and “not yet that experienced, but know how to work my way around a pattern” knitter. Your blog is such an inspiration to me, especially this entry. I’m determined to be a better seamstress and tailor (and knitter) this year — one of my New Year’s Resolutions — and this had inspired me to stop being so afraid of crazy patterns and tailoring! Thank you for talking about your own challenges with this pattern. It makes me feel better to know that even the most advanced seamstress/tailor can run into difficulties here and there.
THANK YOU!!!
Tasha, this coat is ridiculously awesome!!! Congratulations on a truly stunning project that will be well worth all the effort and long hours (and endless toggle sewing). You should be very proud of this one. 🙂 I know there are a few minor issues that you might not be thrilled with, but honestly, no one is ever going to notice them, and who cares because this coat is fabulous! 🙂
WOUAHH! This coat is fabulous! I hope one day i’ll sew like you!
I love the way you wear it, and like Kathy M I like your jeans…
Your photos are great, “exotic” for a french girl like me.
So… allons-y! 😉
hugs from France, Normandie.
LOVE IT!!!!! Especially the embroidery. If it weren’t for embroidery, I’m not certain I’d be making things today.
Lordy! You are nothing short of amazing! This looks spectacular! One can really see the attention to detail and the quality that shines through in this! Fabulous job! And I ADORE the Doctor Who reference! It’s adorable!
xoxo
-Janey
I made a coat last October and found an efficient way to underline my pattern pieces. Instead of cutting out the interlining pieces using the paper pattern, sewing them to the fashion fabric pieces, and then trimming away the seam allowances from the interfacing, I did this: put you fashion fabric pieces on your interlining material, pin them together, rough cut the interfacing around the fabric pieces, take these pieces to your sewing machine and see just inside the seam allowances, and then trim away everything outside the lines of stitching. Hope you are able to picture what I am trying to describe.
Omg! That coat is amazing, you did such a grat job. I just got done making a fleece coat similar to yours for my baby niece and I was quite happy with how it came out. After completing my niece’s coat and seeing how well yours came out I’m thinking I’ll have to make myself a coat. Great post and nice work.
Love it! Way to go! Love all the personalized details such as the toggles and the embroidery.
Heather
A very well done! What an amazing coat! Those toggles and cording work soo brilliantly and were well worth the effort! I’m loving the pockets and genius move adding the cuff tabs for extra detail!
This is a very cute coat! It looks quite modern, but it also fits really well into a more vintage silhouette. Also, I love the geeky Dr Who reference 😉
Looks great and well-constructed! That’s an adorable pattern.
This turned out adorable!! I’m not really into short jackets, but your version seriously tempts me! And secret Dr. Who!!!!!!!!
Wow! It looks great!
It really shows you took your time with this one, as it looks amazing! It’s good that you gives us the heads up on difficult construction details, and share your tips and tricks! Thanks 🙂
I’m so blown away by this coat!! The Doctor Who embroidery is way too cool and the toggle closure is equally impressive. An overall very professional, sharp looking Duffle! Oh, and the mittens are adorable too 😉
That’s a seriously amazing piece of work, Tasha! You did a simply beautiful job. It’s exquisite and you should be proud!
Love, love, love the Doctor Who secret embroidery!
Tasha,
You deserve a massive “two thumbs up”. This coat is done so marvelously, it’s a work of art. No, it is a work of a professional! My sensere CONGRATS on this amazing project being finished.
Marija.
P.S.
Darn it – HOW do you make those fringe of yours “weather-proof”?!
It’s so fantastic! I love the fabric, the colour, the length, the toggles that you opted for, its timeless appeal – everything! Oddly, though I usually need blazers and suit jackets to hit me at the waist or upper hips, when it comes to coats, they tend to add a lot of bulk to my frame if they’re not longer, but you know, I’d happily give akin to this handmade charmer a try, if the chance arose. You’ve made me want something – anything – with toggles on it soooooo much now! 🙂
Tons of hugs & happy start of spring wishes,
♥ Jessica
Wow, this is spectacular. I’m kind of a tailoring geek, so I loved seeing all the shots of your coat’s guts. Oh,the set of those sleeves! A thing of beauty!
This is a lovely looking coat. Tasha, I’m not surprised you’re delighted with it. All that preparation, hard work and attention to detail is very inspiring, big congratulations! Now go and relax and make a cushion or something! xx
WOW! Its such beautiful coat, Great Job!!!!
nice jacket nice work!!!!
Amazing! Looks great! <3
The Doctor Who references *kill* me! So good. I love the jacket and it looks awesome on you! It’s a bit short for my taste, since I’m always cold so I’d want a version that covers my bum… but that’s just me.
I’ve been so inspired and motivated by your commitment to “sewing for winter” .
I got busy and made a wool jacket, a take-off of the Mexican tourist jacket you wore in a post about vintage and repro jewelry.
I worked it up in brown tweed with a silk lining, I posted about it here https://auntbeascloset.wordpress.com/.
Thanks for the inspirational posts and pics. You’re the best!
Your coat is gorgeous, Tracy!!