Hello everyone, I’m here with another post for my series with Craftsy, plus a fun little giveaway for you, too!
Recently, I had the pleasure of taking a new class, Creative Closures: 8 Unique Techniques, taught by Marsha McClintock. I’ve learned over the last year or so that I absolutely adore the look of creative embellishment on clothing, but I tend not to like things too fussy as I’ll just admire them in the closet; I won’t actually wear them. So I thought I’d challenge myself to take the class and come up with an inspiration garment that was both functional and fun.
The Creative Closures class is a great class if you’re looking for inspiration to spruce up a project (garment or not!). At first, I’ll admit that I wasn’t entirely sure what I’d think about it, as most of the samples in the class didn’t necessarily speak to me. But here’s a very important lesson that I quickly remembered: creating is all about you and taking inspiration to make things that speak to you. Marsha is happy to remind you to take free rein with creativity!
 Source: Creative Closures: 8 Unique Techniques, copyright © Craftsy
Marsha goes through some really fun and interesting ideas, like triangle buttonholes, corded closures, reversible buttonbands (cool!) and cut-on closures. She also included a few ones I’d never even heard of. How about inseam buttonholes? You plan your buttonholes between a seam, which she shows you how to add to an existing pattern. So you’re technically not even stitching buttonholes… they’re formed naturally between openings in a seam. Whoa! And talk about a different solution for sewing machines that are temperamental when making buttonholes.
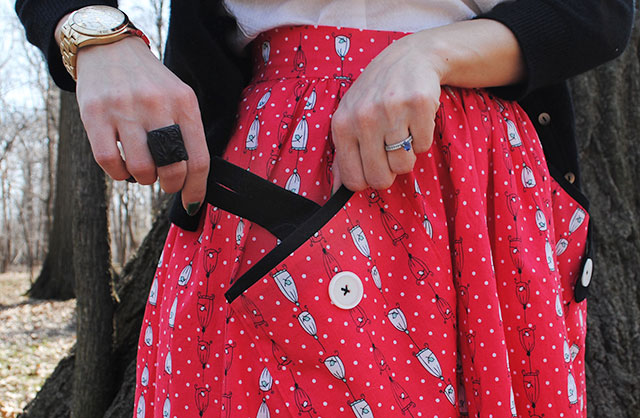
For my garment, I opted to focus on her section on tab closures. I love patch pockets on gathered dirndl-style skirts, but they do tend to gap open by nature. I thought it might be fun to use Marsha’s ideas to give my patch pockets a tab closure to keep that gaping in check!
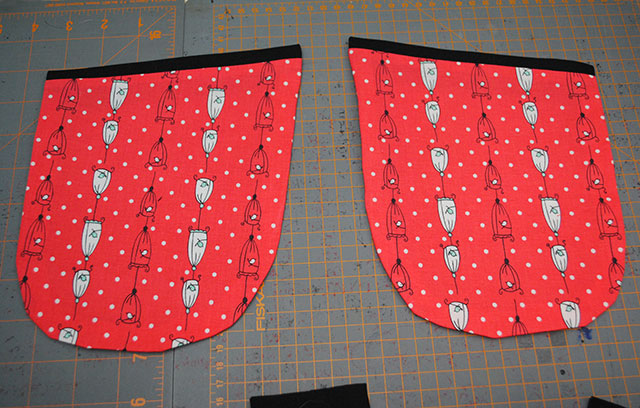
I love Marsha’s teaching style. She really likes to give you creative liberty with your projects, so she shows examples and gives suggestions, but lets you take it in whatever direction you’d like. Keeping that in mind, I used a patch pocket pattern piece from a 40s pattern, and added some black trim at the top to match the black tabs I planned, just for fun.
(Not specific to the class, but I lined the pockets since I planned to turn them sideways on the garment, so I knew they’d stretch on the bias if I actually put anything inside them.)
I decided to go for pointed tabs (a style similar to one Marsha shows in the class but used in a different manner), so I cut out two layers of my black fabric and sewed them together with a 1/4″ seam allowance. I used chalk to mark the corners to make it easy to follow the seam allowance. Then I simply pressed open the seam allowances, notched the corners, turned them right side out and pressed again.
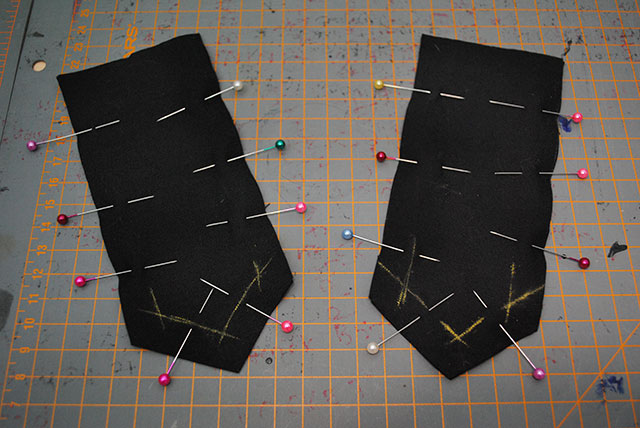
As far as how long to make the tabs, I eyeballed it on my pockets. I wanted a few inches showing on the outside, leaving a few inches inside the pocket to attach it to the skirt and fold to the outside. And once I decided on which buttons to use, I made my buttonholes on the tab by machine. (I was tempted to use Marsha’s section for triangular buttonholes but decided to save that for another time!)
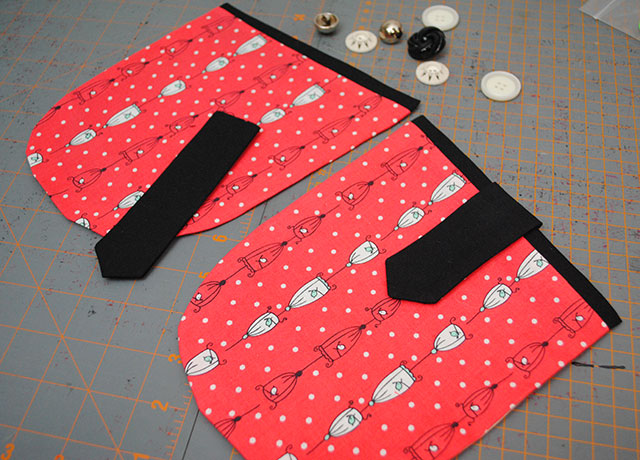
Then I just had to serge the raw edge of the tabs, sew them to the skirt, sew the pockets to the skirt and button the tabs!
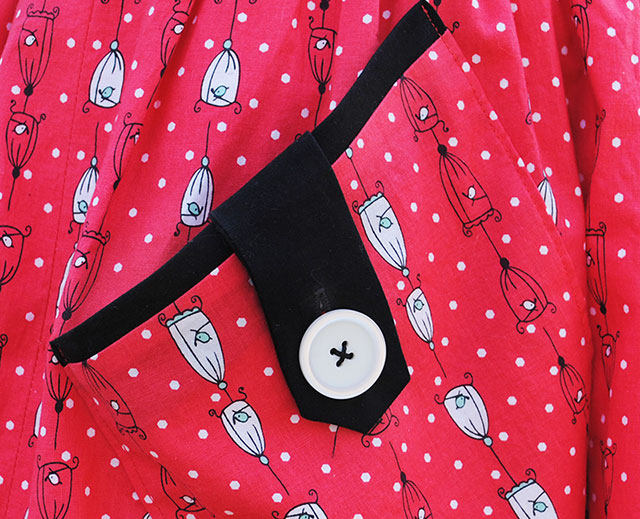
A cute little patch pocket that can be opened up whenever you’d like, and keeps the gaping to a minimum.
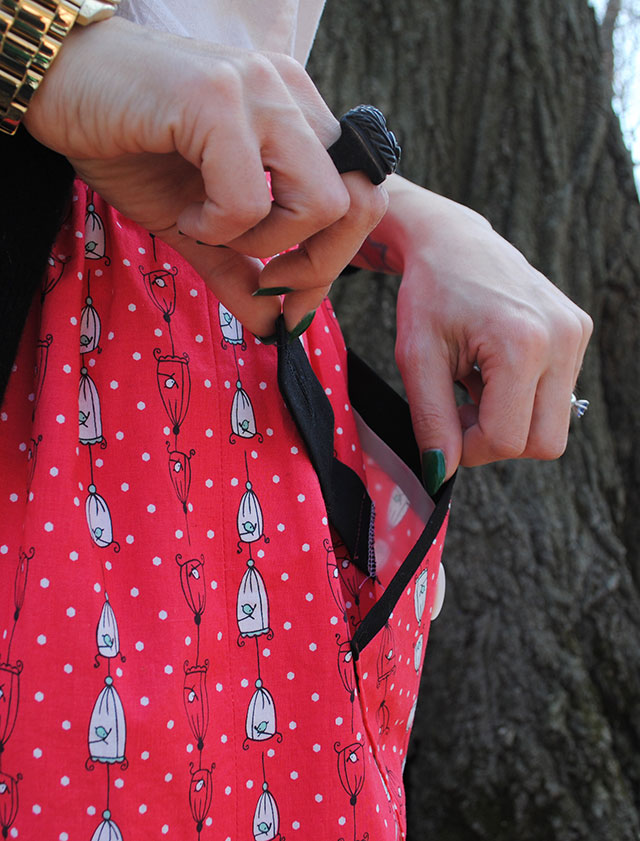
Now, I did pre-plan a little bit of utility into these tabs, because that’s just how I am. I sewed the tab to the skirt a good few inches into the pocket so that I can still slip my hand or phone inside without having to undo them every time. I don’t think Marsha would mind!
Enter the giveaway!
I really enjoyed this class and found a lot of inspiring ideas that I’d like to try out on future projects. And I have great news for you, too. One lucky winner will get a FREE copy of Creative Closures: 8 Unique Techniques thanks to Craftsy!
Here’s how to enter. It’s easy:
- If you’re new to Craftsy, register for a free Craftsy account OR
- If you’re already a Craftsy member, simply sign in and enter the giveaway
There’s one entry per person. The giveaway will close on Tuesday, April 29th at 1pm Central Time. Craftsy will randomly draw a winning entry, and I’ll announce the winner here on my blog then. So get your entry in!
Good luck! And stay tuned tomorrow to see more of this skirt. 😉
(This is a sponsored post with Craftsy, however all thoughts and opinions expressed are my own.)
Creative embellishments are one of my favourite elements of fashion. They so often defined vintage pieces, yet aren’t (on adult clothes in particular) quite as common these days, so it’s fantastic when sewers are able to whip them up on their projects and keep that same super fun vintage embellishment feeling alive.
♥ Jessica
I agree with Jessica! Fun closures add a unique quality to garments just isn’t found much these days. They’re cute details that speak a lot to individuality and quality work!
How fun! I have a jacket with an in seam button hole and I just thought it was the coolest thing ever!
This class looks fun! Such a great way to add a little twist to your clothes.
Love your pockets! I think this class needs to be in my Craftsy Library.
Great fabric! Super pockets 😉 So much inspiration thanks!
Super cute pockets! Thank you for the opportunity to win this class!