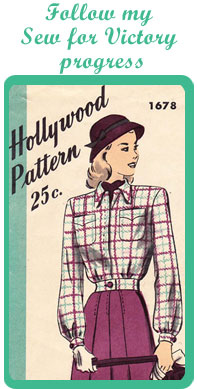
 Today is the next installment in my jacket progress for Sew for Victory!
First, thank you all SO much for your comments and congratulations on my interview in Knit Now magazine. I’m still kind of reeling from that. 🙂
But back to my project. I’m getting ready to start on my actual jacket which is exciting!
Now as you know, my pattern isn’t a fully tailored jacket. It has lots of casual elements like sleeve cuffs and bands below a gathered waistline. But I’ve still been been doing tons of reading on tailoring techniques and supplies that may be helpful for this project for an outerwear newbie.
I admit it, I was initially overwhelmed by thinking about all the things I needed (or had to decide if I needed!), things I didn’t necessarily need for normal dressmaking. It would have been easier if I had been sewing a modern pattern like Colette Anise or Sewaholic Minoru (and did you see Tasia’s new trench pattern?!). New patterns like these outline supplies better and do some hand-holding. For a 1940s pattern… it’s all up to me.
So I did a ton of research and carefully thought through the steps that my project would involve. What supplies did I already have for each step? What did I need to buy for certain tailoring techniques I wanted to use? What could I get away with not having?
Here’s a list of supplies I decided I needed for my first jacket project. Not included are the super obvious like scissors, seam ripper, etc (though I included underlining and interfacing). These supplies fall more under the umbrellas of “things you may not necessarily already own” or “things you may not have thought about”…
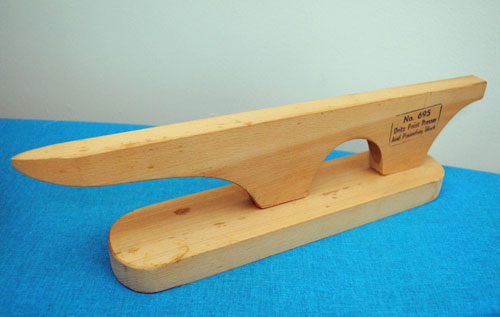
A point presser. For collars, cuffs, etc. I really wanted one anyway! I ordered one from eBay, but Sunni sells them here. (I thought about a tailoring board but was already spending a lot on supplies for this project.) Money well spent, let me tell you!
A tailor’s ham and seam roll. I already had a seam roll, but I wanted a ham to better shape things around the curve of a body.
A point turner. I always have just used the pointy end of my seam ripper or a knitting needle, but this is an inexpensive tool so I thought it would be better to finally have the proper thing, especially since I was already ordered from a site that sold them. TIP: one of my tailoring books said bamboo ones can catch on certain fabrics, so they recommend a plastic one.
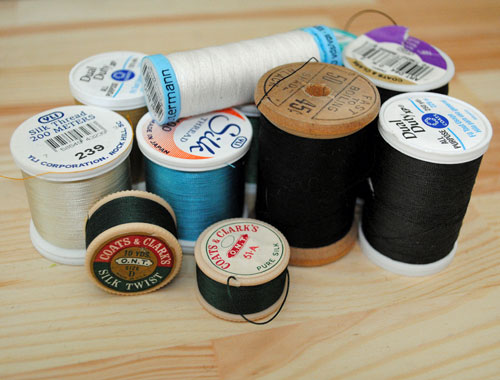
Matching threads. I had to think about so many more threads than I usually do! I’m not doing hand-tailoring but if I was, I would need silk thread that matched my fashion fabric. Since I’m doing hand-worked buttonholes (if I like the results), I need buttonhole twist and gimp. And for basting certain seams to roll them in slightly (look many photos down this page of the Anise sew-along and you’ll see the basting stitches) before pressing, I also need silk thread, but contrasting so I could see it. And of course all-purpose thread that matches my fashion fabric and my lining fabric.
Okay I’m not using all that thread, but a lot of it!
Stay tape. To stabilize the shoulder seams (like Tasia shows here). I already had some, or I could have used twill tape. Or saved some selvages for this purpose!
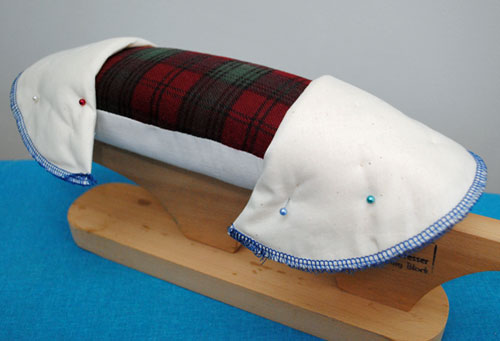
Sleeve heads and shoulder pads. Sleeve heads are a long bias strip of lofty fabric (like fleece) that go inside the top of the sleeve cap in jackets and coats to help support the sleeve at the top. Liz was kind enough to give me sleeve heads (thanks Liz!). As for shoulder pads, I made my own following my pattern’s directions (although I started with 8 1/2″ circles not 10″). Here they are on my sleeve roll:
No one will ever see that blue serger thread since they’ll be sandwiched between my lining and fashion fabric, so that’ll be our little secret, ok?
Marking pens and/or chalk. I was going to order some special chalk just for wool and wool blends, but I tested my chalk and it came out fine on my fashion fabric, so I’ll use it (I don’t love it but I forgot to order something else I was going to try, grr). For marks on my interfacing and underlining, I’ll use one of my erasable highlighters (Pilot FriXion). The marks disappear when pressed. I haven’t decided what I’ll use on my lining fabric yet because that didn’t occur to me until I was typing this. See how many supplies are going around my head?!
Underlining fabric. I decided my fabric could use a bit of structure. After pouring through my sewing resources, I had a couple options I liked: underline it with cotton batiste, or underline it with fusible weft insertion interfacing. I did two samples and I liked it better with cotton batiste, especially when Liz brought up a great point: my bodice and cuffs are gathered areas, and the fusible might be stiffer than I wanted. She was right, so batiste it is.
Lining fabric. I’m using rayon bemberg. I’ve only recently started to line some of my projects, and started off with polyester lining. But for pretty much the same price you can get rayon bemberg (about $6 or $7/yard). It’s lovely, machine-washable, and as a bonus it’s just perfect for vintage sewing! If you can tell, I’m converted. lol But do some research and test what you might like. Blazers have slick lining for ease of getting on and off but not all casual or sporty jackets do. You could try flannel, cotton voile like Gail recently used, twill, etc. (My RTW raincoat is lined with fleece for warmth.)
Above is my lining on the left (don’t ask me why I picked such a boring color), muslin in the middle for my back stay, and my underlining fabric (organic cotton batiste) on the right, all before going in the wash.
Interfacing. For my project, I’ll need to interface a few places. Now this isn’t nearly as big of a deal as a tailored jacket with lapels and a roll line. I’ll need to interface the collar, the bands at the hem, the patch pockets, the cuffs, and the front facings. And I’ll make a back stay out of muslin, which you can think of as sew-in interfacing in this case.
I’m going to use hair canvas for the first time as one of my interfacings. It’s great for structure and stability and is also pliable. You usually use it in hand or machine tailoring methods where pad-stitching would be in order (collars, lapels), but you can also just use it as sew-in interfacing, which I’ll be doing. (I got that idea from Liz… get used to me saying this a lot during this process since she’s my go-to expert on sewing techniques!)
I will likely end up using a layer of fusible interfacing in some areas instead/in addition. Various weights of fusible interfacing are often used in fusible tailoring methods, particularly weft insertion interfacing. It makes a great interfacing for dressmaking, too, which is how I have used it! I buy it from Fashion Sewing Supply here. I used to hate fusible interfacing back in the day when I didn’t understand that there were options outside of the nonwoven interfacings I would buy at my local JoAnn’s that made things stiff as a board even when they were marked “lightweight”. This is a whole new world! (ETA: Jen at Grainline Studios just did a post today on her two favorite fusibles, check it out!)
Anyway, supplies aren’t the most thrilling topic, but I wanted to talk about it a bit since it took so long to piece everything together. Maybe it will help someone out there. 🙂
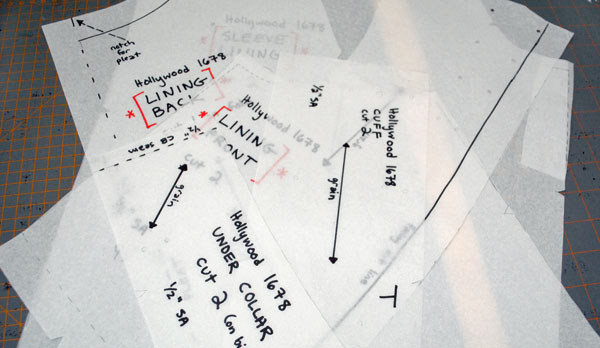
As you can see above my pattern pieces are ready to go. Tonight I’m ready to have a cutting fest… one of my least favorite stages in the sewing project truth be told, but it will mark really starting the jacket so I’m excited nevertheless!

I really appreciate you going into detail with this post! I’m especially looking forward to seeing how you do your underlining and lining (they still kind of confuse me!) and which interfacings you use in which places.
This is such an exciting project!
This sunday I’m going to make my first circle skirt, hopefully it will come out nice enough to blog about.
I am always in awe of your wonderful projects and cannot wait to see the finished project here. I just know it’s going to be the bee’s knees and then some!
♥ Jessica
Thanks for being so meticulous in posting your process. I may end up with the confidence to sew a jacket myself one day, with a few tools. I didn’t even know some of these tools existed. Can’t wait to see the finished jacket!
You are so meticulous as the previous poster commented, it’s amazing and so much attention to detail, I feel positively sloppy in comparison!
I have been trying to do things more correctly for a while, but I always end up losing patience and just doing it with shortcuts, it needs to stop. I’ll be following your progress with interest!!
Phew! I’m always amazed at how much construction really goes into some pieces of clothing. And people think sewing is simple!