
Today I’m finally sharing a little tutorial I’ve thought about all autumn, as I’ve lazily enjoyed wearing berets quite frequently. I love berets (tams, tammys… call them what you will). They are my favorite hat to wear, and my favorite hat to knit, too. You can knit cabled ones, fair isle ones, slouchy ones, you name it. And finding vintage berets isn’t usually too difficult, either. As an added bonus, felt berets haven’t changed much over the years, so you can buy modern ones that look just as vintage.
One of the reasons I love berets is that not only can they keep your noggin warm, but you can use them for lazy or bad hair days, to hide all or a good portion of your hair. So that’s what this tutorial is about, being lazy while looking put-together and fetching at the same time! I’ll show you one simple way to fake a good hair day with a little 1940s-style front roll and a beret. It’s also great for blustery autumn and winter days, as you won’t have to worry about your pretty hair turning into a bird’s nest in the wind. So it’s a two-for-the-price-of-one hairstyle. 🙂
You can use any kind of beret—vintage, modern or hand-knit—but you’ll only be able to do the little shaping trick I do with the brim with a knit beret. If you’re using a felt beret, just skip that step when you get to it.
One way to fake a good hair day with a beret (on a windy day)
Supplies
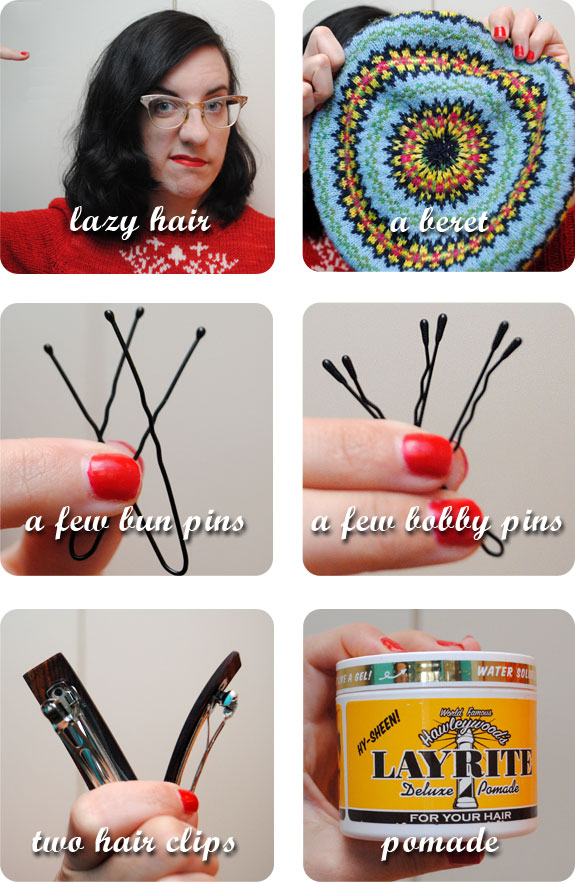
A bit of laziness, your head of hair, a beret, a few bobby pins, a few bun pins, two hair clips and a little pomade.
How I do it
This is so quick and easy. We’re talking 5 minutes, tops.
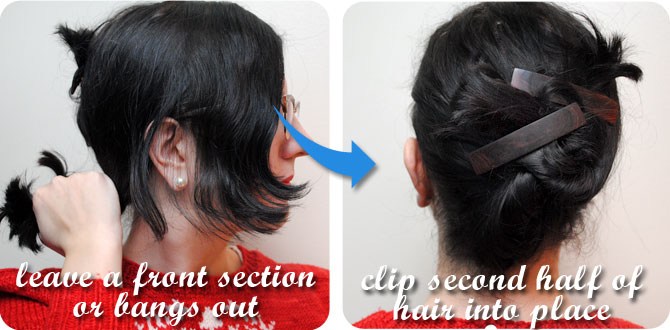
Part your hair like you normally do. On the lighter side of your party, twist that half of your hair up onto your head, and secure with a hair clip. If you have longer hair, you will probably need to place the clip higher than I did.

Do the same thing on the other half of your hair. This time, leave out a front section or long bangs if you have them. That’s the hair you will turn into a front roll.
(In general, twisting your hair up like this may be hard to pull off with hair several inches longer than shoulder-length, but you may be able to make it work with one or two more strategically placed hair clips, or more than two twists of hair. But you don’t want it to look like you have a growth coming out of the back of your head, so try and spread out the bulk of your hair as best you can if that’s the case.)
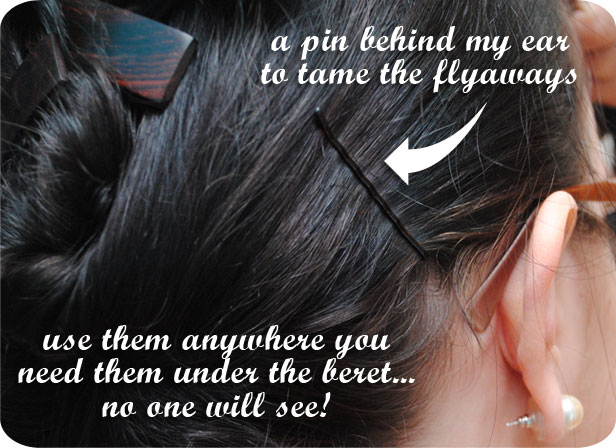
If your hair is prone to flyaways or is ornery, use a few bobby pins anywhere you need them. For me that’s behind my ears, and sometimes at the base of my neck now that my hair is shorter.
Now we’re going to work on the front roll. Put a small amount of pomade on the fingertips of one hand.
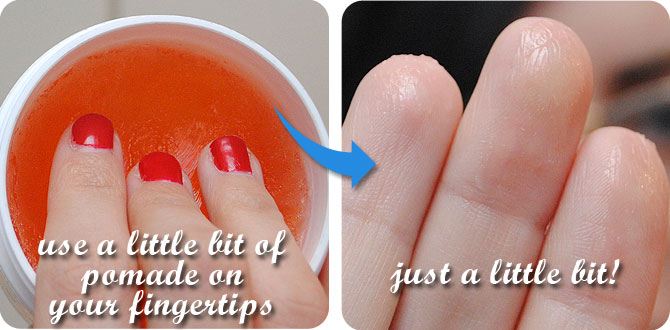
Run the pomade along your hair.
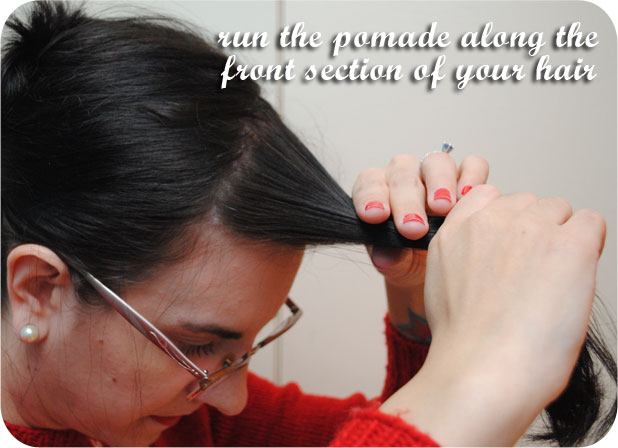
My tip for a good front roll is to keep the hair getting rolled relatively taut while you’re rolling. If I relax my arms too much, the hair tends to get floppier and the result is crappy looking. So as you roll, keep slightly pulling on the hair away from your head.
Start off by pulling the hair in the direction you will tilt your beret. In my case that’s away from my part. (No particular reason, just habit.) I don’t backcomb this hair first, but if you need a bit of fullness, go right ahead.

And now, we roll. If you get a few loose bits hanging out like in the middle photo, just tuck them up into it as you go. (Obviously I use two hands to do this, but only am showing one hand so you can see.)

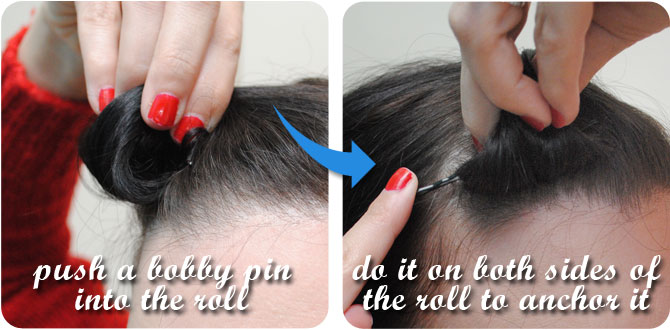
Once you get it tight to the base of your head, insert a bobby pin into the opening on each side of the roll, securing it to your head. (If you used a larger section of hair, you might need another pin or two.)
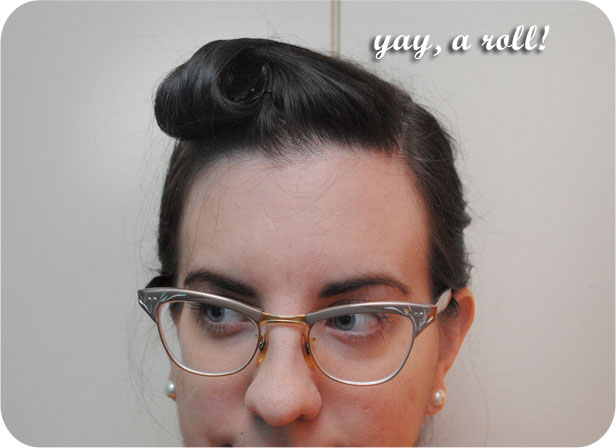
Now it’s a roll, yay! But don’t get frustrated if it takes you a few tries. And if you just can’t get the roll to work, here’s a tip from my hair stylist: wet down the section of hair you want to roll first, then put in the pomade, then blow it dry. It changes the texture of the hair somewhat and makes it a bit more stiff, so it’s easier to roll.
Time for the beret. Now a lot of people say berets don’t look good on them. I think that’s sometimes because they put a beret on and without fiddling with it, immediately declare that it looks bad. The trick is that you need to spend a moment or two orienting it on your head just the way you like it to get it to look good. Because otherwise yeah, it will look bad.

Put the beret on, making sure all of your hair except the roll gets up into it. (And if you don’t want to do a roll you can pull the beret further forward onto your forehead if you’d like). Play around with it until you’re happy with how it looks. I often like to tilt it pretty significantly to one side, and pull the brim rather flat and forwards, as I’ve done here.

(Oops, my roll looked bad here so I re-did it later.)
You could consider yourself ready to go here, but I like to add in a couple of extra steps to secure the beret for windy days. (This is the part that won’t work with felt berets.)
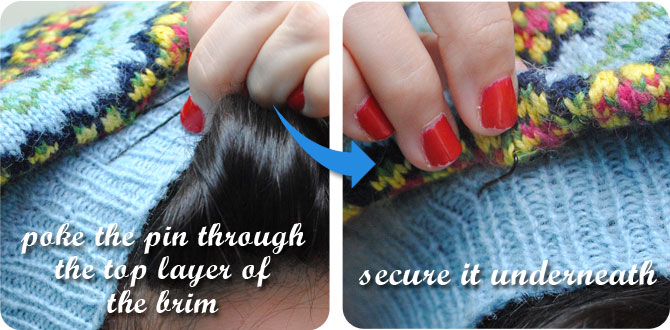
If you’re wearing a knit beret and have the brim placed the way you like it, you can use one or two bun pins to keep the nice shape. Simply push the pin in and back out just under the edge of the brim, and push it into the part of the beret against your head. Push the pin back away from your face. You won’t be able to see it at all.
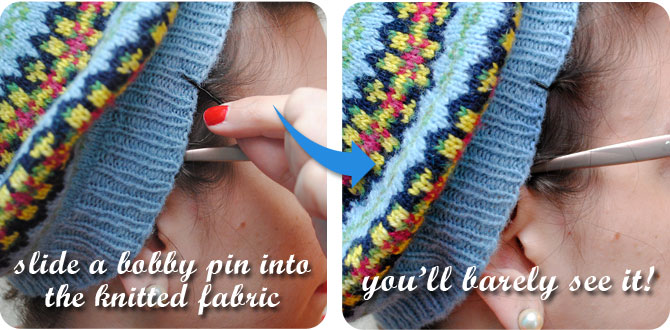
For extra wind resistance, I also use a bobby pin above each ear. With a knit beret you can insert the pin through the fabric so only a little bit shows, but you can secure a felt beret this way, too. Just keep in mind the bobby pin will show more on the outside of the beret since you can’t poke it through the fabric. (Which is just fine, and perfectly vintage.)
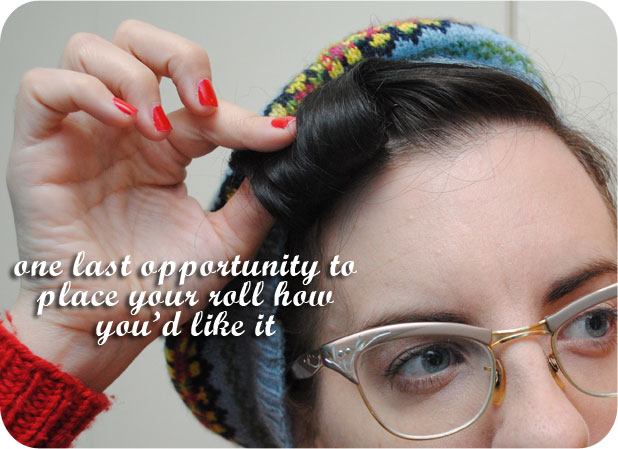
Now that your beret is on and secured, if you’d like to maneuver your roll a little bit, do so now. You can gently tug on it to move it lower onto your forehead, or further down the side of your head, or widen it (you might need to move a bobby pin or two). Once done, give it a good spritz with hairspray.
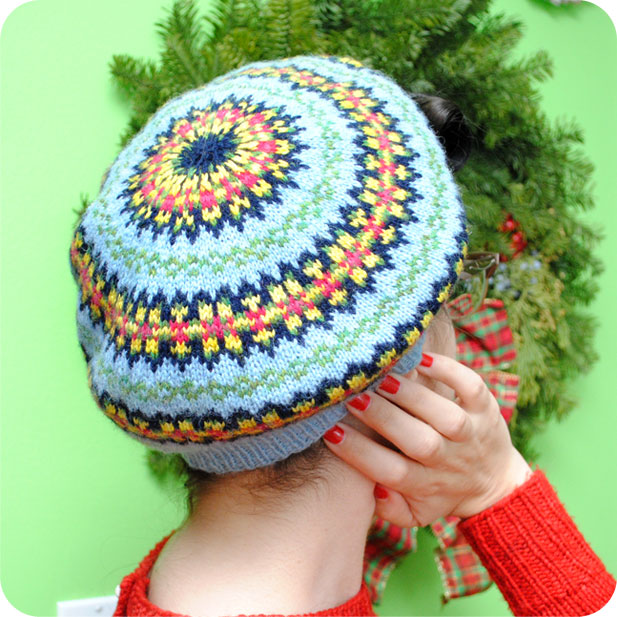
That’s all there is to it! Here’s the finished results from all angles.


So that’s my quick way to look stylish and put-together while being lazy and dealing with a blustery day. It’s great when you don’t feel like setting your hair, or maybe your hair needs to be washed, or you just can’t stand the thought of wind gusts wreaking havoc with your locks.
Hope you enjoyed this little tutorial. Now go be lazy, wind-resistant and fetching in your beret, all at the same time!
This post is ideal for lazy girls like me, I always roll on the front, do not take off even to sleep, so I always keep the fold.
But I had never thought of putting all icapelli into the hat.
I will try soon.
Thanks for your wonderful suggestions.
Deb.
You are just too darn cute! This looks adorable on you!
I would try it out, but I have so much (long) hair, I’d need a huge rastafarian tam, LOL!
This looks adorable!! I’ll have to try it out: my college campus is next to a great big lake, so it’s really windy all day every day 🙁 At least I have a grand excuse to buy some cute hats now!
I love this! :] Thanks!
How cute! I was wanting to try something like this this morning but I couldn’t find my beret. 🙁
Love this! Thanks for sharing!
Wow, this is great! Fabby tutorial as always! Looking forward to trying this…
I am so in love with your jumper!! 🙂
Very cute! Your face in the first picture is priceless 😉
I adore all your cute lil hats!!!!
I wear berets almost every day now that winter has arrived in Canada. Not only because it is cold, but I can be lazy with my hair, and make a pincurl set last for days without having to restyle. A lil dry shampoo spritzed in the front, angled beret, a few bobby pins, and voila!
Love this idea, it’s always so ridiculously windy where I live so I generally have some kind of scruffy ponytail on the go! Must knit some berets now… 🙂
Very stylish!
Your hair looks gorgeous and I love your beret! Thanks for the great tutorial, I’ve always wanted to know how the rolls were done. XxxX
http://thesecondhandrose.blogspot.com/
Good idea! I just finished the Pictorial Beret from A Stitch in Time, I may just try this out next week. I have a bad hair day more or less every other day, so this really comes in handy.
The beret and the Christmas sweater are just gorgeous.
Between the wind and the freezing cold and the dry air and the static, every day is a bad hair day for me this time of year! I may just be wearing a chapeau non-stop until April 🙂
Fab tute! Hats are my SAVIOURS this time of year! I have recently discovered the JOY of using pomade to create rolls. SO easy!! And not crispy like the mousse I sometimes use.
ps) I am still eyeing your beret enviously. Muchous.
So cute! I finally unearthed the few berets I have (a couple knit ones and a black felt beret that I have no idea where it came from… lol) and have been wearing them constantly! Partly because I haven’t had time to do exciting styles/sets, and also because I’m kind of hating the length of my hair at the moment. 😉 It’s a great way to hide everything! Love the cute curl you added–will have to try that soon!
So clever and looks so lovely! Thanks, I shall have to try this.
Looks great! I think we have fairly similar hair quality, so it’s always interesting to see how you style it. Once you’ve done this style, do you just keep your beret on all day? Doesn’t it get hot and itchy when you’re inside?
what wonderful and original tutorial- thanks!
I’m a confirmed beret fan. I have about 4 ..and counting. I’ve recently discovered the joys of rolling up my fringe especially on windy days.
Berets are also great when you want to leave your hair in curls (so they last all evening) but still go about your day without looking a bit loony. I pincurl my ‘mildy damp’ hair roll up the fringe and put on beret…and no one can tell.
I discovered your blog today thanks to Etsy. I am loving it! I am wishing I Had longer hair and a beret right now…
I love berets! unfortunately I lost mine during a train ride last year. Now I want to get a new and will definitely pin it in place this time!
excellent!