Hey knit-alongers! We’ve reached the last instructional post!
My last topic before the official end date tomorrow is about seaming. Call it seaming, call it sewing up, call it a pain in the butt. Unless you’re knitting a completely seamless sweater, you’re going to have to face this step.
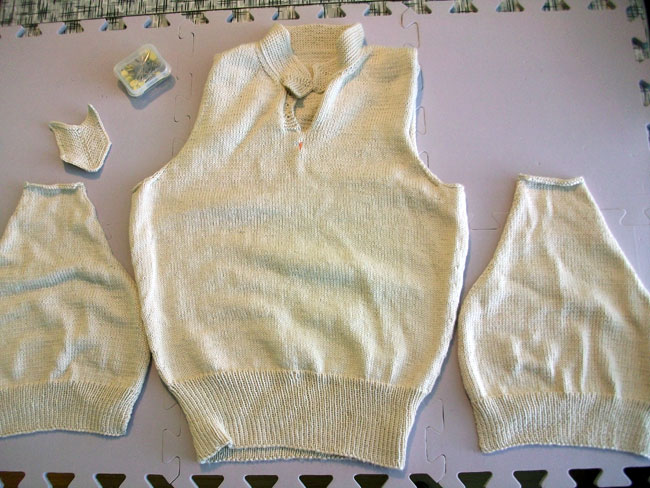
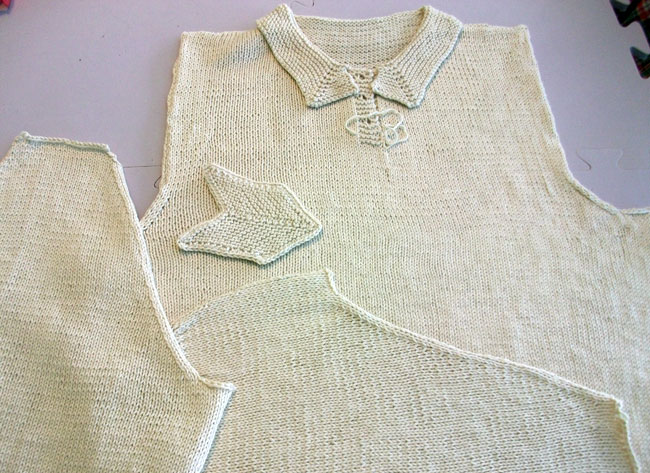
Once you’ve blocked your Briar Rose pieces, you’ll have a nice little pile of flat pieces of knitting that look an awful lot nicer than they did before blocking. To prove it, here’s the before and after.
Before blocking…
After blocking!
Much better, right?
If you’re new to sweater knitting it’s good to say this right now: there is no one right way to sew up your knitting! You have a few options, and you’ll have to decide which method you prefer. Most patterns, vintage and modern, will simply say something like “set in sleeves, sew up side seams”. Not very helpful.
There are at least three ways to sew up your knitting: using mattress stitch, backstitching, or using a crochet slip stitch.
Each method has its own pros and cons.
Backstitch seam
I personally rarely use the backstitching method unless it’s a really small area (like a pleat in a sleeve cap), because it’s an enormous, huge pain in the rear to unpick if you find you’ve sewn it goofy, which is easy to do because you work it with the right sides together, so you’re looking at the wrong sides. On the plus side it’s very sturdy, and that’s about all I can say for it. If I need to sew something more than an inch or two long, I don’t use it.
Mattress stitchseam
Mattress stitch is my preferred method for sewing up seams. It’s easy to work, and you get to look at the right sides of your work the entire time, so if you screw something up you can tell right away. It’s also relatively easy to unpick if you do make a mistake. One of the cons is that it’s not really advisable to pull the same length of yarn in and out and in and out of your stitches over and over again, so it’s often recommended to use shorter lengths of yarn. Say, one length from the bottom of your sleeve to the top, then another from the top around back to the bottom. So you end up having to weave in a lot more ends. You can work mattress stitch on vertical to vertical stitches, vertical to horizontal, etc. It makes a nice, neat invisible seam.
Slip stitch crochet seam
You don’t really need to know how to crochet to work a slip stitch crochet seam. It produces a similar seam to mattress stitch from the public side, but is worked with the right sides facing so you’re working looking at the wrong sides. However unlike backstitching, you can more easily see what you’re doing. As well, it’s the easiest of all three techniques to unpick. In fact, you just give the working yarn a tug and can rip back as many stitches as you need. It also has the added benefit of working from the ball of yarn directly rather than having to cut a length, so you can go around an entire seam and only have to weave in the beginning and end. Personally though, I find it slower going than mattress stitch. For Briar Rose, I opted for a slip stitch crochet seam for all my seams.
Seaming / sewing up your pieces
If you knit your Briar Rose seamless up to the armholes, you won’t have to sew up your side seams. If you knit your shoulders with a three-needle bind off, you won’t have to sew up your shoulders, either. That was the position I was in with my Briar Rose. I had to sew up my sleeves, set them in, then sew on the pocket.
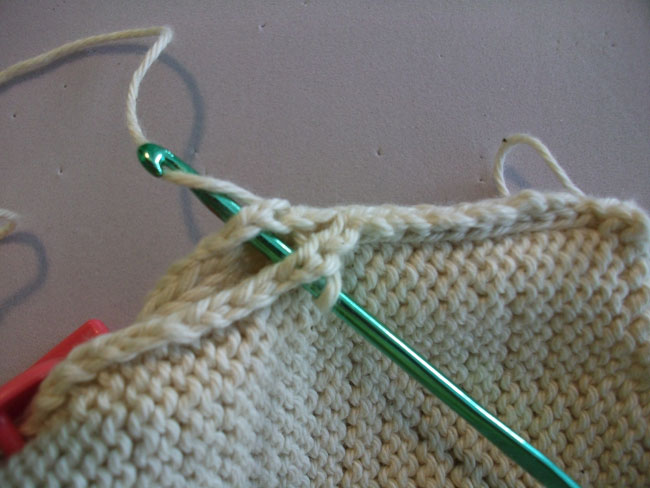
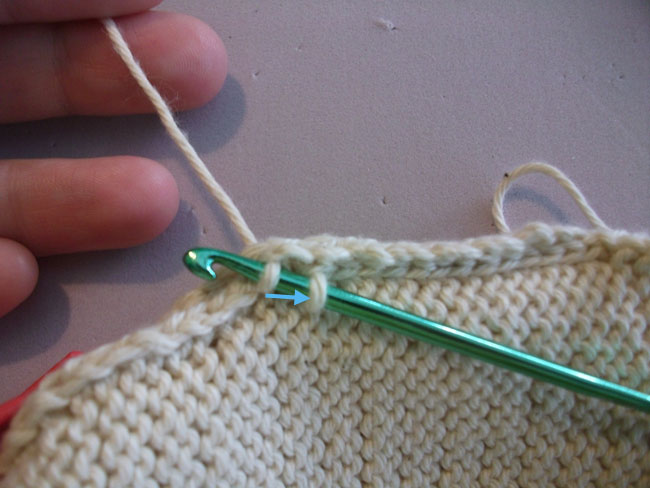
I first sewed up the underarm seam of my two sleeves. Like I said I used a slip stitch crochet seam. I lined up my pieces with the right sides facing and starting at one end, inserted my hook through the edge stitch on both sides, made a loop on the hook…
Then I pulled it through both layers of the fabric and then pulled the loop through the one already on the hook (shown with the blue arrow)…
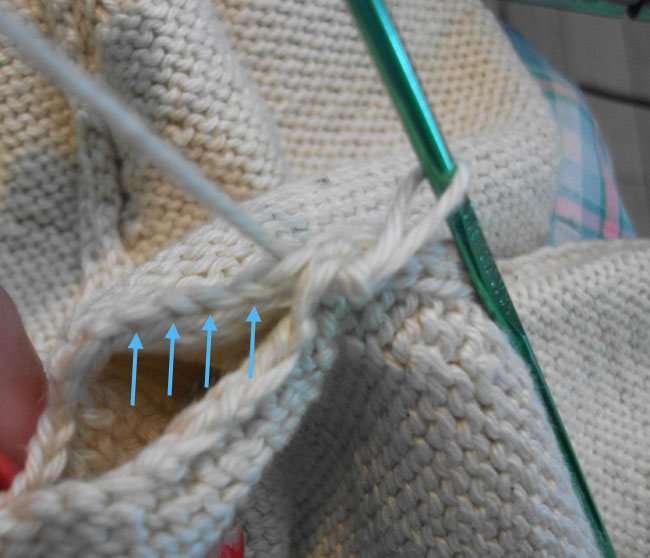
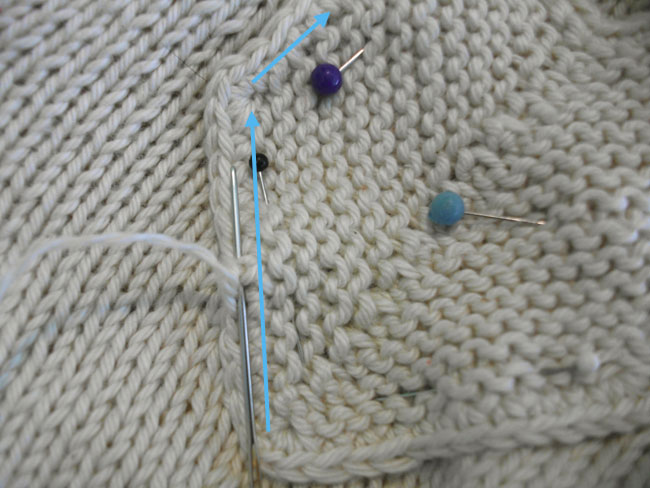
If you have a hard time telling where to put your crochet hook, look for the first “real” stitch at the selvedge. On the far side piece, I’ve shown this with blue arrows in the photo below.
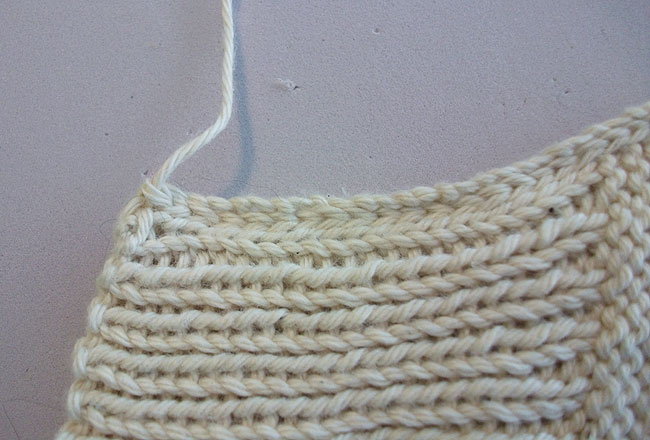
Keep doing this all along the length of the sleeve, being sure to not pull too tightly so you don’t pucker your seam. When you’re at the end, simply cut your tail (with enough length to weave the end in) and pull it up through the last loop just like you would with knitting.
And it’ll look like this when you’re done…
Setting your sleeves in isn’t really any more tricky, even though for a long time I thought it was. It’s really just as easy as any other seam, but takes a bit more setup. The goal is to make sure you set your sleeve in evenly, distributing any ease along the way. The best way to do this is to strategically clip your two pieces of knitting together in several places (kind of like pinning together pieces in sewing). My absolute favorite setting in sleeve tutorial is here, and she beautifully shows you how to clip together your pieces in preparation for setting in your sleeve. She used mattress stitch, but I’ll show you how it looks when you work a slip stitch crochet seam, since it’ll be inside out and look a little different.
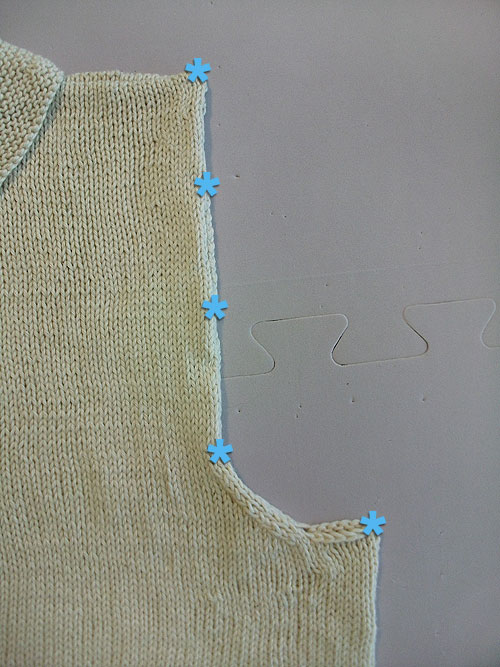
You’ll want to clip together your pieces at the top of the shoulders, bottom at the armpit, and several places in-between. Approximately where the blue stars are in the below photo…
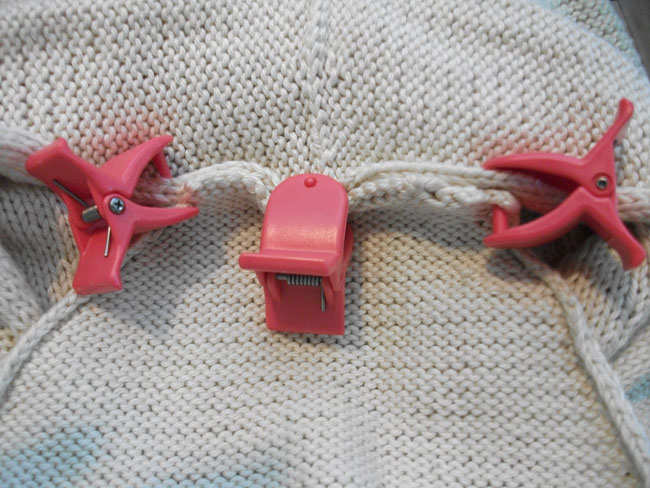
I like to clip the bottom, then the top center shoulder and the sides of the shoulder bind off, too, like this…
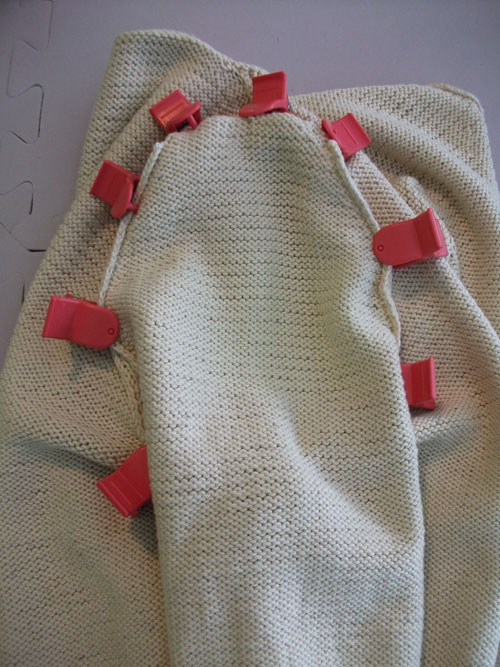
I use Knit Clips (which sadly are not manufactured any longer), but safety pins or stitch markers that close work just as well. It’ll look like this when you’re done.
I personally like to sew my sleeve seam first, then set in my sleeve, starting at the armpit and working my way up and over and back around to the armpit. Just work slowly, and you’ll find it’s not that daunting of a task with the clips helping keep you on track because you work in small manageable areas. It’s easy to tell if you’re taking in too much ease on one side than the other if you suddenly find one side before you get to the next clip is shorter than the other side. If so, rip back a little bit and try again. If you need to work in any ease, take two stitches on one side and one on the other.
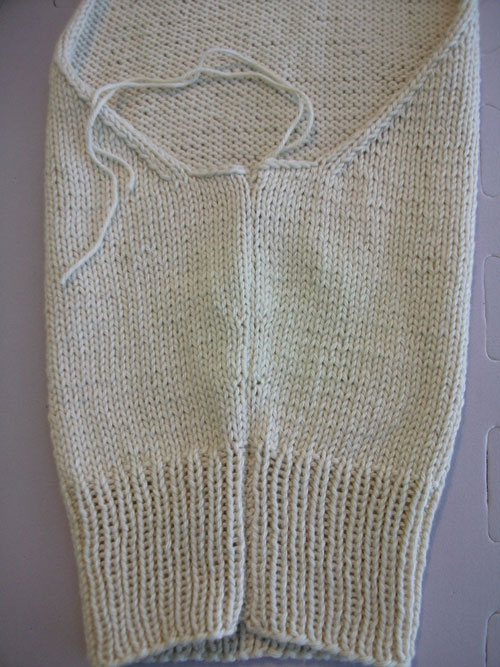
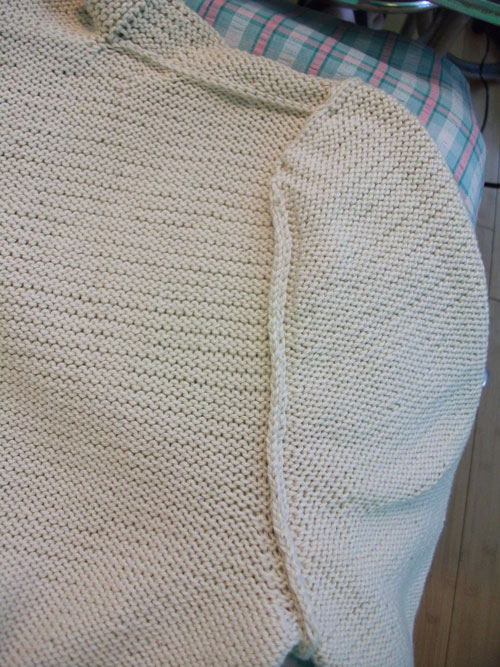
Pretty soon you’ll have an entire set in sleeve…
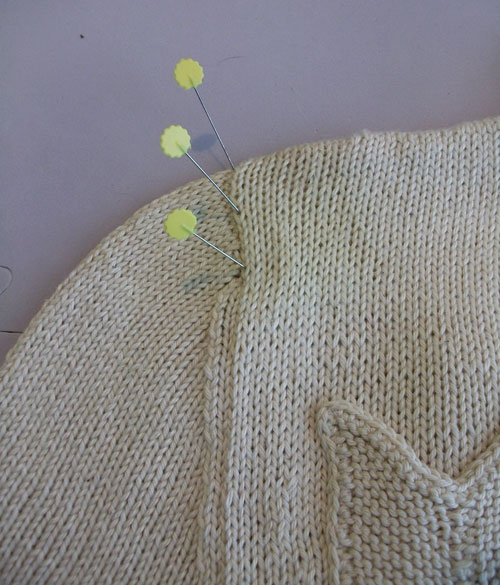
The last thing to note about setting in sleeves is that sometimes, depending upon what method you select, you might find the head of the sleeve cap at the shoulder kind of pulls into the shoulder of the body. Don’t be disappointed if you try your sweater on and see that this is the case. I find this can happen with a slip stitch crochet seam (and also if you work a top down seamless sleeve cap). So after I’m done I wet just the top of the shoulders under the faucet, pin them out to block them to the right shape and wait until it’s totally dry, as if I was blocking a larger piece.
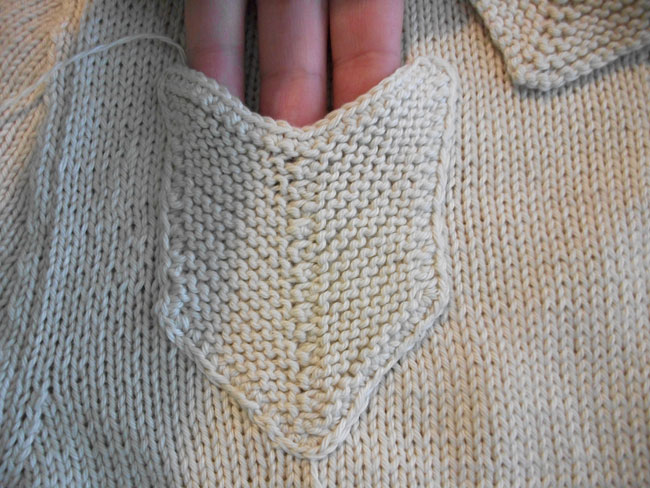
All that’s left is the pocket! And that’s easy. I lined mine up how I wanted it, then pinned it with straight pins. Then I simply sewed in and out along the outermost edge formed by the single crochet edging.
And that’s it! Just make sure to leave the top open since it’s a pocket (I almost forgot!). I sewed a little bit into the top edge of both sides for stability.
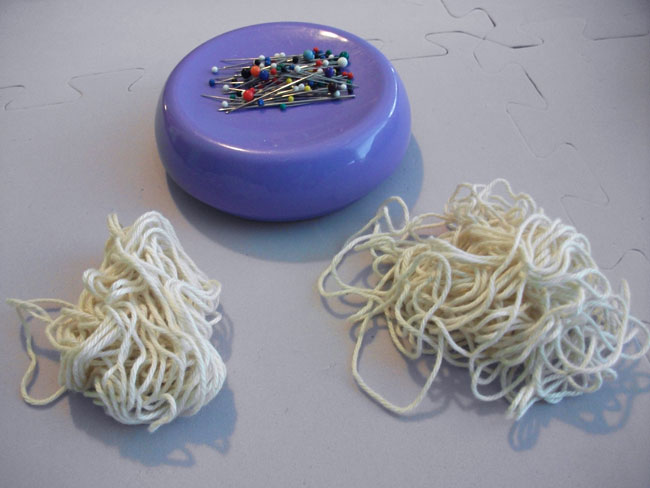
Remember how we estimated yardage, way back in February before casting on? And how I said I liked to over-estimate so I didn’t have to sweat it in the end? If I wasn’t in that habit I would have cut it really close. I had a skein leftover, but look how much I would have had left if I hadn’t over-estimated.
And folks… that’s it! Tomorrow I’ll show off my finished sweater, and invite you to post links to yours. I hope you’ve enjoyed my very first knit-along!!
Shall we all meet again on another vintage knitting project later this year? 🙂

I had a skein left over too, your estimating yardage method was so useful I’ll definitely use it again. Well, basically I’ll be using all your knit along methods from now on! Can’t wait to see your finished sweater 🙂
@Miss Katie Thanks so much Katie! I’m pleased as punch to hear that. 🙂