Hi everyone! Can you believe we’re almost officially done with the knit-along??
It was so interesting reading everyone’s thoughts about A Stitch in Time Vol. 2 and your next knitting projects. And I know there are several of you out there who aren’t knitters yet but I can tell you’re leaning in that direction… c’mon! You know you want to learn! 🙂
Today is my second-to-last instructional post for the knit-along. I can’t believe it’s almost June 1st. We started back on March 15th. That sounds so long ago! I can’t believe how time as flown by. Now, I know that not everyone is nearing the finish line just yet, although there are already a few fantastic finished sweaters in the Flickr group pool. I’d like to do a round-up post of as many finished sweaters as possible, but I think I’m going to wait at least a few weeks after the official cast off date of June 1st to give more people a chance to catch up. Does that sound reasonable to everyone? Please let me know if you’d be willing to let me post one or two photos from your finished sweater on my blog. You can either leave a comment and let me know, or email me at tasha {at} bygumbygolly {dot} com. I may be knocking on some of your virtual doors, too, to ask. Every one I’ve seen so far has been gorgeous!
Anyway, onto today’s topic: blocking.
Thoughts on blocking
Many of you will already know how to block a sweater, so you won’t need any suggestions from me on how to do that. But for those of you who have never blocked anything, or never blocked a sweater, I thought I’d talk a little bit about the subject.
Blocking can be kind of like magic. You take a piece of knitting that might be lumpy and wrinkly from sitting in your knitting bag for weeks or months at a time and turn it into a piece of art. Okay, maybe it’s not that dramatic, but it sure can make the difference between a polished piece an an unpolished one. (And when you’re talking about colorwork like intarsia or fair isle it is absolutely essential, and in those cases blocking really is magic.)
Everyone blocks a little bit differently. Some people steam block, or block by spritzing their pieces with a water bottle and pinning them out that way. I don’t do either of those things. I wet block my sweater pieces, meaning I soak them in soapy water, wring the pieces out, and then block the damp pieces. Why? Because I like to treat the pieces of my knitting like I’ll be treating the finished sweater, and I hand wash all of my handknit sweaters, even if I’m using superwash yarn. It’s just my personal preference. If I had my own washing machine with a gentle cycle or no agitator I might think differently, but I don’t. So I hand wash.
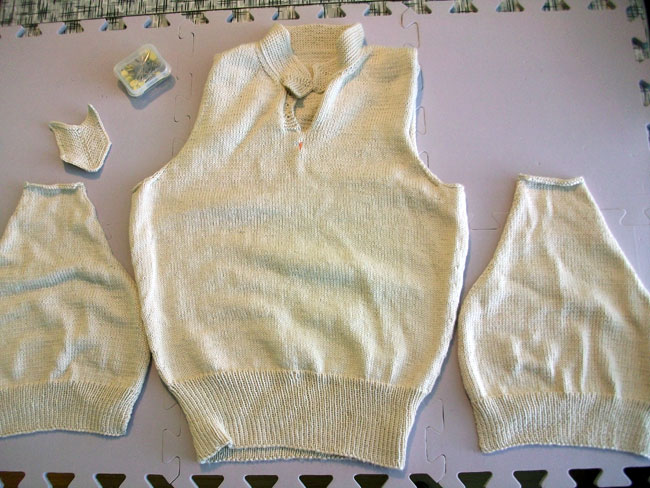
When you finish knitting all the pieces of your sweater you might look at them and think, “Wow, those look a bit crappy.” And they kind of do, don’t they?
But that’s okay, that’s just what they look like. The edges curl in because of the stockinette and they’re a bit wrinkled. Depending on how your swatch behaved, the pieces might not even be the right size yet. If you’re a new sweater knitter don’t be scared by this stage. It’ll take some work to get the pieces looking right, and that’s why we block.
How I block my sweater pieces
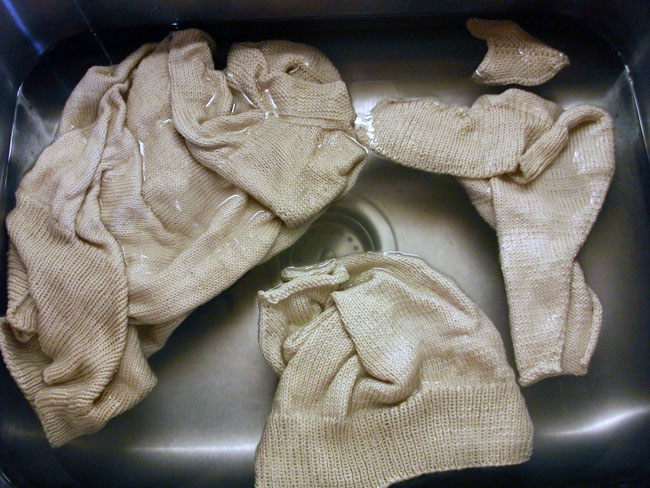
As I said, I wet block my pieces. It’s so easy! I fill up my sink with lukewarm water and a bit of gentle soap. You can use something specifically for knits like Soak or just a bit of your normal laundry detergent. Then I plop my pieces in the sink and make sure that they’re completely covered with water. (Most of the bubbles disappeared by the time I took the photo.)
I set a timer for 10 or 15 minutes and go about other business for awhile. I periodically pass by the sink and move the pieces around. If you’re using a non-superwash wool (i.e. one that may felt) be very careful moving your pieces around as you don’t want to accidentally felt them during the blocking process! But this time I’m using a cotton blend, so I squished them several times just to make sure they got thoroughly soaked through.
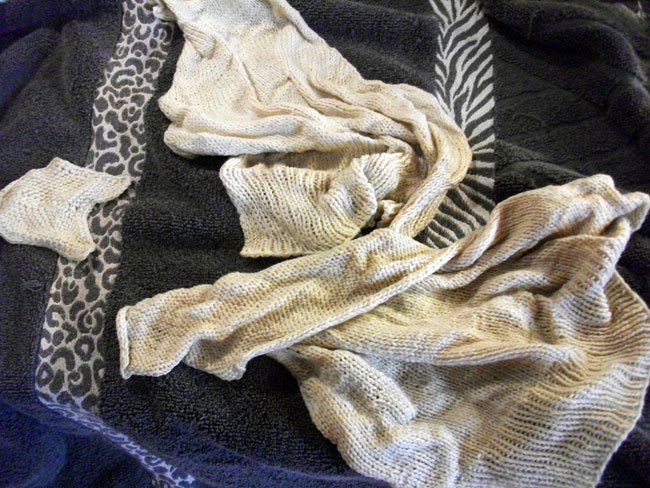
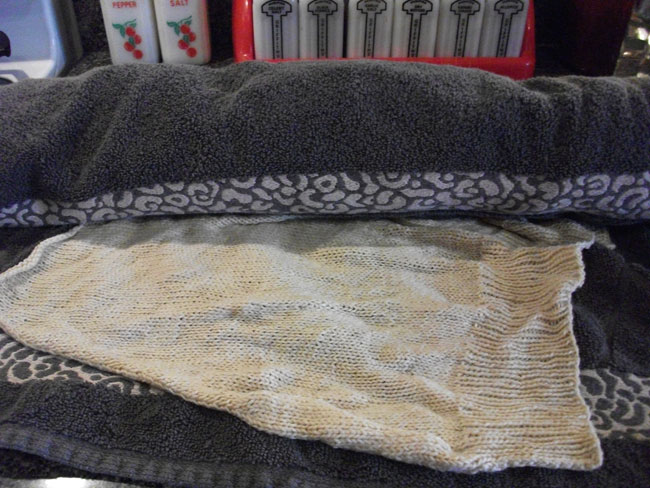
After the timer goes off I drain the sink, rinse the pieces and squeeze all the moisture I can out of them by hand. Then I put them on an old towel, being careful not to let them stretch out of shape as I move them. They’ll look pretty gnarly at this stage.
Not much like pieces of a sweater, huh? Don’t worry, we’re getting there. I then lay the pieces out on the towel (no real precision necessary) and roll them up.
Squeeze, squeeze, squeeze to get out all the excess moisture you can. Then you’re ready to block.
I use blocking mats and rust-free pins, but you can use those foam mats they make for kids to play on, or a towel stretched out on a bed that no one plans to sleep in that night. (It can take 24 hours or more for things to dry, depending on your weather and climate.)
Lay your pieces out on the mat and begin pinning them to the dimensions you planned. It’s going to take some time, so be patient.
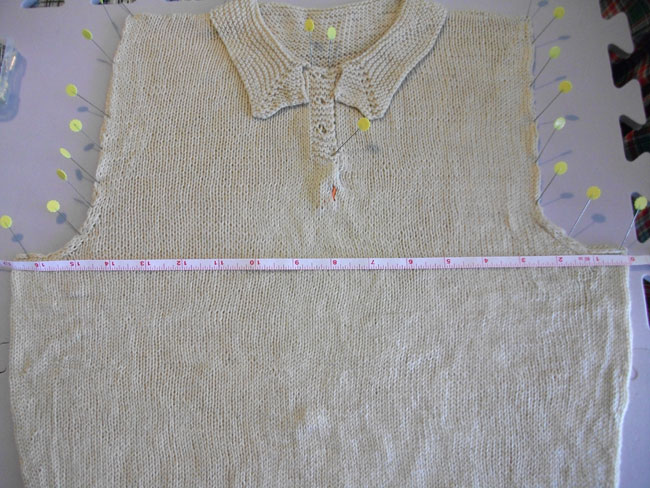
This part is important, and I think sometimes forgotten. Block with a tape measure!
It’s easy to block something smaller or bigger than you planned simply on accident. Knitting is stretchy, and while you know you’ll be able to block your pieces to the size you planned because you knit a gauge swatch, if you don’t pay attention you might stretch the knitting too much or not stretch it enough and you’ll be disappointed with the fit. All that could have been avoided if you just measured key locations. I usually measure the following when I block: bust, waist, length to armhole, across the shoulders, width and length of sleeves.
If you know that your finished sweater is supposed to be 38″ total, that means your front and back pieces should be 19″ wide at the widest part (just before the armhole bind off). If you know it’s supposed to be 14″ from the cast on edge to the armhole bind off, make sure it’s really 14″. If you accidentally stretched it to 15″, you can easily prod things back into place with your hands (I like to use two open hands laid on the knitting to do this). Don’t be afraid to spend some time with the pieces to get them to the right shape. You will be much happier with the fit of your sweater in the long run if you spend the extra time with your pieces while blocking them!
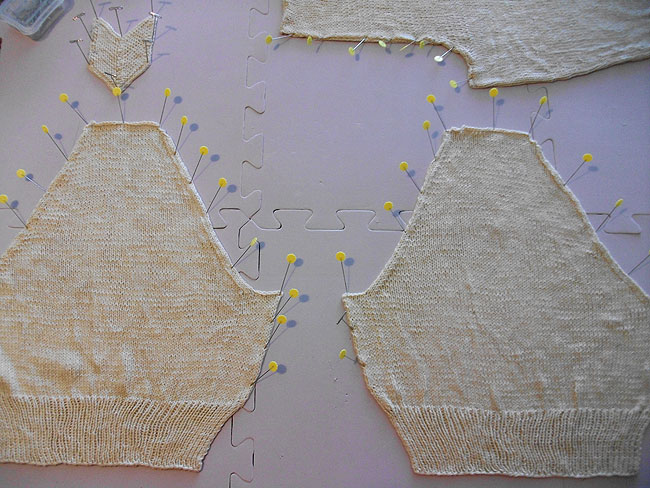
Make sure to use a tape measure when you block your sleeve pieces, too. I like to block my sleeve pieces next to each other so I can easily eyeball them to make sure they’re the same height. Because ribbing tends to stretch out easily, I like to shove it in as close as I can while blocking.
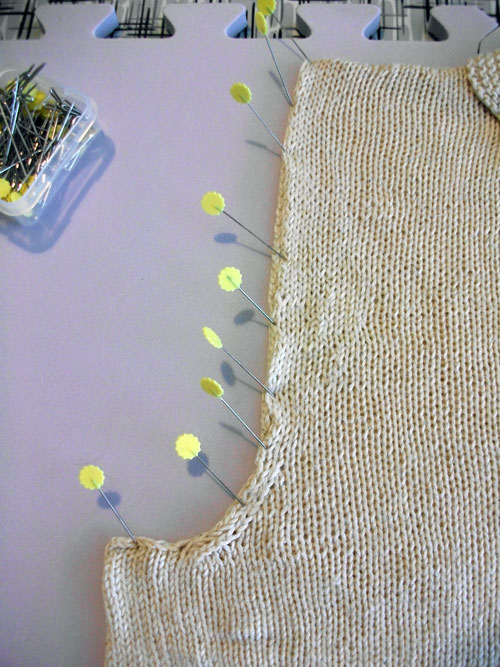
Pin around all the curves and anywhere you have a stockinette edge, because those will curl in and you want them to be as flat as possible for seaming.
Once you’re done poking and prodding and pinning everything in place, all you have left to do is wait for the pieces to dry completely (and I mean completely!) and then sew them all together. Yay! Sewing up will be my last topic to cover for the knit-along.
I still can’t believe we’re almost done, can you??

I failed so bad at this knit along. My fault for trying to do it during finals. I’m still 1/2 done with my sweater, maybe I’ll be able to finish it in August. What a great idea of using those puzzle-pieced playmats as blocking boards! I’ll have to keep that in mind when I finished.
@Sarah You didn’t fail! It’s so hard to knit-along at the same pace as a group. Honestly I had the same 6 inches knit for over a month or more until I jammed at the end to catch up. I look forward to seeing your sweater when you do finish it! 🙂
This looks really good to me, impressive job, can’t imagine knitting a sweater. Just Beautiful.